Bedrooms are our safe haven and the place we feel most comfortable. These are the places we feel at peace once we step in.
Keeping your bedroom clean is therefore mandatory. However, that does not mean it’s the simplest of chores because our bedrooms hold a special place in our hearts.
Apart from a lack of motivation, the tutorials and articles we find online are not in the least practical for people with a busy schedule.
Who else thought cleaning their bedroom would always be as easy as bedroom cleaning games? Hiring a maid service like SwiftClean is always an option, but for some, it isn’t, due to a tight budget.
If you’re on a budget, you’re in luck because we are about to give you some DIY tips for cleaning your bedroom that has been proven to work.
Whether it’s just weekend routine cleaning or its spring season and you can finally open your windows and get some fresh air, here is a DIY guide to bedroom cleaning and organizing.
Let’s get started, shall we?
Read Also:
Here are some essential you will need to leave your sanctuary (bedroom) spic and span;
There are a million places that need decluttering in your room after a long week. Start by decluttering your dresser. Removing all the unnecessary items from your dresser will motivate you to keep it clean all week long.
Every miscellaneous item on your dresser sure belongs somewhere. Whether it’s the makeup, combs, brushes, body oil, skincare products, chargers, and adapter, or jewelry, you need to find their rightful place.
Put them in a box so you can return them to their places after cleaning. Ensure you keep your dresser clutter-free by returning everything where it belongs.
Most of us like to carry work home while some work completely from home. You may also like to study in your bedroom, so you need a table for that.
If you have one, it may be filed with unarranged papers, books, pens, cords, chargers, and folders. Trash what you are not using like tossed papers, pens that are finished, and books filled up.
Arrange all the papers in folders for safe storage and arrange the books on a shelf. Ensure the top of the table is only left with the products that you use daily.
Cleaning the dirt and dust off the study table and dresser will be simpler once you have decluttered these surfaces. The surfaces will most likely have accumulated dust and maybe even stains, so you need two microfiber cloths and some dish soap to remove the dust.
Always move in with a dry microfiber cloth to remove the dust to make cleaning easier. You can them mist the other cloth and apply some dish soap.
Wiper the surfaces clean to remove any stains and dirt. You can ensure the surfaces remain clean for longer by finishing off with an anti-dust furniture spray.
You can also use your microfiber cloth to apply this spray. Even without the spray, the microfiber cloth does an exceptional job of removing all the dust from the surfaces.
A bedroom set is almost incomplete without clothes lying around. (I am sparing the neat freaks in this) a day does not end without throwing a jacket over the chair, leaving your socks on the carpet, or piling clean clothes on the corner of the room.
Start by separating the clothes you use and those you don’t. You could give some out or sell others for some extra bucks. Use the same colored hangers to organize your clothes in the wardrobe.
Leave the dirty clothes in the laundry basket for another day or time. If you try to do everything at the same time, you will burn out.
Ensure you spend a few minutes every day organizing your clothes. You should also make it a habit to leave all your clothes in the right place to avoid piling clothes everywhere.
There is always a place you can place stuff when you are exhausted, including your window seals. If you have large shelves and bookshelves, it will be a great idea to arrange them quickly.
Dispose of anything unnecessary or give away those that are still useful. You should also check under the bed or sofa for any items that might have dropped and were forgotten with time.
If the surfaces are too many, you can divide them into several days. Ensure you get everything off your bedside table, including those coffee mugs and juice glasses that have been there all week.
Dusting and wiping surfaces that have already been decluttered is no more than 10 minutes tops. You can use a clean and dry microfiber cloth to remove the dust from the surfaces.
You can then spray another microfiber cloth with some water and apply dish soap to wipe off the stains and dirt accumulated.
Use a lint roller to clean the bedside lambs after you have wiped clean the bedside table.
Ensure you maintain a daily routine of decluttering your furniture.
Keep the books on the shelf after you are done, the pens in the holder, all papers in the right folders, clean clothes in the wardrobe, and dirty ones in the laundry basket.
Little goes a long way! Spending a few minutes daily on organizing reduces the workload when you need to do general cleaning.
If there is any stone that has been left unturned, make sure you attend to it. Wipe all the furniture in your room, such as wooden sculptures and chairs.
If you have any paintings and pictures, wipe them clean.
Ensure you don’t spray anything on the glass of the pictures and art paintings. Any moisture could seep under the wood and cause it to rot or destroy the picture inside the frame.
Also remember not to over polish the furniture. A quality microfiber cloth is enough to dust all surfaces. If you must use furniture polish, keep the quantities minimal.
It’s crucial to keep your bed clean for a deep slumber. Take advantage of the scheduled cleaning to take out the dirty linen covers on your bed and furniture.
You don’t need to remove your carpet, but it’s a good idea to vacuum clean it.
Even the lighting fixtures such as bulbs and lamps trap dust even though you may not notice. Use a microfiber cloth to clean the blades of your ceiling fan and wipe around the switches to get rid of the accumulated dust.
If you need to wet dust the switches, spray the cleaner on the microfiber cloth and not on the switch.
An excellent tip I learned is to place stickers on the switch area to avoid leaving disgusting smudges and fingermarks on the switches.
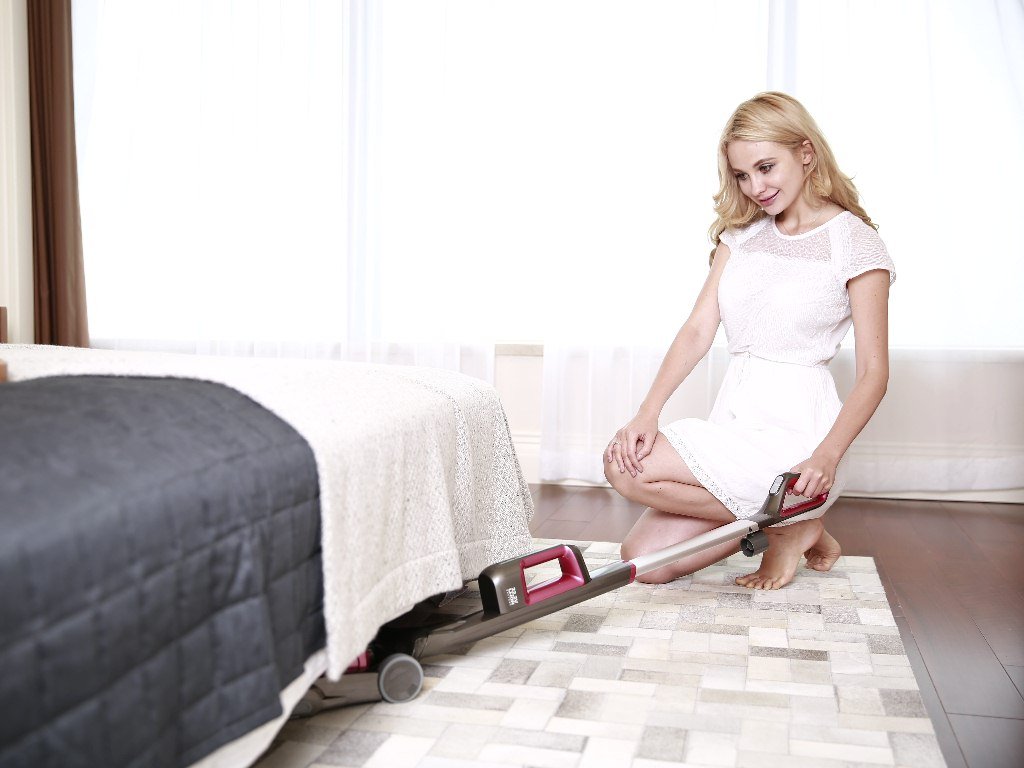
A good vacuum cleaning job should pick up at least 50% of all the dirt in the room. If you don’t have time to vacuum thoroughly, do a simple 10-minute vacuum job.
A vacuum cleaner is efficient as it picks up all the dirt, debris, and dust on the floors, carpets, and upholstery. If it’s too much work and you have limited time, divide it into two days’ work.
The spaces underneath or behind furniture harbor a lot of dirt and dust. Missing these spots could be disappointing.
If possible, move the furniture so you can clean the space underneath it for deep cleaning. If it’s not possible, use a vacuum with a long handle to get under and behind the furniture.
Don’t forget under your bed!
You must have a window or two in your room. They won’t feel too good about being left out.
Use cleansing agents and a squeegee to quickly remove the dirt and dust on the glass. It should not take more than ten minutes to clean two windows.
We always recommend you spot clean the floor before mopping. Spotting helps to remove any dirt you may have carried into your room to avoid creating a bigger mess when mopping.
You can use a broom and a dustpan instead of dragging a vacuum cleaner over the floor. The vacuum cleaner could be carrying dirt from the store too.
Mopping is not as time-consuming as many people make it to be. With the right mop, it’s a five-minute job, and you are done.
There are two ways of mopping; first, we have the common way of making a cleaning solution from some water and soap. You then soak your mop and wring it several times before passing it over the floor area a couple of times.
The second way involves pouring the premade cleaning solution into a bottle and piercing a hole through its cap. You will then squeeze the solution on the floor and pass the mop over it until it is clean.
You can finally flop on your bed for this final step! Create a daily schedule to ensure you keep the bedroom clean to reduce the scheduled cleaning workload. Schedule at least 10 minutes of cleaning time every day.
Find the ideal prayer mat for a deeper spiritual experience with our guide on materials,…
Avoid costly damage with expert tips on preventing and fixing bad plumbing. Protect your home…
Discover why Chesterfield sofas are ideal for seniors: effortless use, ultimate comfort, easy maintenance, and…
In the realm of interior design, the quest for striking yet versatile elements often leads…
Sydney's plumbing industry is a vibrant and essential sector, offering numerous opportunities for skilled professionals.…
Congratulations! You just bought your first home. Now comes the exciting (and maybe slightly overwhelming)…
