Here you will find a guide for learning how to build a pergola attached to the house. Build a DIY pergola that attaches to your house to provide shade for the patio and a place to hang your potted plants.
Includes instructions on layout and placement of posts, sizing your pergola, attaching to the house framing, and installing beams and rafters.
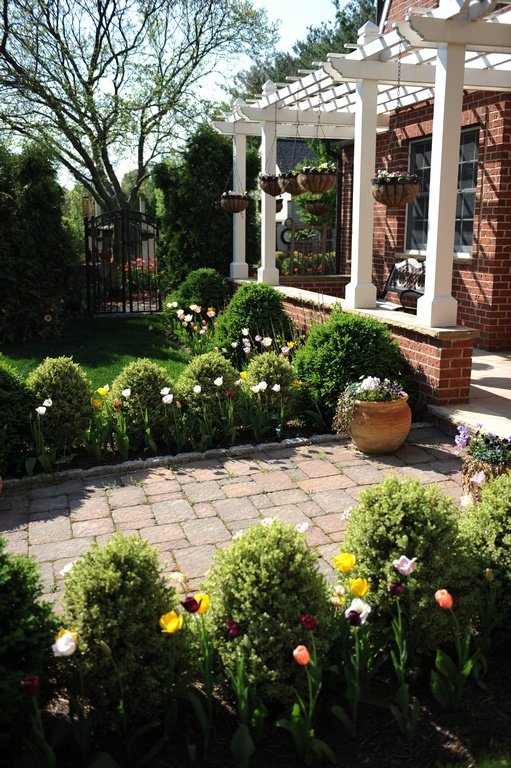
Need to know how to build a pergola attached to the house? Want to build a DIY pergola? This simple design can be expanded or shrunk as necessary to fit the space you have over your patio or deck.
Read Also:
Pergolas provide shade and a place to hang potted plants over patios and decks. If you choose to attach your pergola to the house, it must be anchored to the house framing and not the trim, siding or fascia boards. Since attaching a pergola to the house framing is a structural change, you’ll need a building permit in most cases.
Before you start building or buy any materials, check with your local building department for local code, permits, and inspection information. This is how to build a pergola attached to the house.
A DIY pergola or arbor only has to support its own weight and the weight of whatever you hang from it. This allows you to extend beam and rafter spans.
On a larger pergola, however, you don’t want the lumber to appear unsubstantial, so it is important to increase the size of the members appropriately.
Move up to 6-by-6 posts and 2-by-8 beams and rafters to keep the pergola looking sturdy. Add intermediate posts and additional beams anytime a beam or rafter span is longer than 12 feet to prevent sagging in the future.
The ledger board attaches to the house framing and supports the pergola rafters. You can attach the ledger to the roof rafters but it is better to attach it to the wall framing. Cut the ledger board from 2-by-6 or 2-by-8 lumber.
If you’re using anything but pressure-treated lumber, seal the ledger board with a quality wood sealer before you start construction.
Insert a piece of Z flashing behind the siding above the ledger location and attach the ledger to the wall studs with two, 1/2-inch galvanized lag bolts through the ledger into each stud.
Layout the posts for your DIY pergola. The posts support a double beam that supports the rafters. Hang the plumb bob from the end of the ledger so the point is just barely above the patio surface. When it stops swinging, mark the patio under the point.
Measure straight out from the mark to the patio edge and mark again. Snap chalk lines between the marks at the house and the patio edge.
Measure back towards the house 8 to 12 inches from the patio edge along the chalk lines and mark. Snap a new chalk line between these marks.
Place the posts on this line equidistant from the lines perpendicular to the house. Ensure a square layout by measuring diagonally to the plumb bob marks from the intersecting chalk lines. Both measurements should be the same.
Drill holes into the patio at the postmarks with a hammer drill and place lag bolt sleeves into the holes. Attach adjustable post brackets to the patio with 1/2-inch lag bolts screwed into the sleeves.
Stand a post in each bracket and temporarily brace them with two pieces of 1-by-4 lumber. Plumb the post with a post level and nail it to the bracket with galvanized 1 1/2-inch bracket nails.
Attach a mason line to the bottom edge of the ledger in the middle and pull it out to the posts. Attach a line level to the mason line and find the level point on each post and mark it. The double beam should extend beyond the posts.
Cut decorative ends on the two pieces and hold them on the posts parallel to the house with the top edges even with the level lines from the ledger. Attach the double beam to the posts with two 1/2-by-7-inch carriage bolts at each end.
Read Also:
Space the rafters evenly and no more than 16 inches apart. Cut the outside end to match the decorative ends of the double beam. Attach the rafters to the ledger board with galvanized joist hangers, screws and bracket nails.
Use galvanized hurricane ties to attach the rafters to the beam. You can add additional pieces of narrowly spaced 2-by-2, 1-by-3, or lattice across the top of the rafters for additional shade. That’s how to build a pergola attached to the house.
You’ve just built a pergola attached to your house. Now, it’s time to add the finishing touches to bring out the beauty of your home. With sturdy rot-resistant wood such as pressure-treated cedar and pine, you can finish up your pergola with a wood stain and sealant to preserve its beauty and durability.
These two products protect the wood against the sun’s ultraviolet rays, temperature changes, and moisture. These finishing touches also help maintain the wood’s natural colour. When choosing the best stain and sealant for your pergola, consider the type of wood used, the primary purpose of your pergola in your outdoor space, and your area’s climatic conditions.
When you decide to paint your pergola, you may consult a paint expert to determine the best brand for you. In this way, you’ll also be able to ask them the factors to be considered, with regards to maintenance and weather, for you to be certain that you use the proper materials to achieve a perfect looking and functioning pergola all year round.
The best garden furniture under a typical sized pergola is a 4 seater rattan furniture set. This is because they tend to frame the space nicely without spilling out past the boundaries. In addition, rattan is a tough material from naturally renewable palm, widely grown in Asia, Africa, and other parts of the world. Rattan furniture can withstand harsh environmental conditions and provide great aesthetic appeal under your newly built pergola.
Low water pressure in the house can be more than just a minor inconvenience; it…
Crowdfunding is a busy world, and an attractive video can make all the difference between…
Find the ideal prayer mat for a deeper spiritual experience with our guide on materials,…
Avoid costly damage with expert tips on preventing and fixing bad plumbing. Protect your home…
Discover why Chesterfield sofas are ideal for seniors: effortless use, ultimate comfort, easy maintenance, and…
In the realm of interior design, the quest for striking yet versatile elements often leads…


View Comments
Thanks!