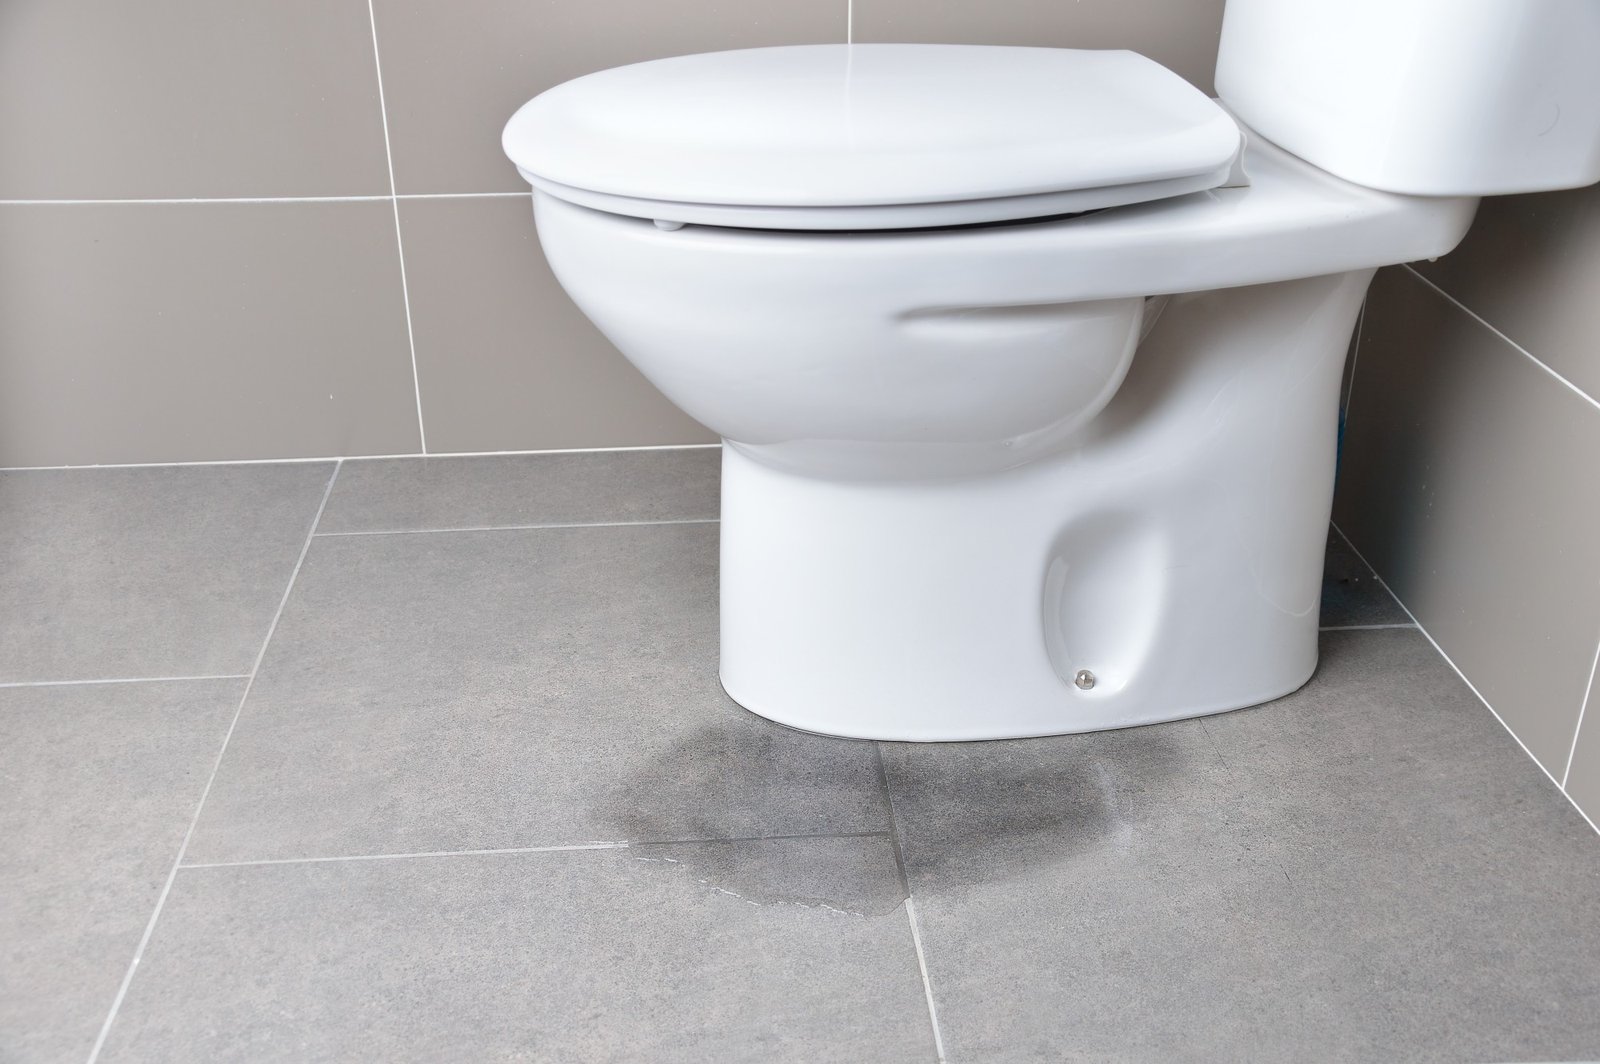
If you have water puddles around the base of your toilet, then there’s no second-guessing it: you have a leaking toilet.
A leaking toilet is as messy and ominous as it sounds. However, the good news is that fixing a leaking toilet is a piece of cake. Anyone with a reasonable DIY skill set can repair toilet leaks in no more than two hours.
The first step is knowing how to fix a leaking toilet, and that’s where we come in. Keep reading, and we’ll show you the easiest and most effective way of fixing a leaking toilet.
Read Also:
There are various reasons why your toilet could be leaking at the base. However, you better address a toilet leak as quickly as you can. Even the tiniest leaks can lead to serious health concerns because of the growth and proliferation of mold and other fungi.
Avoid using your leaking toilet until you take care of the issue. Using a leaking toilet can cause dirty water from your toilet to seep into your bathroom floor. Let’s just say your toilet won’t smell too nice, and even air freshener won’t do the trick.
Here are a few reasons why your toilet might be leaking at the base:
The toilet seal is faulty- There’s a wax ring that connects the toilet to the drain. When the seal is defective, water might leak through the seal and settle on your toilet floor
Loose bolts at the toilet base- Two-tee bolts at the toilet’s base secure it in place. When the bolts loosen, the toilet might rock back and forth. This rocking might break the wax seal, allowing water to leak on the toilet floor, and it’s also what causes a toilet overflow leak through ceiling.
Condensing water on the toilet bowl- In cooler areas, water in the toilet bowl might be colder than the surrounding atmosphere. This makes moisture condense on the toilet bowl’s surface and drip down to the toilet floor.
Condensing water on the toilet bowl is no cause of alarm, but the first two causes definitely need your attention. Now that you know all the causes of a leaking toilet, let’s get to the actual work.
Fixing a toilet leak is a simple DIY job, so you won’t need any over-the-top tools. To fix a leaking toilet, you’ll need the following tools:
You’ll also need replacement tee bolts or a replacement wax sealing, depending on your case. With that in mind, it’s time to roll up your sleeves and get to work.
Fixing a leaking toilet isn’t rocket science and should take no longer than an hour or two, at most. Here’s the correct way to fix a leaking toilet.
Have a peek inside your toilet bowl and see if the water exceeds the overflow tube. If it does, then the problem may not be with the base but the bowl instead. You may have a problem with either the float or the inlet valve.
The float rises with the water level and tells the inlet valve when to stop allowing water into the bowl. You can understand these parts better by using this diagram from Lowes.
If either part is defective, it means that the water flows from the inlet valve into the toilet bowl until it overflows.
If the problem isn’t the float or the inlet valve, then move on to the base of the toilet.
Use your adjustable wrench to tighten the two tee bolts at the base of the toilet after removing the plastic lids. In doing so, you’ll be tightening the toilet to the floor and compressing the wax ring.
This alone could work to stop the leaking, but if it doesn’t, then you might have to replace the wax seal.
Be careful when buying a wax ring replacement for your toilet. Make sure you clearly describe your toilet model to the hardware store clerk to get the right wax ring. Once you get the correct wax ring, you can now get to work.
Start by shutting off the water to your toilet. Flush the toilet to get rid of all the water in the toilet. Use a sponge to get rid of any remaining water.
Using the adjustable screw wrench, take off the mounting nuts from the tee bolts that fix the toilet to the ground. In cases where the bolts won’t turn, or they spin in their position, use the saw to cut them off.
Carefully remove the toilet from its place and lay it on the side. You should now clearly see the drain and the defective wax seal. Scrape the old wax ring away with a putty knife, and remove any old wax residue and throw it in the trash.
With the cone facing downwards, gently place the new wax ring over the drain. Make sure you position the key openings properly on each side of the drain flange.
Carefully lift the toilet and place it over the drain line, aligning the tee holes with the bolts. With your body, press in the toilet so that it presses into the wax ring. Gently rock it side to side so that it creates a watertight seal with the wax ring.
Place the washers and nuts back on the tee bolts, and tighten them in place. The tee bolts should be snug but not too tight so as not to crack the porcelain.
To the tailpiece of the fill valve, reattach the water supply tube and turn off the shutoff valve. This procedure breathes new life into your toilet.
Flush the toilet and check for any leaks before you can walk away in triumph. If there are no leaks, then you have fixed your leaking toilet.
Hopefully, you now know how to fix a leaking toilet the right way. Remember to tighten the tee bolts regularly to keep the wax seal intact. Don’t be shy to call for professional help if you’re finding things a bit difficult.
No-doubt, your bathroom isn’t the only room in your home that needs some touching-up. For more informative pieces about everything to do with your home, check out the other articles on our site.
Low water pressure in the house can be more than just a minor inconvenience; it…
Crowdfunding is a busy world, and an attractive video can make all the difference between…
Find the ideal prayer mat for a deeper spiritual experience with our guide on materials,…
Avoid costly damage with expert tips on preventing and fixing bad plumbing. Protect your home…
Discover why Chesterfield sofas are ideal for seniors: effortless use, ultimate comfort, easy maintenance, and…
In the realm of interior design, the quest for striking yet versatile elements often leads…
