You’re thinking about adding drawers to your kitchen cabinet or pantry space but want something that fits into the space you have. You can buy drawers that work well, but they won’t necessarily fit the space you have.
The solution is to build these simple drawers with plywood on your table saw.
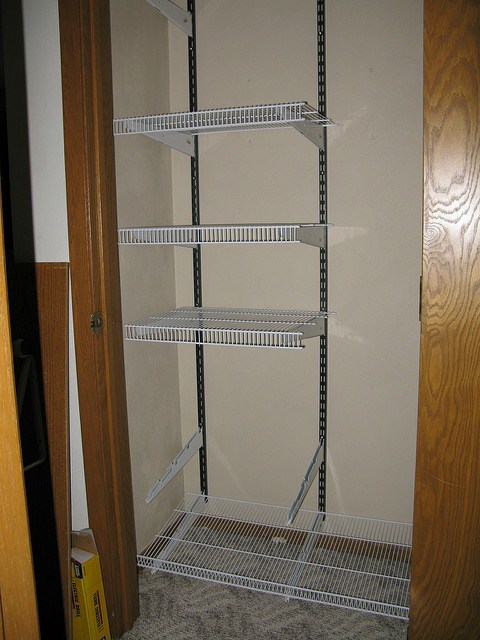
Kitchen cabinets used to have a variety of storage spaces. We had shelves and drawers and a place to put the broom and maybe a few other things on the floor.
New kitchen in homes often come with some wire rack shelving and nothing else.
Shelves are fine for storing some items, but you can’t beat a drawer for organizing and storing small spice bottles, small pots and pans, and dish towels or washcloths.
Here’s a detailed look at building drawers in a kitchen cabinet.
One thing about cabinets is that they usually aren’t very square. So you will want to do some careful measuring and determine the width and depth of the cabinet in the section you want to build your drawers in.
Consider the cabinet door. Will the door frame get in the way of opening the drawer? Usually, with bi-fold doors, this won’t be much of a problem if you take the door into consideration while deciding on the size of the drawers.
A traditional hinged door can make construction more challenging since the doorway is usually narrower than the interior of the cabinet.
Use a stud finder to find the studs inside. In some cases, there won’t be any that will be useful for mounting the drawer slides.
If that is the case you might want to mount a piece of 1/2 inch thick plywood on each side of the cabinet for mounting the drawers. We’ll call those pieces the cabinet inserts.
Start with the cabinet width and subtract the thickness of the plywood cabinet inserts. Two of them equals 1 inch. Next, subtract the clearance for the drawer slides. You can determine this from the instructions shipped with the slides.
What’s left is the room for the drawer and this will also be the width of the front and back pieces of the drawer. Save this number.
Cabinet Width – (Insert Width x 2) – (Drawer Glide Clearance x 2) = Drawer Width
Pick a depth that allows some room in front of the drawer, but still allows for ample drawer space. If the cabinet is 18 inches deep, you might want to reserve a few inches so use 15, or whatever suits you.
One way to pick a drawer depth is to make it the same as the shelving. Don’t forget to leave space for the drawer pulls.
Choose a height that allows you to fit the things you want inside the drawer with a little extra room.
If something gets jammed in the drawer and you can’t get it open, you will have room inside to use a finger to move it out of the way. Add 1/2 inch to the height of the drawers to include space for the bottom.
These drawers are made entirely of hardwood plywood. Plywood is a very stable material that shrinks and expands less with changes in moisture and humidity.
As a result, the drawers will operate smoothly year around. Choose maple, oak, or birch or just hardwood plywood that is finished on both sides.
Use 1/2-inch thick plywood for the sides, front and back, and 1/4-inch thick plywood for the bottom.
We’ve already determined the width of the front and back; now subtract 1 1/2 inches from the drawer depth to account for the thickness of the front and back pieces and to leave a little clearance in the back.
The front and back attach to the sides with 1 1/4 inch long #6 wood screws placed through their faces and into the adjoining edges of the sides.
Don’t skimp and use drywall screws; they are nothing but trouble in a project like this. A wood screw is made specifically to pull two pieces of wood together.
Cut the plywood on a table saw using a sharp, quality carbide blade to minimize tearing of the finished veneers. Cut one long strip of plywood that is long enough to include all four pieces.
Then set the fence so there is 1/4 inch between the blade and the fence. Set the blade height at 1/4 inch and feed the strip through the saw to cut a groove in it.
Adjust the fence slightly further away from the blade and repeat the pass to widen the groove to 1/4 inch.
You’ll need to determine the kerf width of your saw blade to make the groove the correct width. Test fit the plywood in the groove.
It should fit snugly and be able to move once fitted into the groove. It is better to make several passes and get a good fit than to make two passes and find it’s far too wide.
The plywood bottom fits into the grooves cut in the sides, front and back. Therefore it is slightly larger than the interior of the drawer.
Each groove is 1/4 inch deep which makes the available space for the bottom 1/2 inch wider and longer than the interior of the drawer.
We want to leave the bottom a little room to move so subtract 1/8 inch from the internal dimensions of the drawer.
This allows for some seasonal movement due to humidity and temperature. Cut the bottom on the table saw and we’re ready for the first fitting.
Do a dry fit first. Place the drawer front face down on a work table and fit the plywood bottom into the groove. Add the two sides, fitting the bottom into the grooves, and use a clamp between them to apply just enough pressure to hold the sides on the bottom.
Now fit the back in place, inserting the bottom into the groove. The back should mate with the sides and there should be no gaps.
Holding the assembly together with your hands, tip the drawer over so it rests on the top edges of the front, back and sides.
Use two clamps to apply a little pressure between the front and back just inside of both sides. Remove the clamp holding the two sides together.
Now align the side pieces so they are flush with the ends of the front and back. Check for square using a framing square and by measuring diagonally between corners.
Adjust for square if necessary, but the plywood bottom will probably hold the assembly nearly perfectly square.
At each corner, drill two 1/16 inch countersunk holes 1 1/4 inches deep through the drawer front piece and into the side piece. Do the same for the back piece.
Apply yellow wood glue between the two side pieces and the front piece. Apply the glue to both pieces and screw them together.
Wipe up any glue squeeze-out immediately with a damp cloth, giving special attention to the grooves. We don’t want glue in the grooves.
Slide the bottom piece into the grooves. Apply more glue between the sides and the drawer back piece, but don’t get any glue on the plywood bottom.
It’s better to be a little scarce on the glue near the bottom than to get a lot on it or in the grooves. Remember the glue will tend to spread out as you fasten the back to the sides.
Screw the back to the sides, fitting the groove onto the plywood bottom.
Check for square and make adjustments. You can use clamps to keep the drawer square until the glue dries—about one hour.
These are general instructions. Follow the drawer slide manufacturer’s instructions for specifics. You’ll have to plan the installation according to the instructions, but it isn’t very difficult if you pay attention to the details described.
Screw the wall side of the slides to the wall on each side, using a level to draw an installation line first. Most manufacturers supply screws but if you’re screwing through drywall, you’ll need to use longer screws to reach the studs.
More than likely you’ll have mounted cabinet inserts in which case you can just screw the slides to the inserts.
The slides should be installed near the bottom of the drawer, but use care not to place the slides so they screw into the plywood bottom which begins 1/4 inch from the bottom of the sides to 1/2 inch from the bottom.
Drill pilot holes and make sure your screws are 1/2 inch or less long.
Read Also:
Install your pulls on the front of the drawer. To make the drawers look nice, use a piece of stained hardwood that suits your taste to dress up the fronts of your drawers.
Install the pulls on the hardwood first, and then screw the hardwood fronts to the drawer from the inside.
Leave a 1/2 inch to 3/4 inch gap between each drawer front and let the drawer fronts overlap the front edges of the cabinet inserts.
Drawers can add considerable functionality to your storage space and every time you use them, you’ll remember building drawers in your kitchen cabinet (kitchen cabinet drawers).
Kitchen cabinet drawers by Hendricks Photos at Flickr.com; https://www.flickr.com/photos/hendricksphotos/3338919153
Congratulations! You just bought your first home. Now comes the exciting (and maybe slightly overwhelming)…
Concrete is a foundational material for multiple construction projects around you. From the pavements to…
Creating a wildlife-friendly garden is a rewarding endeavor that invites nature’s symphony right into your…
In today's fast-paced world, where trends come and go, and technology evolves rapidly, it's essential…
Protecting your home over the years, the roof goes through a lot. It's exposed to…
The concept of meetings in work settings is evolving, moving away from norms. Meetings of…

