Table of Contents Show
A concrete pathway or driveway in your home can be functional and beautiful. Of course, to fulfill these aims, you need to ensure that the concrete is installed accurately.
That is why it is essential to follow the right steps to execute this job perfectly.

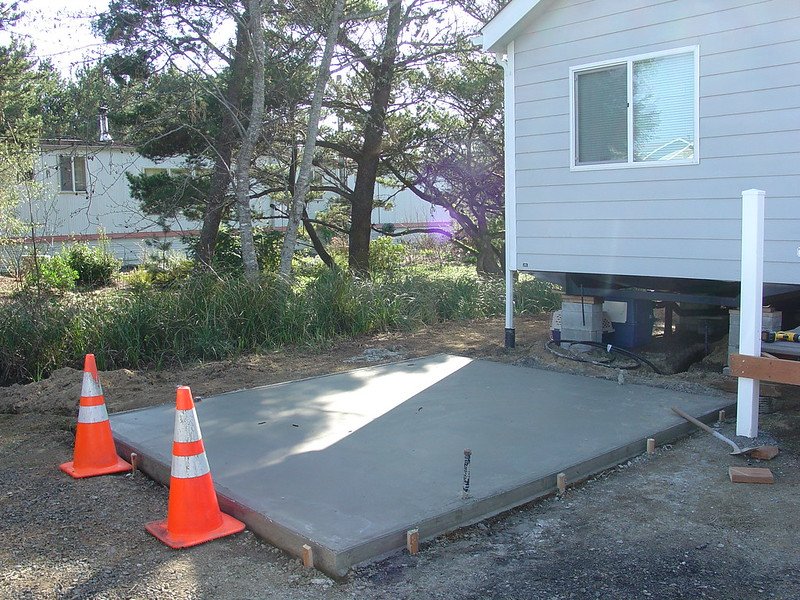
Pouring a concrete slab by yourself can save you money and time as you will not need a professional. Here are the steps you need to take to pour a perfect concrete slab.
1. Safety Gear
Before you start with the process, you need to have the right safety materials. That is because pouring concrete can be challenging if you don’t have the right safety equipment. Here is some personal protective equipment (PPE) you need to have:
- Boots
- Gloves
- HEPA-filter respirators
- Goggles
These will ensure that you don’t slip and you don’t experience any skin or eye irritation because of the concrete. Once you have this gear, you can move onto starting the procedure.
2. Preparing The Area
Firstly, you need to measure the dimensions of the area you will be pouring your concrete in. It will help you understand how many pounds of concrete you will need to order. Take measurements of the length, depth, and width of the area.
However, if you want to do a fantastic job, you will need to assess the ground beneath your concrete slab. The soil support system beneath the ground is there to provide support to your slab.
According to the American Concrete Institute, it can be divided into three sections:
- Subgrade: Native soil
- Subbase: Gravel on the subgrade
- Base course: Layer on top of the subbase and under your concrete slab
Just the subgrade level is enough for you to pour the concrete. However, that may not be ideal. Just make sure the base below the slab is strong, as it will be the foundation of your project.
Read Also:
3. Dampen The Base
To lengthen your finish time on a sunny day, you need to water the ground with water, so the base does not suck any water out of the concrete.
Besides that, spraying it with water will also slow down the curing process. That means your concrete slab will come out strong and durable.
So, grab a hose nearby and dampen the base with some water. Doing so will keep the concrete damp and ensure that the result is a tough concrete slab that will last a long time.
4. Start Pouring The Concrete
Before you pour the concrete, make sure you do it in small sections. It will allow you to distribute it evenly and much more neatly.
You can start spreading the concrete by moving the chute back and forth. Besides that, the driver can pull the truck forward as you keep ongoing.
After the truck is at the end of a section, you need to spread the concrete evenly with a rake or place. Make sure you don’t fill big sections because the screed board will get heavy, and there will be extra concrete that you don’t need.
5. Sliding The Screed Board
To make sure you don’t have any extra concrete, you will need the screed board’s help. You have to slide the board back and forth as you pull. Doing so will help you prevent void inside the surface.
If there are any low spots, you can use a mucker to pull the excess concrete back inside these spots. Make sure you have some extra help while doing this because pouring a concrete slab is not a job for just one person.
6. Start Floating
After you are done with the screen, you have to start floating as soon as possible. It would help if you did this while the concrete is wet to give it the shape you want.
You can do this by running the bull float perpendicular to the direction you pulled with the screed board.
Doing this will help you to smooth the surface and get rid of any ridges, valleys, or troughs that have formed on the concrete. You can also start floating in both directions so that the concrete is as smooth as possible.
7. Troweling
Many people think that all exterior concrete surfaces need troweling. However, this couldn’t be further from the truth because they don’t need to be troweled at all.
However, if your bull float has created ridges, you can use a trowel to make a few passes to eliminate these ridges.
Just make sure that you don’t over-trowel the surface. Doing so can cause the water to be trapped under the concrete surface. It will make your concrete slab weak in the long run, and it will be subject to scaling and spalling.
These problems are especially true if you live in a cold region and pour a concrete slab at such a temperature.
The cold temperature will exaggerate the problem, and your concrete surface will not last for very long. So, only trowel if you think it is absolutely necessary.
8. Clean Your Tools
Many individuals do the entire job and then clean their tools. However, if you want to enhance your experience, you need to clean your tools as you go. That is because concrete is pasty and can get stuck on your tools easily.
That is why you need to clean your tools and scrape them off so that there is no excess concrete anywhere. Once you are done, you should give your tools a thorough wash so that everything is back to its original state.
Final Words
That was your complete guide to pouring a concrete slab on your own. It is challenging, and you need to know some technical details to do a job well done.
Of course, you can always hire Orange County Concrete Pavers to provide you with the best concrete surface.
These professionals are experts in creating concrete surfaces. So, if you want a beautiful and functional surface, you can get in touch with them now.


