Dream Lands Design
  • Home Improvement
    • DIY
    • Remodeling
    • Woodworking
    • Accessories
    • Home Design
      • Furniture
      • Organize
      • Tips
      • Decor
        • Interior
        • Exterior
    • Design Ideas
      • Bathroom
      • Bedroom
      • Dining Room
      • Living Room
      • Kitchen
  • Gardening
    • Backyard
    • Front Yard
    • Landscaping
  • Building Staircase

Categories

  • Accessories
  • Backyard
  • Bathroom
  • Beauty
  • Bedroom
  • Cars
  • Decor
  • Design Ideas
  • Dining Room
  • DIY
  • Entertaining
  • Exterior
  • Finance
  • Front Yard
  • Furniture
  • Gardening
  • Green Living
  • Home Design
  • Home Improvement
  • Interior
  • Kitchen
  • Landscaping
  • Lifestyle
  • Living
  • Living Room
  • Organize
  • Photography
  • Real Estate
  • Remodeling
  • Tips
  • Wall Improvement
  • Woodworking

Archives

  • June 2023
  • May 2023
  • April 2023
  • March 2023
  • February 2023
  • January 2023
  • December 2022
  • November 2022
  • October 2022
  • September 2022
  • August 2022
  • July 2022
  • June 2022
  • May 2022
  • April 2022
  • March 2022
  • February 2022
  • January 2022
  • December 2021
  • November 2021
  • October 2021
  • September 2021
  • August 2021
  • July 2021
  • June 2021
  • May 2021
  • April 2021
  • March 2021
  • February 2021
  • January 2021
  • December 2020
  • November 2020
  • October 2020
  • September 2020
  • August 2020
  • July 2020
  • June 2020
  • May 2020
  • April 2020
  • March 2020
  • February 2020
  • January 2020
  • December 2019
  • November 2019
  • October 2019
  • September 2019
  • August 2019
  • July 2019
  • June 2019
  • May 2019
  • April 2019
  • March 2019
  • February 2019
  • January 2019
  • December 2018
  • November 2018
  • October 2018
  • September 2018
  • August 2018
  • July 2018
  • June 2018
  • May 2018
  • April 2018
  • March 2018
  • February 2018
  • January 2018
  • December 2017
  • November 2017
  • Privacy Policy
  • Terms of Use
  • Disclosure
  • Sitemap
  • Contact Us
29K
98K
0
Dream Lands Design Dream Lands Design
  • Home Improvement
    • DIY
    • Remodeling
    • Woodworking
    • Accessories
    • Home Design
      • Furniture
      • Organize
      • Tips
      • Decor
        • Interior
        • Exterior
    • Design Ideas
      • Bathroom
      • Bedroom
      • Dining Room
      • Living Room
      • Kitchen
  • Gardening
    • Backyard
    • Front Yard
    • Landscaping
  • Building Staircase
You're here: Home Furniture DIY Headboard Ideas: How To Make Your Own Upholstered Headboard

DIY Headboard Ideas: How To Make Your Own Upholstered Headboard

  • Perla Irish
  • June 22, 2018
Total
1
Shares
1
0
0
0
0
Table of Contents Show
  1. How To Make an Upholstered Headboard
    1. The following are tools and supplies that you’ll need to make an upholstered headboard:
    2. How do you install flush mounts?
    3. Image Credit
Make Upholstered Headboard – Now that your bed is done, it’s time to get started on a beautiful DIY upholstered headboard!

How To Make Your Own Upholstered Headboard
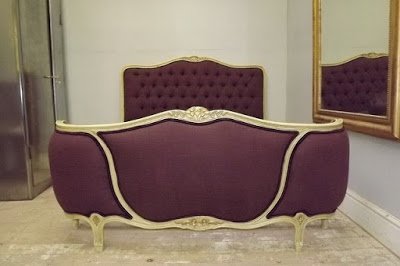
Upholstered Headboard – By French Finds Via  (CC BY 2.0)

How To Make an Upholstered Headboard


The first thing you should do is pick out your fabric. Find a swatch of whatever you like – whether it you go with microfiber, leather, or velvet – and bring it into your bedroom. Does it match your drapes? Walls? Comforter?

Once you’ve found a fabric you like, start thinking about what shape you’d like your headboard to be. If you’re planning to cut out the design yourself, you might want to stick to something simpler so it isn’t as difficult. If you’re going to get the shape pre-cut, why not try a unique shape for your headboard? Research headboards on the Internet and decide on the shape for you.

The following are tools and supplies that you’ll need to make an upholstered headboard:

  1. A jigsaw (if you’re shaping the headboard yourself)
  2. Pencil, scissors, utility knife
  3. Staple gun
  4. Tape measure
  5. ¼ or ½ inch plywood (depending on your stability preference)
  6. 2 inch thick foam
  7. Fiberfill (or “batting”)
  8. Your fabric choice
  9. Template papers (once again if you’re going to cut it yourself)

You’ll need to measure the width of your mattress before you get started. Your headboard should typically be slightly wider than your mattress.

Then, you’ll need to decide how high you want your headboard to be. Are you using it for decoration only, or are you going to rest against it while watching TV or reading? If the latter is the case for you, make sure your head will rest comfortably against the headboard – and not the wall.

Once you have your plywood cut out & sanded, either by you or a professional, you’ll need the foam cut next in the same shape. Remember that the foam should be around 2 inches thick to be properly comfortable.

Then, you’ll need to get fiberfill cut off a roll from the store. Add about 12 extra inches, since you’ll need to wrap the entire thing around the headboard, and not just place it in front. When it comes to your fabric, you’ll need to do the same thing – order 12 extra inches, since it will wrap around the headboard too.

Once all of your pieces are cut out and ready to be put together, you’ll need a big, open, flat surface to work on. Then, follow these steps:

  1. Iron your fabric before you start working with it (if it needs to be de-wrinkled) – you’ll want it to be nice and smooth once completed.
  2. Place the fabric flat, faced down on the smooth surface.
  3. Layer the fiberfill over the fabric – they should be the same size. 
  4. Next, put the foam over the fiberfill. 
  5. Finally, finish off the layering with the plywood on top. 

All four of the layers should now be sandwiched together. The fabric and fibrefill should be equally aligned with each other, and the foam and plywood should be lined with one another. The fabric and fiberfill should extend more than the foam and plywood so it can be wrapped around the back.

Pull the fabric and fiberfill to the back of the plywood and begin evenly stapling it in place with the staple gun. The staples should be ¼ inches in size, and should be applied 2 inches apart. Test it first – staple every corner, flip the headboard around, and see if it looks good. If so, continue stapling the spaces between, and if it doesn’t, take out the staples and try again.

If there’s any excess material at the end, trim it off with your scissors.

Now it’s time to put up your new headboard! Flush mounts are recommended for supporting headboards on walls. All you do is apply them to the wall, and the back of your headboard, and they slide together, interlocking one another. The headboard is guaranteed not to bang against the wall every time you get in bed, like some loose headboards!

How do you install flush mounts?

  1. Locate the studs on the wall behind the space where the headboard will rest.
  2. Attach the bottom part of the flush mount to the wall and then into the studs as widely as possible (within the width of your headboard).
  3. Lean the headboard against your wall to get the location of the receiving flush mount on your headboard.
  4. Remove headboard and drill the holes for the mounts.
  5. Attach the mounts facing down, and then lift your headboard on your wall to secure it.

Step back upholstered headboard – together! Remember, if the headboard is off center or just in a weird position, you can always reset the wall mounts – they aren’t permanent!

Image Credit

  • Upholstered French Vintage Bed Plush Purple Fabric; By French Finds; https://www.flickr.com/photos/frenchfinds/7725043226
Total
1
Shares
Share 1
Tweet 0
Pin it 0
Share 0
Share 0
Related Topics
  • diy headboard

Subscribe

Subscribe now to our newsletter

You May Also Like
featured image - living room
View Post

How to Choose a Set for the Living Room: Expert Advice

  • May 30, 2023
featured image - wood craft interiors
View Post

WoodCraft -The Ultimate Choice For Creating Truly Mesmerizing Interiors

  • May 30, 2023
Featured image - Best Methods for Removing Furniture
View Post

Best Methods for Removing Furniture

  • May 6, 2023
Featured image - How to Avoid Damage During White Glove Furniture Delivery Service in New York
View Post

How to Avoid Damage During White Glove Furniture Delivery Service in New York

  • May 3, 2023
Featured image - Enhance Your Outdoor Space with the Perfect Outdoor Furniture
View Post

Enhance Your Outdoor Space with the Perfect Outdoor Furniture

  • April 12, 2023
Featured image - Office Interiors: Tips to Upgrade the Reception Area
View Post

Office Interiors: Tips to Upgrade the Reception Area

  • February 17, 2023
featured image - The Best Multifunctional Furniture to Maximize a Small Space
View Post

The Best Multifunctional Furniture to Maximize a Small Space

  • February 12, 2023
Featured image - Upgrade Your Home with Modern Luxury Furniture
View Post

Upgrade Your Home with Modern Luxury Furniture

  • January 15, 2023

Leave a Reply Cancel reply

Your email address will not be published. Required fields are marked *

This site uses Akismet to reduce spam. Learn how your comment data is processed.

Dream Lands Design
  • Privacy Policy
  • Terms of Use
  • Disclosure
  • Sitemap
  • Contact Us

Input your search keywords and press Enter.

Add Dream Lands Design to your Homescreen!

Add