• Home Improvement
    • DIY
    • Remodeling
    • Woodworking
    • Accessories
    • Home Design
      • Furniture
      • Organize
      • Tips
      • Decor
        • Interior
        • Exterior
    • Design Ideas
      • Bathroom
      • Bedroom
      • Dining Room
      • Living Room
      • Kitchen
  • Gardening
    • Backyard
    • Front Yard
    • Landscaping
  • Building Staircase
  • Categories
    • Home Improvement
    • Decor
    • Gardening
    • Woodworking
    • Lifestyle
    • Green Living
    • Real Estate
Dream Lands Design
  • Home Improvement
    • DIY
    • Remodeling
    • Woodworking
    • Accessories
    • Home Design
      • Furniture
      • Organize
      • Tips
      • Decor
        • Interior
        • Exterior
    • Design Ideas
      • Bathroom
      • Bedroom
      • Dining Room
      • Living Room
      • Kitchen
  • Gardening
    • Backyard
    • Front Yard
    • Landscaping
  • Building Staircase
  • Categories
    • Home Improvement
    • Decor
    • Gardening
    • Woodworking
    • Lifestyle
    • Green Living
    • Real Estate
Featured image - How to use Sandwich Cutters for Better Results
You're here: Home Tips How to use Sandwich Cutters for Better Results

How to use Sandwich Cutters for Better Results

  • Perla Irish
  • February 12, 2023
Total
1
Shares
0
0
1
0
0
Table of Contents Show
  1. Choose the Right Cutter for Your Needs
  2. Prepare Your Ingredients
  3. Assemble Your Sandwich
  4. Experiment with Different Fillings

Sandwich cutters are a great tool for making sandwiches that are not only delicious but also visually appealing.
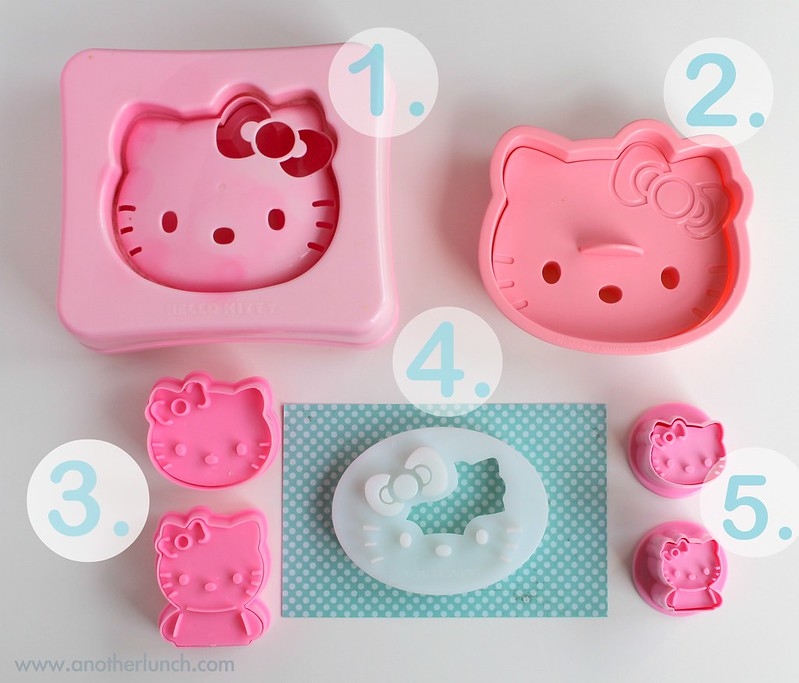
Image - How to use Sandwich Cutters for Better Results
How to use Sandwich Cutters for Better Results

They come in a variety of shapes and sizes, making it easy to find one that suits your needs and preferences. Whether you’re making lunch for yourself or preparing a meal for a crowd, using a sandwich cutter can make your work easier and more efficient.

In this article, we’ll go over some tips and tricks for using sandwich cutters to get the best results possible.

Choose the Right Cutter for Your Needs

Before you start using your sandwich cutter, it’s important to choose the right one for your needs. There are cutters that are designed specifically for crustless sandwiches, while others are made for cutting sandwiches into shapes such as stars, hearts, and squares. Some sandwich cutters even come with multiple blades, allowing you to make different shapes and sizes of sandwiches.

When choosing a sandwich cutter, consider the type of bread you’ll be using and the fillings you’ll be putting in your sandwich. If you’re using soft bread like white bread, you may want to choose a cutter with a rounded edge, as this will prevent the bread from getting crushed or torn.

On the other hand, if you’re using denser bread like whole grain bread, you may want to choose a cutter with a sharp edge, as this will make it easier to cut through the bread.

Prepare Your Ingredients

Once you’ve chosen the right cutter for your needs, it’s time to prepare your ingredients. The key to making a great sandwich is to have all of your ingredients prepped and ready to go before you start assembling your sandwich.

This will allow you to work efficiently and ensure that your sandwich is made to your liking. When preparing your ingredients, consider the fillings you’ll be using and make sure they’re sliced or diced into bite-sized pieces.

This will make it easier to get all of the flavors into each bite of your sandwich. You may also want to consider marinating your meats or vegetables in advance, as this will add extra flavor to your sandwich.

Assemble Your Sandwich

Once you’ve prepared your ingredients, it’s time to assemble your sandwich. Start by laying out two slices of bread and spreading a layer of condiments, such as mayonnaise or mustard, on one of the slices.

Then, add your fillings on top of the condiments, making sure to distribute them evenly. Finally, top your sandwich with the other slice of bread and press down gently to seal the sandwich together.

At this point, you’re ready to use your sandwich cutter. Simply place the sandwich on top of the cutter and press down firmly to cut through the bread and fillings.

Depending on the type of cutter you’re using, you may need to wiggle the cutter slightly to make sure it cuts through the entire sandwich. Once you’ve finished cutting your sandwich, remove the excess bread and enjoy!

Experiment with Different Fillings

One of the best things about using a sandwich cutter is that it allows you to be creative and experiment with different fillings.

You can use a variety of meats, cheeses, vegetables, and condiments to create unique and delicious sandwiches. Some popular fillings include turkey, ham, cheese, lettuce, tomato, and pickles.

When experimenting with different fillings, consider the flavors and textures of the ingredients you’re using. For example, you may want to pair a tangy cheese like cheddar with a sweet condiment like honey mustard. Or, you may want to add some crunch to your sandwich by adding a layer of lettuce or sliced cucumber.

Total
1
Shares
Share 0
Tweet 0
Pin it 1
Share 0
Share 0
Perla Irish

Perla Irish, who is more familiarly known as Irish, is the Content Manager at Dreamlandsdesign.com. She loves following trends around home and garden, interior design, and digital marketing. Through this blog, Irish wants to share information and help readers solve the problems they are experiencing.

Related Topics
  • bread
  • cutter
  • sandwich
Previous Article
featured image - Declutter Your Home with Professional House Cleaning Services

Declutter Your Home with Professional House Cleaning Services

  • Perla Irish
  • February 12, 2023
View Post
Next Article
featured image - How Much Does a Home Propane Tank Cost?

How Much Does a Home Propane Tank Cost?

  • Perla Irish
  • February 12, 2023
View Post

Subscribe

Subscribe now to our newsletter

You May Also Like
A backyard pool surrounded by fences under a sunny sky.
View Post

Budget-Friendly Pool Fencing: Affordable Safety Solutions

  • May 16, 2025
Split image of a sunny backyard with a natural wood deck on one side and a sleek composite deck on the other, surrounded by green plants.
View Post

Composite vs. Wood Decking: Which Is Right for Your Home?

  • May 16, 2025
Bright modern kitchen with elegant custom wooden cabinets in varied styles and finishes, highlighting high-quality craftsmanship and tailored design.
View Post

Choosing the Right Custom Cabinets Manufacturer for Your Dream Space

  • May 15, 2025
Bright modern home office with an ergonomic black mesh chair and light oak desk.
View Post

From Couch to CEO: Transforming Any Room into a Professional Home Office

  • May 15, 2025
Cozy backyard at dusk with warm string lights casting long shadows, soft path lights highlighting a mossy stone garden walkway, and elegant pendant lights illuminating a simple wooden outdoor dining table, spring evening.
View Post

10 Outdoor Lighting Ideas to Transform Your Backyard

  • May 15, 2025
Tape measure measuring the thickness of a piece of lumber.
View Post

How to Determine Deck Framing Lumber Sizes: A Complete Guide

  • May 13, 2025
A large pile of mixed construction waste, including broken concrete, wood scraps, and twisted metal, sits in a cluttered urban renovation site on a rainy autumn afternoon.
View Post

Renovating? Here’s What No One Tells You About the Aftermath

  • May 12, 2025
Modern heat pump unit installed outside a cozy home with green grass and clear blue skies, representing energy-efficient heating and cooling technology.
View Post

Heat Pump Repair 101: What Every Homeowner Should Know

  • May 10, 2025
  • About Us
  • Privacy Policy
  • Terms of Use
  • Disclosure
  • Sitemap
  • Contact Us

Input your search keywords and press Enter.