Table of Contents Show
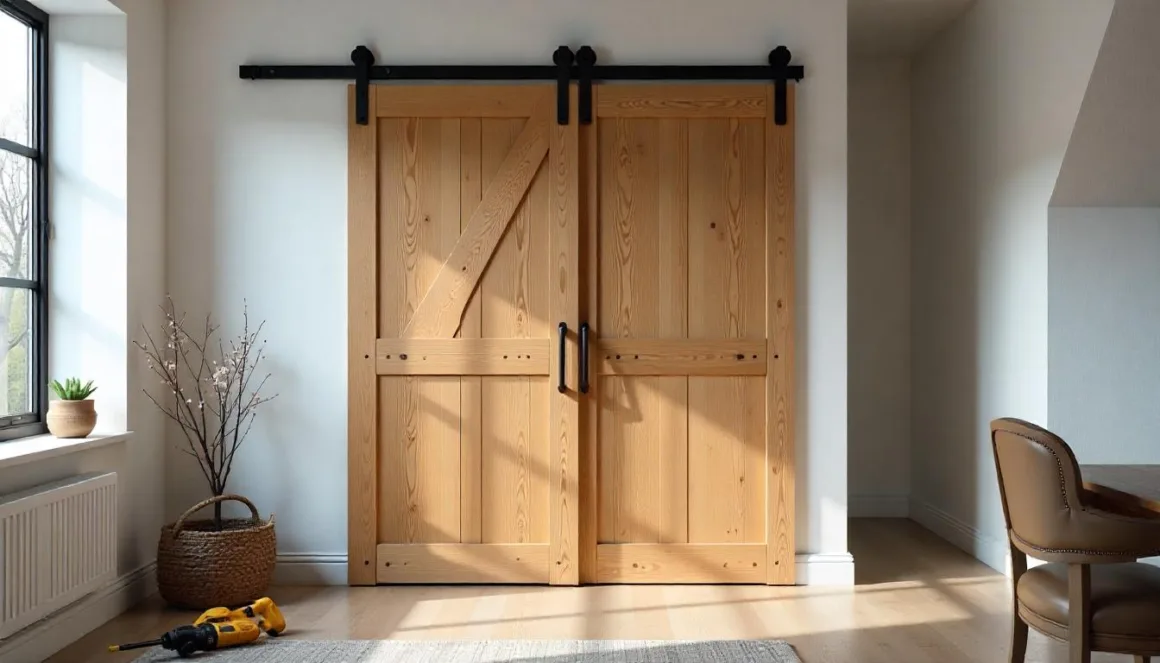
Learning how to install an interior barn door is a fun DIY project to upgrade your home. A barn door is usually configured into a sliding barn door system that operates by using a sliding mechanism or track that slides either to the right or the left. Mounting hardware to complete this process isn’t hard to do with the right amount of planning, tools, and determination.
Installing an interior barn door in any room of your home will change the entire look of your interior design. That’s because barn doors are very much in vogue these days and are modern-day solutions for both improving a home’s aesthetic and functionality. Here are a few tips for installing an interior barn door the right way:
1. Choose a Door
While it sounds simple enough, purchasing a high-quality barn door for your home is the first step to ensuring a smooth installation. A good-quality barn door should be made of premium materials and offer both functionality and aesthetic appeal. A hollow-core door that’s warped won’t hang properly or offer the same sound insulation that a solid-core and well-constructed barn door provides.
Additionally, you should invest in a barn door with a proper track system such as sliding systems that feature dual shock-absorbing stops. This will keep your barn door operating smoothly, prolonging its lifespan. Lastly, consider the warranty that comes with your door and whether or not it covers any potential issues during the installation process or during the time of its use.
Related reading: Sliding Frosted Glass Barn Doors to Make Your Bathroom Modern
2. Gather Your Tools
Before you begin installing your sliding barn door, make sure you have the following tools on hand:
Tools:
- Barn door premium door set, delivered with tracks, hinges, door handles, floor guide, and other hardware elements that will make installation ready to be installed. (Installation is made relatively easy by all-in-one kits that include the door and hardware.)
- Measuring tape
- Step stool or small ladder
- Stud finder (to ensure safe, secure, and stable mounting)
- Drill and drill bits
- Screwdriver
- Socket Wrench
- A level (at least 4 ft)
- A pencil
- Safety goggles (if needed)
- A guide for installation (sometimes included)
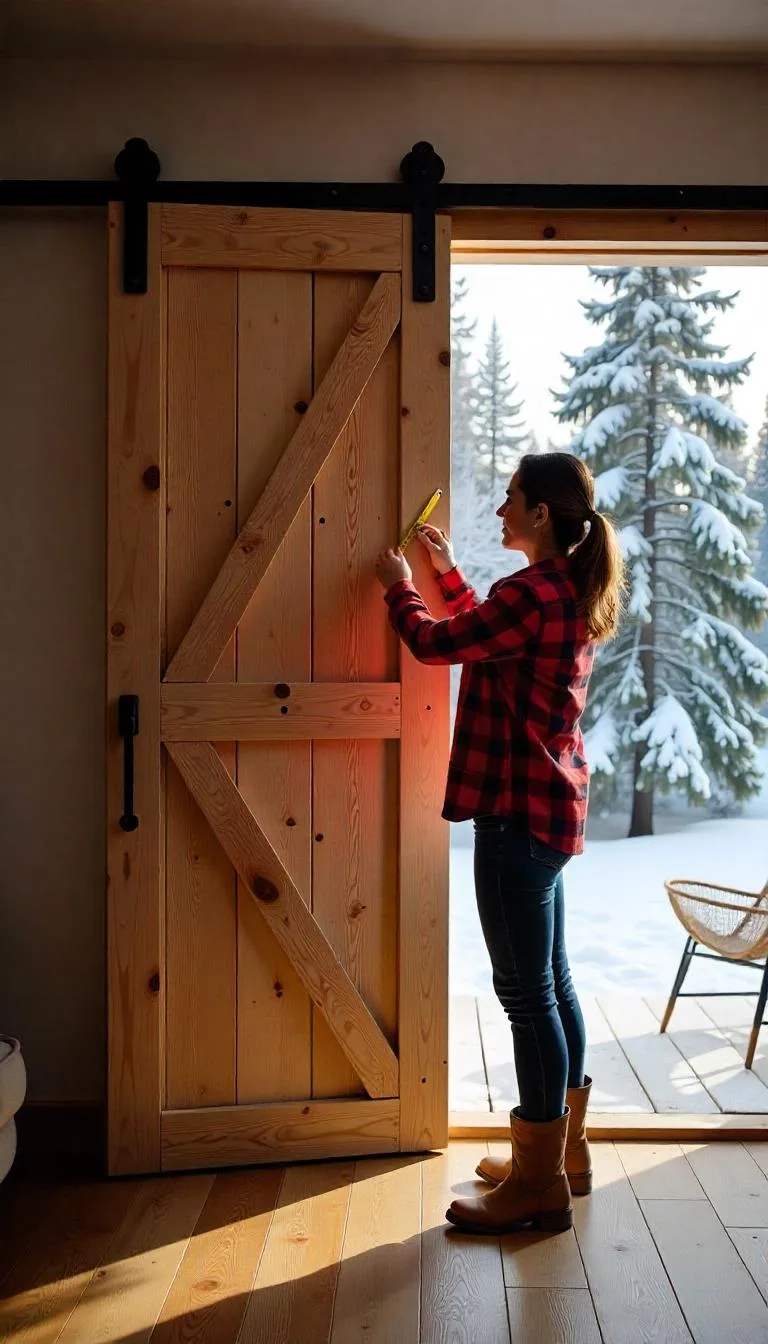
3. Measure and Mark Your Wall Space
Barn doors slide on a track placed against the interior wall. Due to this, you will want to check the wall space to one side of the door where it will be sliding open. To make sure your barn door won’t bump into nearby furniture or fixtures, measure the amount of space needed for a smooth slide.
Key measurements to make:
- Door width: The door should be the same width as the opening, or even better, 2 to 3 inches wider on each side for full coverage.
- Door height: Measure from the floor to the top of the opening and add roughly 1 inch for clearance (that is, your door should hang 1 inch above the floor).
- Wall clearance: Confirm the wall space adjacent to the opening is free of outlets, vents, or switches, and that it is also wide enough to allow for the natural swing of the door.
4. Locate Your Wall Studs
Use your stud finder tool to locate the studs on your wall. A stud finder is able to locate all the places in the wall above the door where you will be able to mount your header board securely. Mark all these points on the center line using a pencil.
5. Mount a Header Board
Most sliding barn doors should be mounted on a header board, also known as a mounting board, to fix the door to your wall. This not only ensures that your hardware and track system are securely mounted to the wall but also keeps the door from dragging on or scraping against the wall. This board should have the same length as the track that will hold the sliding barn door (with about 2 inches to spare on each side).
Next, you will need to identify the track’s center line on the wall before you fasten the mounting board to it. According to Architectural Builders Hardware Manufacturing, Inc., the best way to find the center line position of a track is by adding 1-3/4″ to the door height and measuring up from the floor. Then, to find the end location of the track, measure 3 inches over from the opening. Nevertheless, this can change based on the door you select.
Mount your header board to the wall using your level to ensure it’s straight. Ask for help from a friend or family member to hold the board straight. Attach the mounting board with screws to the wall using your drill. Make sure your mounting board is the same color as the surrounding to maintain a good visual appeal.
6. Install Your Track System
The wagon wheel hangers on your barn may already be included with many barn door kits and standard door kits. If not, you will need to install those first onto your barn door by drilling two holes in the areas of the door where you want your hangers.
You will also need to install anti-jump discs on the top of the door and two stops on each end to prevent the door from sliding off. These will be installed by using your drill. Once your entire door track system is installed, you’re finally ready to hang your barn door.
Related reading: Things to Consider When Maintaining Your Old Barns
7. Hang Your Barn Door
Ask a friend or a family member again to give you a hand to help you lift the door into position and onto the track system. Make sure the anti-jump discs are situated correctly, and tighten the screws all the way using your socket wrench. This will ensure that your track system is installed securely.
Slide the door along the track to check the stoppers and make sure there are no bumps, jams, or other obstructions that prevent your sliding door from smoothly sliding open and closing.
Put the floor guide into the groove at the bottom of the door and mark holes on the floor for drilling. Drill the holes and secure the floor guide, which will also ensure that your barn door slides correctly when opening and closing.
Enjoy Your New Door!
Once your barn door is hung, add any finishing touches, such as extra decorative hardware or paint coats. Usually, there is nothing left to do but enjoy the fruits of your labor and a new addition to your space. A barn door, after all, is a timeless and striking element to add to any room of your home.
FAQs
You will need a drill, level, measuring tape, stud finder, screwdriver, and possibly a saw for trimming the door. Remember to wear safety goggles during the installation.
Measure the width of the door opening and add approximately 2 inches on each side for proper coverage. For the height, measure from the floor to the top of the door frame, adding extra inches for the hardware.
Absolutely! Many people successfully install barn doors independently. Make sure you have the necessary tools and carefully follow the provided instructions. It can be a fulfilling DIY project!
You will require a sliding track system, typically including a track, rollers, door stops, and mounting brackets. Choose a style that matches your decor from the various options available in the market.
It’s advisable to ensure that your wall can support the weight of the door and its hardware. When mounting on drywall, locate and use studs for a more secure installation. If unsure, seek advice from a professional before proceeding.