• Home Improvement
    • DIY
    • Remodeling
    • Woodworking
    • Accessories
    • Home Design
      • Furniture
      • Organize
      • Tips
      • Decor
        • Interior
        • Exterior
    • Design Ideas
      • Bathroom
      • Bedroom
      • Dining Room
      • Living Room
      • Kitchen
  • Gardening
    • Backyard
    • Front Yard
    • Landscaping
  • Building Staircase
  • Categories
    • Home Improvement
    • Decor
    • Gardening
    • Woodworking
    • Lifestyle
    • Green Living
    • Real Estate
Dream Lands Design
  • Home Improvement
    • DIY
    • Remodeling
    • Woodworking
    • Accessories
    • Home Design
      • Furniture
      • Organize
      • Tips
      • Decor
        • Interior
        • Exterior
    • Design Ideas
      • Bathroom
      • Bedroom
      • Dining Room
      • Living Room
      • Kitchen
  • Gardening
    • Backyard
    • Front Yard
    • Landscaping
  • Building Staircase
  • Categories
    • Home Improvement
    • Decor
    • Gardening
    • Woodworking
    • Lifestyle
    • Green Living
    • Real Estate
How to Prepare Your Home for a Seamless Roof Installation Process
You're here: Home Home Improvement How to Prepare Your Home for a Seamless Roof Installation Process

How to Prepare Your Home for a Seamless Roof Installation Process

  • Perla Irish
  • February 22, 2024
Total
2
Shares
0
0
2
0
0
Table of Contents Show
  1. Remove Debris
  2. Remove Old Roofing Materials
  3. Clean the Roof
  4. Clean the Soffit

Your roof’s underlayment plays an important role in your metal roofing system. It protects your shingles and prevents water leaks from penetrating the roof.

Before the work begins, remove pictures and knick-knacks from your walls and ceiling. The banging and hammering of the installation process could cause them to fall off.

Remove Debris

There are a lot of things that can get caught on your roof, from spent leaves to tree branches. It’s important to regularly clear debris from your roof. This helps prevent water damage to your home and can help with pest control.

It’s best to clear out as much debris as possible before the roofing project starts. This will make it easier for the contractors and save you money by reducing the materials needed.

Since there will be a lot of banging and hammering during the roof installation process, it’s a good idea to walk through your home before the work begins and remove any pictures or other wall ornaments that aren’t permanently secured with screws. This will also prevent them from getting damaged by the vibrations produced during construction.

You should also relocate any outdoor furniture or decorations and cover any plants or lawn areas that may get damaged by the commotion.

Remove Old Roofing Materials

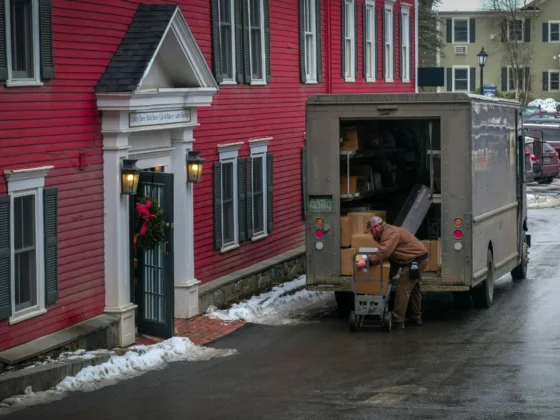
If you’re installing a new roof over old shingles, it’s best to have someone on the ground to gather and transfer debris to a dumpster. Having a sturdy extension ladder, a roofing shovel, a nail puller, and safety equipment like a work harness is also a good idea.

A Redmond roofing company typically starts by removing the existing shingles using a “tear-off shovel.” This has a serrated edge that easily slides under nails and a fulcrum underneath for extra leverage.

After tearing off the shingles, the contractor will remove the flashing around chimneys, skylights, and vents.

Before beginning the tear-off process, it’s a good idea to cover plants, bushes, doors, and windows with inexpensive tarps. This will minimize the mess and make cleanup much easier.

It would help if you also trimmed any low-hanging branches and cut the grass near the house a day before construction starts to keep shingle shards from blowing in the yard.
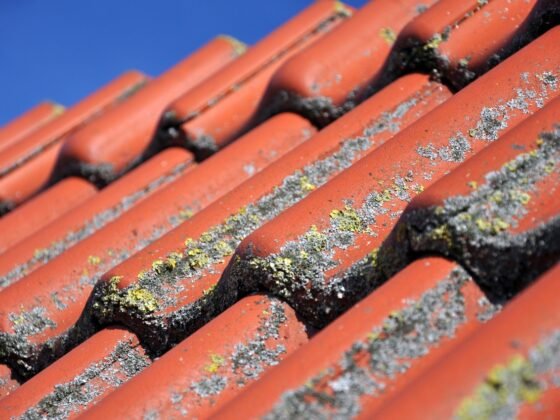
Clean the Roof

If you have a metal roof, ensure all the panel seams and flashing are in good condition. Metal seams and flashing can be vulnerable to rust and corrosion if not properly installed or if they begin to fail.

Make sure all screws are tightly fastened to the panels and that the flashing around air vents, chimneys, skylights, and solar panels is well-sealed.

Installing a seamless roof system eliminates the seams and joints that can leak, so it is essential to prevent leaks before they occur. The best way to do this is by ensuring a properly functioning gutter system and cleaning it regularly.

Before the roofing project begins, walk through your home and remove any pictures or wall ornaments that could fall during the installation process. There will be a lot of banging and hammering during the roof installation, so anything that could be damaged by falling debris should be removed.

Also, trim tree branches that hang over the roof and keep them trimmed regularly. This can inhibit the growth of moss and algae on your roof.

Clean the Soffit

Homeowners often overlook soffits and fascia, essential to your home’s ventilation. Without a properly functioning soffit, moisture, mold, mildew, and debris can build up in the attic and roof and cause problems such as shingle curling and rotting.

Regular inspections are recommended to keep soffits and fascia looking great. If you notice any signs of rot, deteriorating caulking, or pests, you should repair them immediately.

Aluminum soffits and fascia require little maintenance, but wood fascia and soffits should be stained or painted every few years.

You should also remove any outdoor furniture, BBQ grills, and decorations from your roof to give the contractors clear access to the work area.

If you have any plants or shrubs close to your roofline, consider putting them in crates or boxes to protect them from falling debris during the process. It’s also a good idea to cut the grass and remove any tree branches that hang over your roofline.

Total
2
Shares
Share 0
Tweet 0
Pin it 2
Share 0
Share 0
Perla Irish

Perla Irish, who is more familiarly known as Irish, is the Content Manager at Dreamlandsdesign.com. She loves following trends around home and garden, interior design, and digital marketing. Through this blog, Irish wants to share information and help readers solve the problems they are experiencing.

Related Topics
  • debris
  • installation
  • process
  • remove
  • roof
  • roofing
Previous Article
featured image - 5 Items Every Gardener Should Have

5 Items Every Gardener Should Have

  • Perla Irish
  • February 22, 2024
View Post
Next Article
featured image - The Link Between Gutters and Roof Health: What You Need to Know

Why Professional Roof Cleaning is Essential for Home Maintenance

  • Perla Irish
  • February 22, 2024
View Post

Subscribe

Subscribe now to our newsletter

You May Also Like
Cozy rustic cabin in a forest clearing with wooden textures, rocking chairs, and a fire pit under soft sunlight.
View Post

Transforming Pioneer Cabins into Guest Houses, Offices, or Airbnb Rentals

  • May 20, 2025
Wooden pergola attached to the house with strong beams.
View Post

How to Build a Pergola Attached to the House: Instructions and Drawings

  • May 19, 2025
Outdoor patio with sleek modern furniture in neutral tones, surrounded by lush greenery, creating a cozy and sophisticated atmosphere.
View Post

A Curated Blend of Beauty: Premium Outdoor Furniture for Elegant Living

  • May 19, 2025
A roofer installing a new roof.
View Post

Is It Time to Replace Your Roof? Here’s How to Tell

  • May 16, 2025
Insulation installation process: Sealing air leaks around windows with caulk and weather stripping during a rainy winter night.
View Post

Boost Home Energy Efficiency with Quality Insulation

  • May 16, 2025
A rustic, farmhouse-style home transformed for a lively party, with a large wooden deck extending into a sprawling backyard during a warm autumn evening. String lights illuminate the outdoor space, highlighting a barbecue area and comfortable seating arrangements.
View Post

How to Transform Your Home into a Party-Friendly Place

  • May 16, 2025
A large metal dumpster sits in a driveway surrounded by blooming flowers in spring, filled with garden waste and old landscaping materials from a yard makeover. A white picket fence borders the property.
View Post

Why DIYers Trust Residential Dumpster Rentals for Home Improvement Jobs

  • May 16, 2025
Cozy outdoor lounge with wicker ottoman, colorful cushions, sunlit patio, greenery, and stylish outdoor furniture.
View Post

Using Outdoor Ottoman Cushions to Create a Cozy Outdoor Lounge

  • May 16, 2025
  • About Us
  • Privacy Policy
  • Terms of Use
  • Disclosure
  • Sitemap
  • Contact Us

Input your search keywords and press Enter.