Table of Contents Show
Wallpaper How To’s
Installing wallpaper can be rewarding and enjoyable when you have the right tools and know the best methods. Read the article below for complete instructions and tips on installation, preparation, removal and care.
 |
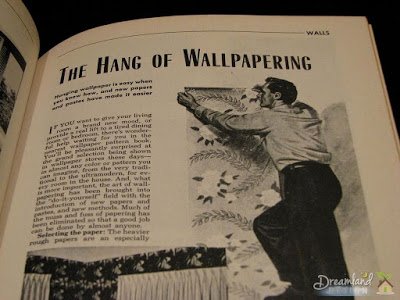
| The Hang of Wallpapering |
Tools
Get your tools ready before you start the job:
- Prime the wall with an acrylic-based primer/sealer specially formulated for wallcoverings.
- Spackling compound
- Vinyl-to-Vinyl Adhesive for overlaps in corners and borders
- A clear, large work surface such as a table or flat door
- Drop cloths and masking tape;
- Tips: Do not use newspaper as a drop cloth or to cover your work area. The newsprint ink may transfer to the wallcovering.
- Yardstick or metal (not cloth) measuring tape
- Stepladder and/or step stool
- Sharp scissors
- Trash bags
- Snap-blade razor knife with several new blades
- Seam roller for gently pressing seams
- A wide wall scraper or broad knife at least four to six inches wide
- A carpenter’s level and/or plumb bob and chalk line
- A smoothing brush
- Bucket and sponge
- A water tray and/or painting pad (for pre-pasted)
- Paste and roller or brush (for un-pasted)
- Masking or “blue” tape
- Pencil
- Screwdriver for removing switch plates and outlet covers
- Portable lights (if necessary)
- Coarse Sandpaper
Preparation
- Like so many home projects, preparation is key.
- Move furniture to the center of the room or to another room.
- Turn off power to light switches and outlets. Remove switch plates and outlet covers and cover the openings with masking tape.
- Remove curtain hardware and window treatments.
- Put down drop cloths and hold flush to baseboards with masking tape or blue tape.
- If the walls you are papering currently have wallpaper on them, soak the old wallpaper first with a removal solution according to the instructions. Give the solution time to work. Patience is the key! Scrape off the old paper and any paste residue. Wash walls to remove old adhesive.
- Repair any small nicks or cracks in the wall with a spackling compound, then sand to create a uniformly smooth surface. Look carefully for any small bumps or protrusions, scrape or sand flush as these will tend to show through adhered wallpaper.
- The wall should be clean, dry, and free of grease, mildew or other stains.
- If you are not sure about the quality of the paint over which you will be installing, try the tape test: Cut a small “x” into three walls, cover the “x’s” with a piece of clear cellophane tape, and quickly pull off the tape. If any paint flakes remain on the tape, the wall should be lightly sanded with coarse sandpaper.
- Prime the wall with an acrylic-based primer/sealer specially formulated for wallcoverings. A good primer will reduce the wall’s ability to absorb moisture from the paste. This will make it easier to position the wallpaper while you work. Priming also helps the wallpaper adhere better and remove more easily when you are ready for a change. A white pigmented primer will also prevent “show-through” of a painted surface. When hanging a border only, use a clear primer in the border area.
- Let walls in new construction properly cure before hanging wallpaper; 48 hours for new drywall, 30 days for new plaster, 5 days for flat latex paint, and 14 days for semi-gloss (after de-glossing).
- If the wallpaper has a dark background, consider tinting your primer to match the paper.
- Paint trim (window and door casings, baseboards, cove molding and the like) prior to hanging wallpaper
Estimate How Much Wallpaper You Need
There are several ways to calculate how much wallpaper you will need, and many variables can come into play, such as vaulted ceilings, paper width, pattern repeat, number and size of doors and windows. Just as two situations are not exactly alike, no single method of calculation will work perfectly every time. It is always a good idea to do your measurements a couple of ways and then compare them. As the carpenter says, “measure twice, cut once.” It is also a good idea to order a little more than you need in case you make a mistake or need to make a repair sometime later.
- When you search for wallpaper, use a calculator to help you determine how much you need to order based on your room dimensions, and the specific size and pattern repeat of the design you select.
- If you want to develop a quick estimate of your needs, use the estimating charts or the square footage method described below.
- Finally, if you want even more precision, engineer the room strip by strip.
- Remember that wallpaper is priced by the single roll, but is sold in double – or triple-roll bolts. This method of packaging creates longer continuous runs of paper and usually results in less waste. So make sure your measurements adjust for the bolt packaging of your particular paper.
- Always round up to the nearest foot when taking your measurements and use a yardstick or steel tape measure, not cloth.
Estimating Charts
Estimate Chart – Ceilings and Borders
| Room Size | Single Rolls to Cover Ceiling | Border Segments |
|---|---|---|
8×10 |
4 |
3 |
10×10 |
4 |
3 |
10×12 |
4 |
3 |
10×14 |
6 |
4 |
12×12 |
6 |
4 |
12×14 |
6 |
4 |
12×16 |
8 |
4 |
12×18 |
8 |
4 |
12×20 |
10 |
5 |
14×14 |
12 |
4 |
14×16 |
10 |
4 |
14×18 |
12 |
5 |
14×20 |
12 |
5 |
16×16 |
12 |
5 |
16×18 |
14 |
5 |
16×20 |
14 |
5 |
18×18 |
14 |
5 |
18×20 |
16 |
6 |
Estimate Chart – Single Rolls Needed 20.5″ wide paper, average repeat
| Length of Wall in feet | Ceiling Height in Feet | ||||
|---|---|---|---|---|---|
8 |
9 |
10 |
11 |
12 | |
6 |
3 |
3 |
3 |
3 |
4 |
8 |
3 |
4 |
4 |
4 |
5 |
10 |
4 |
5 |
5 |
5 |
6 |
12 |
5 |
5 |
6 |
6 |
7 |
14 |
6 |
6 |
7 |
7 |
8 |
16 |
6 |
7 |
8 |
8 |
9 |
18 |
7 |
8 |
9 |
9 |
10 |
20 |
8 |
9 |
10 |
10 |
11 |
22 |
8 |
9 |
10 |
11 |
12 |
24 |
9 |
10 |
11 |
12 |
14 |
26 |
10 |
11 |
12 |
13 |
15 |
28 |
11 |
12 |
13 |
14 |
16 |
30 |
11 |
13 |
14 |
15 |
17 |
32 |
12 |
14 |
15 |
16 |
18 |
34 |
13 |
14 |
16 |
17 |
19 |
36 |
14 |
15 |
17 |
18 |
20 |
38 |
14 |
16 |
18 |
19 |
21 |
40 |
15 |
17 |
19 |
20 |
22 |
Estimate Chart – Single Rolls Needed 27″ wide paper, average repeat
Length of Wall in feet |
Ceiling Height in Feet | ||||
|---|---|---|---|---|---|
8 |
9 |
10 |
11 |
12 | |
6 |
2 |
2 |
2 |
3 |
3 |
8 |
3 |
3 |
3 |
3 |
4 |
10 |
3 |
3 |
4 |
4 |
4 |
12 |
4 |
4 |
4 |
5 |
5 |
14 |
4 |
4 |
5 |
5 |
6 |
16 |
5 |
5 |
6 |
6 |
7 |
18 |
5 |
6 |
6 |
7 |
8 |
20 |
6 |
6 |
7 |
8 |
8 |
22 |
6 |
7 |
8 |
9 |
9 |
24 |
7 |
8 |
8 |
9 |
10 |
26 |
7 |
8 |
9 |
10 |
11 |
28 |
8 |
9 |
10 |
11 |
12 |
30 |
8 |
9 |
10 |
11 |
12 |
32 |
9 |
10 |
11 |
12 |
13 |
34 |
10 |
11 |
12 |
13 |
14 |
36 |
10 |
11 |
12 |
14 |
15 |
38 |
11 |
12 |
13 |
14 |
16 |
40 |
11 |
12 |
14 |
15 |
16 |
After you have determined the number of rolls you need from the charts above, you can deduct one half roll for each standard size door or window. However, many people find that the little they may save by doing so does not compensate for the peace of mind that comes from having extra paper in case they run short, make mistakes, or need to make a repair. Do not deduct for windows and doors if measuring for borders or ceilings.
Square Footage Method
- Multiply the length of each wall by its width to get the square footage
- Add the square footage of all walls together
- Find the pattern repeat for the wallpaper you have chosen from the website, the sample book, or the product label
- Divide the total square footage of your project by the usable yield figure shown in the table below:
And the roll width is 20.5″… |
And the roll width is 27″… | |
|---|---|---|
If the pattern repeat is… |
Divide square footage by… |
Divide square footage by… |
0-6″ |
25 |
32 |
7-12″ |
22 |
30 |
13-18″ |
20 |
27 |
19-23″ |
18 |
25 |
24-28″ |
16 |
23 |
29-33″ |
14 |
21 |
34-38″ |
12 |
19 |
- This is the number of single rolls you need. Divide by 2 and round to the nearest even number to get the number of double-roll bolts needed. Divide by 3 if the product is packaged in triple-roll bolts. While product is priced by the single roll, it is packaged and ordered in full bolts.
Engineering the Room
Engineering the room involves planning where each strip will be hung before you start the job.
- Choose the inconspicuous spot where you intend to hang your first strip, and make a mark with your pencil. (See How to Hang Wallpaper)
- Measure the width of your wallcovering and add 1/8″ to accommodate the natural expansion of the paper. Make pencil marks that distance around the room in the direction you will be hanging. At inside corners, subtract ¼” and at outside corners, subtract ½”.
- Check to make sure you will not be left with any very narrow (2-3″) strips to hang in corners or next to windows or doors. If there are, move your starting point to eliminate them as much as possible.
- Using the pattern repeat for the paper you have chosen, determine the length of each strip you will hang, including the necessary scrap to match the pattern.
- Determine the total amount of paper needed by adding the amounts needed for each strip. Divide your total measurement by the amount of paper in each bolt to determine the number of bolts to order. (Remember bolts come in single – or double-roll bolts.) Add one bolt for coverage
Measuring A Cathedral Ceiling
- Calculate each wall separately as some may be standard height and some may have a cathedral ceiling. Add up the square footage of each wall.
- To calculate the square footage of a cathedral ceiling wall, measure the height of the wall at the highest point and at the shortest point. Add these measurements together and divide by two. This gives you the average wall height. Multiply by the wall’s width to get the square footage of the wall.
 |
| Cathedral Ceiling Wall |
Measuring a Stairway Wall
- Divide the area into triangles (“A” and “C” in the diagram) and, if necessary, a rectangle (“B” in the diagram). Calculate the rectangle by multiplying the length times the height, and triangles as two-thirds the length times the height. Add the totals of these individual areas to determine the total wall surface to be covered.
- Divide the square footage by 44 and round up to determine the number of single rolls needed.
 |
| Measuring a Stairway Wall |
How to Hang Wallpaper
- Make sure the dye lots on each roll match, and that the paper is free of any imperfections.
- Make sure you have prepared the walls properly (see Preparation)
- Plan to install your first strip in an inconspicuous corner, such as behind the entry door to the room. The pattern will rarely match perfectly when the last piece meets the first, and starting in an inconspicuous spot will help conceal this mismatch. Generally, plan to work left to right around the room.
- Tip: If you have a pattern with a large repeat, engineer the room so that the pattern falls in the center of the focal point wall, usually the wall opposite the door.
- Tip: Professionals will “engineer” the room by first measuring and marking where each seam will land. If they find that any very narrow strips will result in corners or around windows and doors, they will move their starting point to adjust.
- Measure the width of your wallpaper with a yardstick or steel tape (do not use cloth)
- Deduct one-half inch from the width of your wallpaper and place a mark on the wall that distance from the corner of the wall, near the ceiling. For example, if the wallpaper is 20 ½ ” wide, make a mark approximately 20″ from the corner. Your wallcovering will overlap slightly around the corner. You’ll cover that overlap later with your final strip.
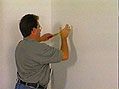
- Make a plumb line on the wall using your carpenter’s level to mark several additional points on the wall. Then use a pencil to lightly draw a straight line down the wall. This will ensure that your wallpaper will hang true, vertically. Alternatively, a chalk line may be used.
- Tip : When using chalk to make a plumb line on the wall, consider using yellow chalk instead of blue. It will be less likely to stain the edge of the wallpaper.
- For your first strip, measure the height of the wall. Measure the wall surface only; not crown moldings or baseboards. Then cut a strip of wallpaper 4″ longer than that height. This will allow 2″ overlaps at the top and the bottom of the strip. When measuring your first strip, identify the portion of the pattern that you want to run along the top of the wall and avoid cutting through a major design element. Cut the paper 2-3″ above that spot to allow for overlap.
- Tip : Matching strips is easier if you cut two at the same time. Cut the second strip before you hang the first, and you won’t have to find the match by carrying the roll to the wall.
- Tip : If your paper has a drop match, where the pattern series repeats every other strip, you can cut the alternating strips from alternating rolls to conserve paper.
- If you are using pre-pasted wallpaper, loosely re-roll the first strip backwards, with the paste side out.
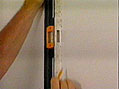
- Place the rolled strip in lukewarm water in the water tray for no longer than the time indicated in the instructions, usually about 15 seconds. Place a dull, weighted object, such as a kitchen knife, inside the roll to keep it immersed. Change the water frequently to avoid paste build-up on the surface of the paper.
- Tip : You can use a painting pad or roller to wet the back of pre-pasted wallpaper instead of using a water tray. This will ensure more even wetting and the face of the paper will stay dry.
- Pull the strip from the water tray by the edges onto a flat surface and loosely fold half the strip back on itself, paste to paste. Then fold the other half in on itself. This is called booking the sheet. Do not crease the edges. Roll the folded, booked strip loosely to keep edges together so they will not dry out. Be patient and follow the directions exactly, as specifications can vary considerably. Permit the booked sheet to relax for five minutes or more to allow the paste to fully activate and let the paper expand and contract before you take it to the wall.
- Tip : Many professionals reduce trips to the wall by marking, pasting and booking several strips at the same time and keeping them damp in a plastic garbage bag.
- When it’s ready, carry the booked strip to the wall, step up to the ceiling, and unfold the top portion of the strip. Allow the two inches you’ve allowed for trimming to overlap the ceiling, and align your pattern against the ceiling
- Carefully align the strip to your plumb line. This ensures that your first strip hangs straight, and the following pieces will line up evenly.
- Wrap the extra half-inch onto the adjoining wall.
- Using a sponge, smoothing tool or brush, gently slide the wallpaper into position. Avoid pulling or pushing wallcovering, because this can stretch the paper. Also avoid squeezing paste out of the seams. Don’t overwork the sheet.
- Tip : Many paperhangers prefer to use a wallpapering brush. Plastic smoothers can force too much paste out of the seams. Gentle smoothing is all that is required.
- Fold out the bottom half of the strip and slide the middle of the strip into position. Check that it’s still aligned with your plumb line, then smooth in a downward and out motion with your brush or smoothing tool.
- Make a cut from the top of the strip into the corner next to the ceiling so the paper will lay down on both walls. Then adhere the paper with a couple of strokes of your brush or smoothing tool.
- Make sure there are no air bubbles; you can lift the paper again and reposition it if necessary. At this point, the wallpaper is actually quite slick, and can be maneuvered easily.
- Now trim along the ceiling with your razor knife. Use your straight edge as a guide. Lift and move your straight edge as you go, without lifting your knife from the paper to ensure an even cut. Then do the same at the baseboard, first making a relief cut in the corner to avoid tearing.
- Tip : When cutting along ceilings and baseboards, keep your straightedge between the wall and your knife. This will prevent cutting the strip short.
- Tip : Use a wallpaper knife with break-away or “snap” blades and change the blade after every strip to avoid tearing and fraying.
- Tip : Instead of trimming the ceiling and baseboard after hanging each strip, save time by trimming after you’ve hung two to three strips.
- Finally, rinse the wallcovering with your wet sponge to remove any excess adhesive. Wipe along the moldings and baseboard, too. Remember to change your rinse water frequently.
- Now it’s time to hang the second strip. Take into account the pattern match and repeat, to make sure you cut the second strip long enough. For example, if the pattern has a drop match, the placement on the wall is not identical from piece to piece. If your paper has a drop match, where the pattern series repeats every other strip, you can cut the alternating strips from alternating rolls to conserve paper. Therefore, it’s important to cut the strip longer than necessary, to match your pattern as needed.
- Tip : Reverse the direction of every other strip when hanging a pattern with a random repeat (such as a faux) to disguise any side-to-side shading in the sheet.
- Tip : Even so-called random match patterns have a repeat if you look carefully. This is because most wallpaper is printed with cylinders and the repeat occurs with each revolution of the cylinder.
- When the strip has soaked for the correct amount of time, book it as before and carefully align it with the edge of the first strip so the patterns match. Do not overlap the strips, but make certain the edges butt against each other as closely as possible.
- Tip : When matching subsequent strips of wallpaper, match first at eye level. Any mismatches in a long strip will be minimized and occur at the top and bottom of the sheet.
- Press the strip firmly to the wall, smooth it and cut it as before, and rinse with warm water.
- Roll the seams gently with your seam roller. Rolling too hard can cause the seams to open by squeezing out the adhesive along the edges. It’s also a good idea to wait until you’ve installed several pieces before you roll the seams. This will permit the adhesive to tack-up slightly. Always keep the roller clean.
- When you come to a window, simply drape the paper over the window, butting the seam with the previous strip. Then, to relieve stress on the paper and prevent tearing, make a relief cut at a 45-degree angle inward from the corner of the window frame toward the center of the window at the point where the paper will actually meet the corner of the window frame.
- Find the edges of the window and cut away most of the extra wallpaper, and trim around the window.
- Tip : When you install around a large window, don’t trim the short strips under the window until you’ve finished the long strips on either side. That way, if there is a slight mismatch from one end of the window to the other, you can minimize it by adjusting the small strips slightly.
- It works the same way for doorframes and electrical outlets. But be careful! Turn off the electricity before papering near an outlet box. Hang wallpaper and simply smooth strip gently over the outlet or switch area. With a sharp knife, pierce the paper at the center of the fitting and make diagonal cuts toward each corner. Press the paper against the wall around the edge. Trim away surplus. You can cover the outlets and switch plates with leftover wallcoverings.
- At an inside corner, don’t wrap the strip around the corner. Since very few walls are perfectly straight, you will get a wrinkle in the corner, and your next wall will start out vertical. Instead, measure the distance from the edge of your last strip to the corner and add about one-half inch. Measure at the top, center, and bottom of the strip and choose the longest measurement.
- Mark the new strip of wallpaper with the measurement you just made and cut the new strip lengthwise along your measurement. This will be the piece you hang next, into the corner, and you will have enough paper to wrap around the corner by about one-half inch at all points. Save the remaining piece.
- Hang the first cut strip into the corner by carefully aligning the pattern against the last full strip, and allowing it to overlap the corner.
- For the adjacent wall, measure the piece of wallpaper remaining from your lengthwise cut and drop a plumb line on the next wall that distance from the corner. A new plumb line should be drawn on each new wall.
- If you’re using vinyl wallpaper, apply a vinyl-to-vinyl adhesive to the overlap in the corner to secure the next strip. Using the plumb line as a guide, hang the remaining piece of wallpaper. It should overlap the preceding piece that wraps around the corner, with the pattern matching where you cut it. But make sure to follow the plumb line, not the corner, to ensure a vertical hang on the next wall.
- At outside corners it’s usually best to simply wrap the strip around the corner and continue hanging the entire strip. Before you turn the corner, make a relief cut at the top and the bottom of the paper into the corner. If you feel the wall is too uneven to continue in this fashion, use the same technique as for inside corners, but leave a full inch of overlap around the corner so the paper will adhere properly.
- If you’re ending your project at a corner of a wall, cut your strip of wallpaper 1/8 of an inch shorter than the length of the wall. Do this by holding your blade at a 45-degree angle, so the wallpaper stops short of the corner. This will eliminate peeling and fraying.
 |  |  |  |
 |  |  |  |
 |  |  |  |
 |  |  |  |
 |  |  |  |
 |  |  |  |
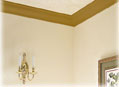
How to Hang Borders
- If hanging over paint, prime the area the border is to be hung with an acrylic-based primer/sealer specially formulated for wallcoverings. If hanging over wallcovering, use a good vinyl-to-vinyl adhesive. Self-adhesive borders should not be hung over wallcovering.
- Start in an inconspicuous corner. Allow an extra 1/4″ for overlap)
- For pre-pasted borders, activate the paste by soaking the border in your water tray according to the instructions included with the border.
- After pulling your border from the water tray, it should be booked paste-to-paste in an accordion style.
- Now, unfold your accordion along the wall.
- Smooth the border, and you’re done!
- If you plan to hang your border to separate two adjoining wallpaper patterns, the two wallpapers must be double cut when hung. This is done by overlapping the top of the bottom wallpaper panel over the bottom of the upper wallpaper panel.
- Next, use a level to draw the line where the overlapping wallpaper will be cut.
- Carefully peel back the top portion of the lower wallpaper and remove the excess strips attached to it.
- Now smooth the upper and lower wallpapers until both edges are flush. Any overlapping will cause a ridge to show when the border is hung over the adjoining patterns.
- Because your border will be hung on wallpaper, you’ll need to apply a vinyl-to-vinyl adhesive to ensure proper adhesion.
- Then, book the border in an accordion fold fashion.
- During installation, simply unfold the accordion as you move along the wall, using the ceiling as a guideline. Hang one full wall at a time if you have enough yardage on your roll.
 |  |  |  |
 |  |  |  |
How to Hang Ceiling Paper
If you are going to hang ceiling paper, do the ceilings first, then the walls. Work across the width of the ceiling rather than the length, since shorter strips are easier to handle. Measure ½” less than the width of the wallcovering from the corner of the room and insert a thumbtack. Do the same along the other wall. Use these tacks to hold your plumb line and snap a chalk line. Cut strips 4″ longer than the length of the ceiling, paste, fold and book the paper. Use a broom or mop to hold the wallcovering in place along the plumb line while a partner smoothes it into place. Work with only half the sheet un-booked at a time.
 |
| How to Hang Ceiling Paper |
How to Hang and Use Paintable Wallcovering and Borders
- For larger cracks, concrete blocks or textured surfaces, apply a lining paper first.
- Follow the instructions for hanging pre-pasted wallpaper on walls or ceilings. Also read the specific instructions included with the product regarding soaking and booking.
- Wait 72 hours to allow the product to totally cure on the wall before applying paint.
- To paint, apply two coats of any color premium quality, latex wall paint using a medium to heavy nap roller
- You can also achieve unique effects with paintable wallcovering:
Dragging
Paint a base color and allow to dry. Tape stripes on the wall at desired thickness using drafting or very low tack tape. Apply contrasting color stripes with a hard rubber roller.
Ragging
Use a brush to apply a base color to the surface. While the paint is still wet, brush on a slightly lighter and slightly darker paint to achieve the desired ragged look.
Sponging
Apply slightly thinned latex paint to the surface using a brush. While the base coat is still wet, rub paint off raised areas using a clean cloth. After the base is dry, dab on a second paint color in a random pattern. You may apply as many colors as you wish without waiting for them to dry.
Stencil
Paint the base color and allow to dry. With a hard rubber roller, apply metallic paint to raised areas.
Antiquing
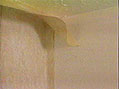
Apply a light colored base paint to the surface. Using water, slightly dilute darker colored paint. Apply using a spray bottle or splatter with a paintbrush. Lightly blot drops of paint that begin to run using a clean cloth. Veins can be created by applying a darker shade of paint using an artist’s brush, then lightly brushing the lines at an angle.
Colorwashing
Apply a thinned base coat and dab off raised areas with a cloth. Let dry, then dab contrasting color on with a sea sponge or dry brush. You may add as many contrasting colors as you wish.
 |  |  |
 |  |  |
How to Hang Lining Paper
- Lining paper is a non-printed base paper that can be installed over cinderblock, concrete, old wallcovering or glass. It is often used to hide small cracks or smooth textured walls prior to hanging.
- Hang liner paper horizontally, if possible, using a heavy-duty clear vinyl adhesive. This ensures that the seams of the wallpaper will not fall directly over the seams of the lining paper. Professionals call this “railroading” the liner.
- Allow the lining paper to dry for 36 hours.
- Prime as you would a painted wall with a wallpaper primer.
  |
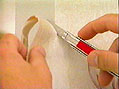
How to Remove Wallpaper
- Try peeling back the existing paper at a corner or at a seam. Many times the paper will “dry-strip” off the wall. Other times, the surface layer may peel off, exposing the bottom, paper layer. Pull slowly to improve your chances of removing large pieces.
- Purchase a high-quality wallpaper removal solution or gel.
- Wet the surface of the paper according to the instructions, using a pump sprayer, sponge, or paint roller. BE PATIENT! Give the solution plenty of time to do its work.
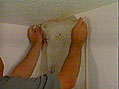
- Scrape the wallpaper off the wall, beginning at the seams, using a putty knife or 6″ broad knife.
- If you were unable to remove the outer layer, you may have to soak and peel the outer layer first, then soak and remove the bottom layer.
- When all paper has been removed, rewet the wall using the removal solution. Use a scrub pad to make sure all paste is washed off the walls, leaving the surface clean and smooth. Change your rinse water frequently.
- Let the wall dry completely before priming and hanging new wallpaper.
 |  |
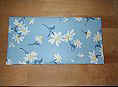
How to Cover Electrical Outlets
- Make sure power is off to the outlet or switch.
- Remove the outlet cover or switch plate from the wall.
- Hold a piece of wallpaper from your scrap pieces or leftover material against the wall, matching the pattern surrounding the outlet or switch. Mark the paper several inches larger than the opening, evenly on all sides.
- Cut the paper at the marks.
- Brush vinyl-to-vinyl adhesive onto the front of the switch plate or outlet cover.
- Center the switch plate, face down, on the back of the paper.
- Double check the match and press the paper to the surface of the switch plate or outlet cover.
- Wrap the excess paper around the back of the cover and secure it to the back as you might wrap a package.
 |
| How to Cover Electrical Outlets |
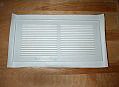
How to Cover Vents
Caution: Do not cover any electrical devices such as electric heaters.
- Hold a piece of unpasted wallpaper over the vent on the wall, matching the pattern surrounding the vent. Mark the paper several inches larger than the vent, evenly on all sides.
- Remove vent from the wall.
- Cut the paper at the marks.
- Brush vinyl-to-vinyl adhesive onto the front of the vent and into the openings.
- Center the vent, face down, on the back of the paper.
- Double check the match, and press the paper to the surface of the vent.
- Wrap the excess paper around the back of the cover and secure it to the back as you might wrap a package.
- Changing your blade frequently to keep it sharp, slit each vent along the edge and down the side of each opening.
- Press each slit piece to adhere it to the vent openings.
- Reinstall the vent cover on the wall.
 |  |  |
 |  |
How to Hang Soffits
- If you’re just papering the front of a soffit, simply hang the wallpaper over the opening and trim the excess. Hold your knife at a 45-degree angle pointing toward the ceiling to prevent fraying of the edge.
- If you’re papering both the front and the bottom of a soffit, wrap the paper around the front edge and install it on the bottom of the soffit and overlap the wall by ½”.
- Next, paper the wall below the soffit, attaching the paper to the overlap with vinyl-to-vinyl adhesive.
How to Wallpaper Archways
Rectangular archways
- Plan the layout of the wall containing the archway so that the first strip will overlap the arch to cover it.
- Make a horizontal cut precisely at the top edge of the arch over to the wall. Install the wallcovering that remains below the vertical cut around the left-hand vertical side of the arch.
- Cut the header strips over the archway long enough to cover the underside of the archway.
- Hang the strip on the right side of the archway in the same manner as the strip was hung on the left side of the archway.
- Now, fill the areas on the underside of the arch at the extreme left and right. Cut matching pieces. Tuck the “top ends” under the wallcovering on the face of the arch, where the horizontal cuts were made, and smooth the piece onto the underside of the arch, filling the space.
- If you are wallpapering the wall on the other side of the arch, wrap all pieces around to that wall slightly and trim to a ½” overlap.
Curved Archways
- This is similar to rectangular archway hanging, except that when hanging paper on a curved archway, a separate piece must be used to cover the inside of the arch.
- Plan ahead so that you end up with about 2″ at the edge of the doorway to wrap to the inside. It’s fine if there is more, but you don’t want to be caught with less.
- Hang the strips around and above the arch in the usual manner, letting the excess hang freely in the doorway.
- Cut any excess away, leaving 2″ to wrap to the inside
- In the curved area, make small wedge-shaped clips, snipping close to the edge. Wrap the wallcovering to the inside of the arch and smooth. If you do not want to cover the inside of the arch, use a very sharp blade to trim away ¼” from the arch edge on the wall
- To cover the archway, cut two pieces ½” less than the width of the arch and long enough to cover from the middle of the arch down the sides.
- Figure the pattern match from the bottom up. Then hang the strips from the center down the sides, with the edge of the wallcovering in ¼” from the edge of the archway. Use vinyl-to-vinyl adhesive on the overlap.
 |  |  |
 |  |
Hanging Around Plumbing
- Install the strip up to the pipe.
- Cut the paper horizontally at the same level as the pipe, from the loose edge to the pipe.
- Cut around the pipe.
- Lay the cut pieces back together, butting the seam together at the horizontal cut you made.
Hanging Around Radiators and Commodes
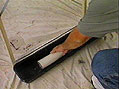
- Hang the paper to the top of the obstruction. Then, using a yardstick, long-handled windshield scraper or similar long tool, gently work the paper behind the object against the wall.
- If you can reach the bottom of the paper along the baseboard to cut it, do so after you have adhered the paper to the wall and made sure the seams are correctly aligned.
- If you can not reach the baseboard with your blade, use the yardstick to rub the paper along the baseboard, making a crease in the paper. Then, gently lift the paper from the wall, bring it back out from behind the obstruction, and cut it along the crease you make with the yardstick. Finally, reapply the trimmed paper behind the object.
How to Hang Murals
- Mark a plumb, vertical line at the midpoint of the wall.
- Count the number of panels in the mural. If there are an even number, you will place an equal number of panels to the left and right of the midpoint line. If there are an odd number, center your first panel directly over this line.
- Now, hang the mural as you would wallpaper, following the instructions that came with the mural.
Wallpaper Care
Wallpaper care instructions depend upon the type of wallcovering. Always follow the directions included with your wallpaper.
- “Washable” wallpaper can be washed infrequently with warm water, soap, and a soft sponge.
- “Scrubbable” wallpaper can be washed frequently with warm water, soap, and a soft sponge.
- “Paintable” wallcovering, if painted, should be cleaned according to the paint manufacturer’s instructions.
- Do not use abrasive cleansers or scrubbers, products containing bleach, or solvents of any kind.
- For best results, wash from the bottom of the strip up to avoid letting dirty water running down the face of the wallpaper.
- Rinse thoroughly with clean warm water.
- Dry with a soft lint-free cloth.
- If mildew is present, existing wallpaper will have to be removed. Wash the bare walls with a detergent containing mildewcide or a mixture of ½ cup household bleach to one gallon of water. Wear goggles and protective gloves. CAUTION: Do not mix bleach or any other cleaning product with other cleaners or chemicals. Scrub with a medium brush until the mildew discoloration is gone. Thoroughly rinse the walls with a clean water after washing to be sure the chemicals have been removed. Before reapplying wallpaper, apply a stain-killing primer followed by a acrylic-based primer/sealer specially formulated for wallcoverings.
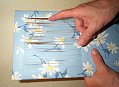
Instant Stencils
INSTANT STENCILS™ can be applied to the following surfaces: wall tile, stained wood, painted wood, glass, mirrors, painted walls, painted plaster and gypsum walls, ceramic, plastic, metal, cardboard, paper and strippable wallpaper.
This product is NOT recommended for fabric or materials that wrinkle in use or cleaning, surfaces exposed to prolong intense heat, surfaces exposed to moisture (i.e. sinks or showers), surfaces exposed to excessive abrasion (i.e. floors), natural varnish finishes or shellac, vinyl wallpaper, or sharp or heavily textured surfaces. If there is a question regarding the application, test the stencil on a small, hidden area before beginning. DO NOT apply INSTANT STENCILS™ to surfaces intended to come in contact with food or surfaces that young children can place in their mouths (i.e. crib rails or plastic toys).
APPLICATION:
- Before starting, make sure the surface is smooth, clean, sound and completely dry.
- Plan the layout of the product with graph paper. Remember the Strips, Small Accessories and Large Accessories can be used alone or together to create a variety of looks.
- Remove the protective liner from the INSTANT STENCILS™ and place the product, tacky side down, on the desired surface. INSTANT STENCILS™ can be repositioned on painted walls prior to rubbing the design on the surface.
- Position and hold the stencil segment with one hand, rub briskly with the INSTANT STENCILS™ Applicator. Start in the upper left corner of the design, and rub with pressure in a back and forth motion. (Note: Seam roller tools can be used when pressure is applied.)
- The pressure will cause the transfer process to begin. A change in color to a milky white will indicate the release of the stencil onto the surface. (Hint: Work on small sections at a time, concentrating extra time on areas with thin lines or great detail.)
- Frequently check to insure the design is transferring by slowing lifting the carrier liner. If the design has not fully transferred, replace the liner and continue to rub until the color change occurs.
- When the entire carrier sheet is milky white in color, it will easily slip from the surface to reveal the full design. At this point the carrier sheet will be void of color or design.
- Allow the INSTANT STENCILS™ to bond to the surface for 48 hours before touching or cleaning.
- Repeat steps 1-8 for each new segment or accessory.
- If a surface coat or finish is desired, test a water-based product on a small area before beginning.
OTHER HINTS
- Individual designs can be cut in countless ways to create new, unique designs. When cutting apart the stencil designs, leave the protective carrier liner attached to the stencil until it is applied to a surface. The Small Accessories should be cutout prior to application.
- When applying the stencil to an inside or outside corner, cut the stencil exactly at the corner. Apply the first segment into the corner, match the design at the point of the cut, and apply the remaining piece. Simply wrapping the stencil at a corner will prevent the stencil from completely adhering to the wall.
CLEANING
INSTANT STENCILS™ can be gently cleaned with a soft damp sponge, mild soap, and warm water. Do not apply excessive pressure when cleaning. This product is not recommended for dishwasher cleaning.
REMOVAL & REFINISHING
- Painted Wall Surfaces: Apply an appropriate barrier coating over the INSTANT STENCILS™, allow sufficient drying time, apply paint or wallpaper as directed.
- Non-Porous Surfaces (Tile, Glass, Ceramic, Metal): Apply baby oil or acetone-based fingernail polish remover to soften the adhesive. Clean with a paper towel. Work small areas of the design at a time, dissolving and removing the stencil color and adhesive. When using any type of remover, work in a well-ventilated area and insure proper safety precautions.
- Wood Surfaces (Other Painted or Stained Surfaces): Lightly sand the stencil using paint stripper or acetone-based fingernail polish remover. The surface will have to be repainted or stained as the cleaner or sanding will affect the surface.
- Some Plastic Surfaces: Place duct tape over the stencil, apply pressure with the applicator and pull the tape quickly from the surface. In some cases INSTANT STENCILS™ cannot be removed from plastic without damaging the surface, a ghost image of the design may remain on the plastic.
 |  |  |  |
 |  |  |  |
 |  |  |
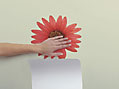
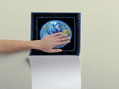
Walls My Way
- Carefully peel the top quarter of the liner sheet away from the artwork.
- Position the exposed portion of the wall art in the desired location on a clean, smooth, and dry wall surface.
- Gently pull the liner in downward motion until it releases. Use your hand to smooth out any bubbles in the artwork. (The Imperial Applicator Tool can also be used to smooth the art to the wall.)
Cleaning: To clean Walls My Way, gently wipe with a damp sponge.
Note: Walls My Way is not intended to be a toy. For decorative purposes only. Recommended for children 3 years of age or older. Walls My Way can be applied to almost any smooth, clean and dry surface.
 |  |  |
 |  |  |
Instant Etchings
Just rub-on. No chemicals and no mess. Add style and interest to mirrors and windows in an instant! Before you start: remove liner, hold sheet tacky side up and cut carefully around the designs
- Step 1: Following your design plan, position Instant Etchings tacky side down.
- Step 2: Rub on with the Instant Stencils Applicator Tool until product transfers to surface.
- Step 3: Peel away transfer liner and discard.
Instant Etchings can be gently cleaned with a soft, damp sponge, mild soap and warm water or with glass cleaner.
Imperial Visions
- Step 1: Prepare your wall with a recommended wallpaper primer1. Then use a standard paint roller to apply a recommended paste2 directly to a wall. The paste will assist in ensuring even coverage. Work on two (2) strips of wallpaper at a time to ensure the paste does not dry.
- Step 2: Position and smooth the easy-to-match seams in a top to bottom direction with a wallpaper brush or a wet sponge. An amazing benefit to Imperial Visions wallpaper is that it can be hung dry. Whether you are a first-time user or an experienced wallpaper hanger, you will be amazed at how easy Imperial Visions is to hang. It is dimensionally stable and will not expand, shrink or separate at the seams.
- Step 3: After hanging Imperial Visions, use a sharpened utility knife to trim. It’s as simple as that!
- Step 4: When the time comes to give your room a new look, you will be ready to decorate in a snap! Imperial Visions comes down effortlesly and is 100% dry strippable if using the recommended paste and primer as described. Start by lifting the wallpaper strip at the bottom corners and pull the paper off in an upward motion. Try to lift the sides of the paper in an even and slow motion. No need for chemicals or steaming.