Dream Lands Design
  • Home Improvement
    • DIY
    • Remodeling
    • Woodworking
    • Accessories
    • Home Design
      • Furniture
      • Organize
      • Tips
      • Decor
        • Interior
        • Exterior
  • Design Ideas
    • Bathroom
    • Bedroom
    • Dining Room
    • Living Room
    • Kitchen
  • Gardening
    • Backyard
    • Front Yard
    • Landscaping

Categories

  • Accessories
  • Backyard
  • Bathroom
  • Beauty
  • Bedroom
  • Cars
  • Decor
  • Design Ideas
  • Dining Room
  • DIY
  • Entertaining
  • Exterior
  • Finance
  • Front Yard
  • Furniture
  • Gardening
  • Green Living
  • Home Design
  • Home Improvement
  • Interior
  • Kitchen
  • Landscaping
  • Lifestyle
  • Living
  • Living Room
  • Organize
  • Photography
  • Real Estate
  • Remodeling
  • Tips
  • Uncategorized
  • Wall Improvement
  • Woodworking

Archives

  • January 2023
  • December 2022
  • November 2022
  • October 2022
  • September 2022
  • August 2022
  • July 2022
  • June 2022
  • May 2022
  • April 2022
  • March 2022
  • February 2022
  • January 2022
  • December 2021
  • November 2021
  • October 2021
  • September 2021
  • August 2021
  • July 2021
  • June 2021
  • May 2021
  • April 2021
  • March 2021
  • February 2021
  • January 2021
  • December 2020
  • November 2020
  • October 2020
  • September 2020
  • August 2020
  • July 2020
  • June 2020
  • May 2020
  • April 2020
  • March 2020
  • February 2020
  • January 2020
  • December 2019
  • November 2019
  • October 2019
  • September 2019
  • August 2019
  • July 2019
  • June 2019
  • May 2019
  • April 2019
  • March 2019
  • February 2019
  • January 2019
  • December 2018
  • November 2018
  • October 2018
  • September 2018
  • August 2018
  • July 2018
  • June 2018
  • May 2018
  • April 2018
  • March 2018
  • February 2018
  • January 2018
  • December 2017
  • November 2017
  • Privacy Policy
  • Terms of Use
  • Disclosure
  • Sitemap
  • Contact Us
29K
98K
0
Dream Lands Design
  • Home Improvement
    • DIY
    • Remodeling
    • Woodworking
    • Accessories
    • Home Design
      • Furniture
      • Organize
      • Tips
      • Decor
        • Interior
        • Exterior
  • Design Ideas
    • Bathroom
    • Bedroom
    • Dining Room
    • Living Room
    • Kitchen
  • Gardening
    • Backyard
    • Front Yard
    • Landscaping
You're here: Home Home Improvement Cracked Concrete: Fix for Cracked Concrete That Almost Looks Perfect

Cracked Concrete: Fix for Cracked Concrete That Almost Looks Perfect

  • Perla Irish
  • September 26, 2020
Total
1
Shares
0
0
1
0
0
Table of Contents Hide
  1. Clean the Damaged Area
  2. Mix the Patch Material
  3. Fixing Popouts
  4. Thin-blended Layers
  5. Shrinkage and Static Cracks
  6. Important Factors to Put in Mind
    1. The Extent of the Damage
    2. Cost of Repair vs Overhaul
    3. Technical Skills
  7. Conclusion

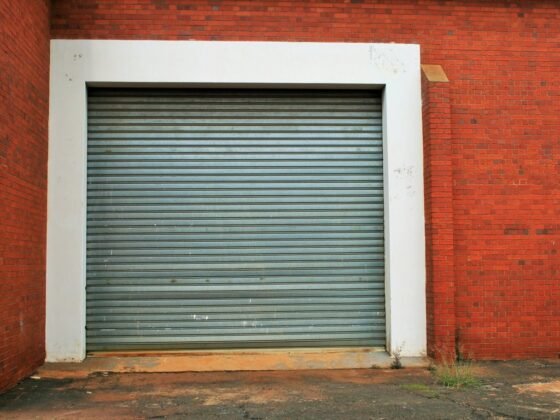
Cracked concrete gives a bad impression, can cause injuries, and generally could lead to greater damages in your construction. It’s advisable to fix them as soon as they happen.

Whereas there are simple DIY techniques to repair cracked concrete, you can also seek the services of an expert to help you get over them. The most important aspect, however, is that proper procedures should be followed. At the same time, the use of proper materials is essential in ensuring that you get the desired results.

image - Cracked Concrete: Fix for Cracked Concrete That Almost Looks Perfect
Cracked Concrete: Fix for Cracked Concrete That Almost Looks Perfect

In this article, we highlight some important tips to restore your cracked concrete to a look that is just as perfect as the original look.

Clean the Damaged Area

It’s critical to have the space you are working on properly cleaned. This will help you establish the extent of the damage and also ensure that you don’t work on bumpy surfaces.

You can use a steel scrub brush to clear loose particles and ensure that your surface is relatively leveled. You may also use water to clean small cracks. Ensure that it dries thoroughly before starting to work on it.

Do not leave any loose blocks or try to fix the cracks while loose particles are still hanging. If you do this, you will be working on a weakened slab that may cause further breakages in the future.

Mix the Patch Material

Various types of patches required different types of materials to fix them. You will thus need to establish the appropriate materials to fix cracks on your concrete.

Common damages to concrete include: popouts, thin-bonded overlays, cracking blemishes as well as static cracks. The approach to fixing these kinds of concrete damages will differ significantly while they are also similar in a number of ways.

Fixing Popouts

Popouts occur when just a small piece of the concrete breaks from the rest of the slab’s surface. They cause an ugly disfiguring of the slab. If left unattended, they may spread and to a larger surface.

Popouts are similar to potholes on the road and spread in a similar matter. Repairing them depends on the initial material used. However, there are several prepackaged repair solutions that can be used to fix these holes.

You can also use the traditional brick and mortar approach. Importantly, you need to cure them appropriately over a period of time before that surface is used again.

Thin-blended Layers

 If a popout extends over a larger surface and becomes difficult to handle individually, a thin-blended layer can be laid over to avoid delamination. Give the area a thorough clean up, preferably with pressure washing as this will remove all the debris, chemical residue, and any loose concrete.

A good way of fixing such delamination could be using the same kind of material previously used as this will harmonize the entire surface.

Shrinkage and Static Cracks

Over a period of time, as the surface slowly dries up, shrinkage cracks and static cracks may begin to appear. These can be treated in a number of ways depending on the size of the crack.

A common approach used by contractors is aligning the entire cracked area by saw cutting. This ensures that the length of the crack is nearly straight and can be filled up evenly.

These cracks are usually shallow and can be filled with properly-prepared repair materials. However, deeper cavities can be filled up using sand and gravel to the bottom.

Some repair products come bottles that have an applicator tip to make application easy. However, you can also use a caulking gun to repair shallow cracks on your surface. Others that are too thin may also be repaired

Important Factors to Put in Mind


Read Also:

  • Applying Concrete Sealer to Shield as well as Preserve your Home Garage
  • Revitalize the Look of Your Home with Beautiful New Concrete
  • How Would You Repair Concrete Driveway on a Budget?
  • How to Stain Concrete Floors? Step by Step Guideline
  • Top 6 Reasons to Choose Concrete Pavers for Home

The Extent of the Damage

You must assess the extent of the damage before embarking on the repair. This will help you to gather the right tools and materials to get the job done

Cost of Repair vs Overhaul

Some cracks may be too large that only a total overhaul could restore it to near perfect. It would also be counterproductive to make repairs on cracks where more damage may eventually occur. If the crack is extensive, consider a total overhaul

Technical Skills

Do you have the technical knowhow to fix the crack or you need to hire labor? Although there is currently a lot of available material that guides you into DIY, you may still consider having some technical experts for your concrete sealing Gold Coast needs to help you out to give the repair process the best approach.

Conclusion

When all the repair work is finally done, proper curing will be necessary. Curing ensures that the surface is stronger and doesn’t encounter more damages faster.

Curing also enhances hardening which is necessary to avoid shrinking and cracking. Finally, ensure that you take generally good care of your surfaces for them to last longer without repairs.

Total
1
Shares
Share 0
Tweet 0
Pin it 1
Share 0
Share 0
Related Topics
  • concrete
  • repair

Subscribe

Subscribe now to our newsletter

You May Also Like
featured image - How To Know When It's Time to Replace Your Home's Windows
View Post

How To Know When It’s Time to Replace Your Home’s Windows

  • January 26, 2023
featured image - Trenton, NJ Roof Repair by Certified Roofers
View Post

Trenton, NJ Roof Repair by Certified Roofers

  • January 26, 2023
Featured image - 6 Living Room Design Errors and How to Avoid Them
View Post

6 Living Room Design Errors and How to Avoid Them

  • January 26, 2023
Featured Image - Four Interior Design Styles to Consider Before Buying Your Next Holiday Home
View Post

Four Interior Design Styles to Consider Before Buying Your Next Holiday Home

  • January 26, 2023
featured image - 10 Tips for Decluttering Your Home and Maximizing Space
View Post

10 Tips for Decluttering Your Home and Maximizing Space

  • January 26, 2023
Featured image - How to Create Memory Galleries
View Post

How to Create Memory Galleries

  • January 25, 2023
featured image - Leaky Roof? Everything You Should Know About Roof Repairs
View Post

Leaky Roof? Everything You Should Know About Roof Repairs

  • January 25, 2023
featured image - Yes, You Need to Seal Your Pavers. Here's Why!
View Post

Yes, You Need to Seal Your Pavers. Here’s Why!

  • January 24, 2023
Dream Lands Design
  • Privacy Policy
  • Terms of Use
  • Disclosure
  • Sitemap
  • Contact Us

Input your search keywords and press Enter.

Add Dream Lands Design to your Homescreen!

Add