• Home Improvement
    • DIY
    • Remodeling
    • Woodworking
    • Accessories
    • Home Design
      • Furniture
      • Organize
      • Tips
      • Decor
        • Interior
        • Exterior
    • Design Ideas
      • Bathroom
      • Bedroom
      • Dining Room
      • Living Room
      • Kitchen
  • Gardening
    • Backyard
    • Front Yard
    • Landscaping
  • Building Staircase
  • Categories
    • Home Improvement
    • Decor
    • Gardening
    • Woodworking
    • Lifestyle
    • Green Living
    • Real Estate
Dream Lands Design
  • Home Improvement
    • DIY
    • Remodeling
    • Woodworking
    • Accessories
    • Home Design
      • Furniture
      • Organize
      • Tips
      • Decor
        • Interior
        • Exterior
    • Design Ideas
      • Bathroom
      • Bedroom
      • Dining Room
      • Living Room
      • Kitchen
  • Gardening
    • Backyard
    • Front Yard
    • Landscaping
  • Building Staircase
  • Categories
    • Home Improvement
    • Decor
    • Gardening
    • Woodworking
    • Lifestyle
    • Green Living
    • Real Estate
Featured image - How to Use Glow in the Dark Paint in Your Backyard
You're here: Home Landscaping Glow Stones, Glow! How to Use Glow in the Dark Paint in Your Backyard

Glow Stones, Glow! How to Use Glow in the Dark Paint in Your Backyard

  • Perla Irish
  • November 6, 2019
Total
5
Shares
0
0
5
0
0
Table of Contents Show
  1. Making Your Own Glow Stones
    1. Select the Stones
    2. Thoroughly Clean the Stones
    3. Choose Your Paint
    4. Place the Stones
  2. More Ways to Add a Glow

Are you looking for a creative, energy-efficient way to decorate your backyard?

Ready, set, glow! We’ve got you covered with this simple guide on how to use glow in the dark paint to add a little light to your outdoor decor in one ingenious way. It’s a project that can be completed in no time, with few supplies.

Get ready to make your backyard shine with glow stones!
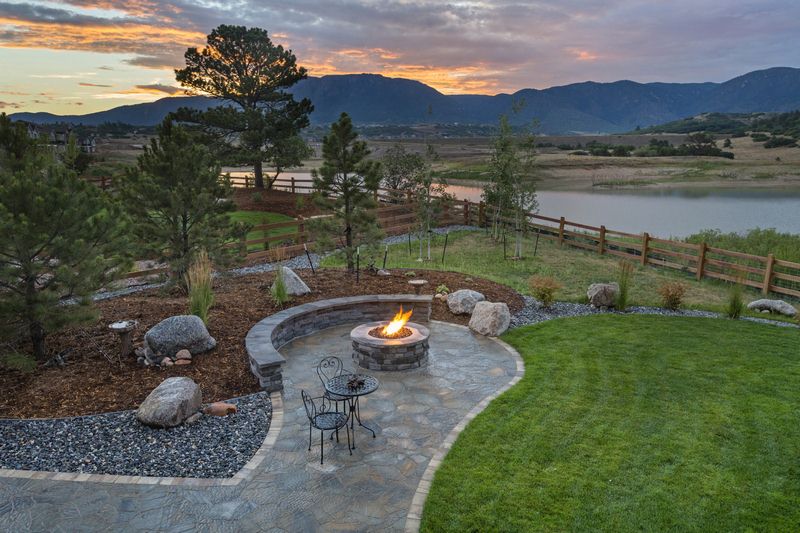
image - How to Use Glow in the Dark Paint in Your Backyard
How to Use Glow in the Dark Paint in Your Backyard

Making Your Own Glow Stones

Whether you’re looking for a way to cut your outdoor-decor budget, or simply like the idea of a solar-powered light source, glow in the dark paint could be a great solution for your yard.

Make your own glow stones to light the walkways in your backyard with these simple steps:


Read Also:

  • 7 Key Tips for Choosing the Best Exterior Paint Palette for Your House
  • 5 Awesome Ideas to Improve Your Backyard Garden
  • 7 Ways to Get Rid of Your Boring, Barren Backyard
  • 10 Cool Items You Need for the Best Backyard Ever
  • Homeowners’ Guide to Backyard Design
  • 6 Steps to a Better Backyard

  1. Select the Stones

Start by choosing the number of stones you want to illuminate with your glow in the dark paint. You can use stones straight from your garden, or purchase real “stepping stones” from your local garden or hardware store.

  1. Thoroughly Clean the Stones

Dirt and dust are no friends to paint, no matter the project. Grab some water, soap, and a scrub brush to give your stones a thorough cleaning.

Once you’ve scrubbed the stones clean with soap and water, pull out the rubbing alcohol or acetone.

This will make sure the paint goes on cleanly and doesn’t chip once applied. Be sure to let the stones dry completely before painting.

  1. Choose Your Paint

Once you’re ready to paint, you have two options for glow in the dark paint. You can find spray paint or regular liquid paint to cover your soon-to-be glowing stones.

If you opt for spray paint, make sure you hold the bottle the right distance away from the stone before applying. Holding it too close will cause bubbling and over-application.

The spray paint bottle will tell you the ideal distance.

As for regular paint, you’ll want to apply more than one coat to make sure the stones are bright enough come evening. Again, be sure to read the instructions on the paint can see how many coats are ideal for maximum brightness.

  1. Place the Stones

Once the paint has dried, (this will take longer than the drying time between coats), it’s time to place your stones wherever you’d like them. You can create your own pathway, line an existing pathway, line a garden or water feature. Get creative!

When choosing where to place the stones, don’t forget, they need sunlight during the day so they’ll glow at night. Avoiding putting them in spots that don’t get much sunlight or where other lights outshine them.

If you’re serious about making your pathway look great, Patio Pavers with professional experience can help you lay a perfect path.

More Ways to Add a Glow

If you’re serious about adding glow stones to your yard and landscaping, there is more than one way to do it. While painting existing stones is an easy and fast solution, you can also try making your own glow in the dark stones with a little cement and glow mix.

For more ideas on fun landscaping and home improvement projects, browse our latest articles.

Total
5
Shares
Share 0
Tweet 0
Pin it 5
Share 0
Share 0
Perla Irish

Perla Irish, who is more familiarly known as Irish, is the Content Manager at Dreamlandsdesign.com. She loves following trends around home and garden, interior design, and digital marketing. Through this blog, Irish wants to share information and help readers solve the problems they are experiencing.

Related Topics
  • backyard ideas
  • paint
Previous Article
Featured image - 5 Ways to Make Your Home Handicap Accessible

5 Ways to Make Your Home Handicap Accessible

  • Perla Irish
  • November 6, 2019
View Post
Next Article
Featured image - 6 Benefits of High-Pressure Power Washing your Home Annually

6 Benefits of High-Pressure Power Washing your Home Annually

  • Perla Irish
  • November 6, 2019
View Post

Subscribe

Subscribe now to our newsletter

You May Also Like
A roofer installing a new roof.
View Post

Is It Time to Replace Your Roof? Here’s How to Tell

  • May 16, 2025
Insulation installation process: Sealing air leaks around windows with caulk and weather stripping during a rainy winter night.
View Post

Boost Home Energy Efficiency with Quality Insulation

  • May 16, 2025
A rustic, farmhouse-style home transformed for a lively party, with a large wooden deck extending into a sprawling backyard during a warm autumn evening. String lights illuminate the outdoor space, highlighting a barbecue area and comfortable seating arrangements.
View Post

How to Transform Your Home into a Party-Friendly Place

  • May 16, 2025
A large metal dumpster sits in a driveway surrounded by blooming flowers in spring, filled with garden waste and old landscaping materials from a yard makeover. A white picket fence borders the property.
View Post

Why DIYers Trust Residential Dumpster Rentals for Home Improvement Jobs

  • May 16, 2025
Cozy outdoor lounge with wicker ottoman, colorful cushions, sunlit patio, greenery, and stylish outdoor furniture.
View Post

Using Outdoor Ottoman Cushions to Create a Cozy Outdoor Lounge

  • May 16, 2025
A backyard pool surrounded by fences under a sunny sky.
View Post

Budget-Friendly Pool Fencing: Affordable Safety Solutions

  • May 16, 2025
Split image of a sunny backyard with a natural wood deck on one side and a sleek composite deck on the other, surrounded by green plants.
View Post

Composite vs. Wood Decking: Which Is Right for Your Home?

  • May 16, 2025
Bright modern kitchen with elegant custom wooden cabinets in varied styles and finishes, highlighting high-quality craftsmanship and tailored design.
View Post

Choosing the Right Custom Cabinets Manufacturer for Your Dream Space

  • May 15, 2025

Leave a Reply Cancel reply

Your email address will not be published. Required fields are marked *

This site uses Akismet to reduce spam. Learn how your comment data is processed.

  • About Us
  • Privacy Policy
  • Terms of Use
  • Disclosure
  • Sitemap
  • Contact Us

Input your search keywords and press Enter.