Dream Lands Design
  • Home Improvement
    • DIY
    • Remodeling
    • Woodworking
    • Accessories
    • Home Design
      • Furniture
      • Organize
      • Tips
      • Decor
        • Interior
        • Exterior
  • Design Ideas
    • Bathroom
    • Bedroom
    • Dining Room
    • Living Room
    • Kitchen
  • Gardening
    • Backyard
    • Front Yard
    • Landscaping

Categories

  • Accessories
  • Backyard
  • Bathroom
  • Beauty
  • Bedroom
  • Cars
  • Decor
  • Design Ideas
  • Dining Room
  • DIY
  • Entertaining
  • Exterior
  • Finance
  • Front Yard
  • Furniture
  • Gardening
  • Green Living
  • Home Design
  • Home Improvement
  • Interior
  • Kitchen
  • Landscaping
  • Lifestyle
  • Living
  • Living Room
  • Organize
  • Photography
  • Real Estate
  • Remodeling
  • Tips
  • Uncategorized
  • Wall Improvement
  • Woodworking

Archives

  • February 2023
  • January 2023
  • December 2022
  • November 2022
  • October 2022
  • September 2022
  • August 2022
  • July 2022
  • June 2022
  • May 2022
  • April 2022
  • March 2022
  • February 2022
  • January 2022
  • December 2021
  • November 2021
  • October 2021
  • September 2021
  • August 2021
  • July 2021
  • June 2021
  • May 2021
  • April 2021
  • March 2021
  • February 2021
  • January 2021
  • December 2020
  • November 2020
  • October 2020
  • September 2020
  • August 2020
  • July 2020
  • June 2020
  • May 2020
  • April 2020
  • March 2020
  • February 2020
  • January 2020
  • December 2019
  • November 2019
  • October 2019
  • September 2019
  • August 2019
  • July 2019
  • June 2019
  • May 2019
  • April 2019
  • March 2019
  • February 2019
  • January 2019
  • December 2018
  • November 2018
  • October 2018
  • September 2018
  • August 2018
  • July 2018
  • June 2018
  • May 2018
  • April 2018
  • March 2018
  • February 2018
  • January 2018
  • December 2017
  • November 2017
  • Privacy Policy
  • Terms of Use
  • Disclosure
  • Sitemap
  • Contact Us
29K
98K
0
Dream Lands Design
  • Home Improvement
    • DIY
    • Remodeling
    • Woodworking
    • Accessories
    • Home Design
      • Furniture
      • Organize
      • Tips
      • Decor
        • Interior
        • Exterior
  • Design Ideas
    • Bathroom
    • Bedroom
    • Dining Room
    • Living Room
    • Kitchen
  • Gardening
    • Backyard
    • Front Yard
    • Landscaping
featured image - How to Refinish Old Kitchen Cabinets
You're here: Home Kitchen How to Refinish Old Kitchen Cabinets

How to Refinish Old Kitchen Cabinets

  • Perla Irish
  • November 16, 2022
Total
0
Shares
0
0
0
0
0
Table of Contents Hide
  1. Remove the Cabinet Doors
  2. Remove Old Finish from the Cabinets
  3. Fill Damaged Wood and Sanding Cabinets
  4. Now Apply Color and Give a Finish to Old Kitchen Cabinets:
  5. Final Verdict

It’s no secret that kitchens are one of the most important rooms in any house. They’re where we cook, eat, and socialize.
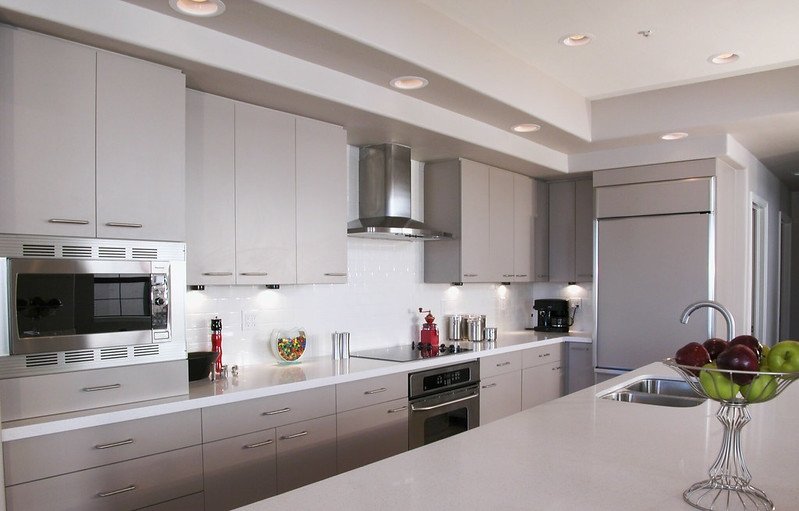
Image - How to Refinish Old Kitchen Cabinets
How to Refinish Old Kitchen Cabinets

But what happens when your kitchen starts to look dated? One option is to refinish your old kitchen cabinets. This can be a great way to give your kitchen a fresh new look without spending a lot of money.

If you’re looking to update your kitchen without spending a lot of money, then refinishing your old cabinets may be the way to go. With a little elbow grease and some basic supplies, you can transform your old cabinets into something new.

Remove the Cabinet Doors

Remove the cabinet doors to refinish the old kitchen cabinets. This will give the cabinets a new look and make them more durable. First, remove all of the hardware from the doors. This includes screws, hinges, and knobs. Next, use a putty knife to remove any paint or varnish that is peeling off of the door.

Once the door is stripped down, sand it with medium-grit sandpaper. Be sure to sand in the direction of the grain to avoid damaging the wood. After sanding, wipe off any dust with a damp cloth.

To refinish the door, choose a stain or paint that you like and apply it evenly to the door surface. Let it dry completely before reattaching the hardware and putting the door back on the cabinet.


Read Also:

  • Kitchen Cabinets Decorating Ideas | Creating a Modern Look with Stainless Kitchen Cabinets
  • Which One is Better Refinish or Replace Your Kitchen Cabinet
  • Affordable Kitchen Cabinets Ottawa

Remove Old Finish from the Cabinets

Stripping the old finish from the cabinets is an important step in refinishing old kitchen cabinets. This will remove any wax or grease build-up, and it will also roughen up the surface to provide a better key for the new finish. There are a few different ways to strip the old finish from the cabinets.

You can use a chemical stripper, sandpaper, or a heat gun. Chemical strippers are the most effective, but they can also be dangerous to use. Sandpaper is less effective, but it’s also less dangerous. Heat guns are somewhere in between.

Whichever method you choose, make sure to follow all safety instructions carefully. Once you’ve stripped the old finish from the cabinets, you’re ready to start refinishing them!

Fill Damaged Wood and Sanding Cabinets

Refinishing old kitchen cabinets can be a great way to give your kitchen a new look without spending a lot of money. However, before you begin, you will need to fill any damaged wood and sand the cabinets down.

To fill damaged wood, you will need to use a wood filler. First, clean out the area around the damage and then apply the filler with a putty knife. Once the filler is dry, sand it down until it is flush with the rest of the cabinet.

Next, you will need to sand the cabinets down. Start with a coarse grit sandpaper and then move to a finer grit. Wipe down the cabinets after each sanding with a damp cloth to remove any dust. Once you have filled and sanded the cabinets, you are ready to begin painting or staining them.

Now Apply Color and Give a Finish to Old Kitchen Cabinets:

Color is one of the easiest ways to give new life to old kitchen cabinets. Whether you want a fresh, clean look or a more dramatic change, applying color to your cabinets is a relatively simple process. Here are a few tips to get you started.

Start by sanding down your cabinets to create a smooth surface. This will help the paint adhere better and create a more professional-looking finish.

Next, choose the right type of paint for your project. If you’re going for a high-gloss finish, use semi-gloss or high-gloss paint. For a more matte look, use an eggshell or satin finish paint.

Once you’ve selected your paint, apply it evenly with a brush or roller. For best results, use two coats of paint and allow the first coat to dry completely before applying the second.

Final Verdict

Refinishing old kitchen cabinets is a great way to save money and update your kitchen. With a little elbow grease and some basic tools, you can transform your kitchen on a weekend. But, if you need a new one, shaker cabinets are the recommended ones.
Total
0
Shares
Share 0
Tweet 0
Pin it 0
Share 0
Share 0
Related Topics
  • cabinets
  • finish
  • kitchen

Subscribe

Subscribe now to our newsletter

You May Also Like
featured image - 15 Home Door Decoration Ideas for a Modern & Stylish Look
View Post

15 Home Door Decoration Ideas for a Modern & Stylish Look

  • February 5, 2023
featured image - 6 Signs Your Digital Marketing Strategy Is Not Working
View Post

6 Signs Your Digital Marketing Strategy Is Not Working

  • February 5, 2023
Featured image - How to Choose the Right Paint for Your Home
View Post

How to Choose the Right Paint for Your Home

  • February 4, 2023
Featured image - What You Need to Know About Refinancing Your House
View Post

What You Need to Know About Refinancing Your House

  • February 2, 2023
Featured image - 3 Constructive Hiring Trends for Construction Managers to Try in 2023
View Post

3 Constructive Hiring Trends for Construction Managers to Try in 2023

  • February 2, 2023
Featured image - Pros of Using Cordless Vacuum Cleaner for Hardwood Floors
View Post

Pros of Using Cordless Vacuum Cleaner for Hardwood Floors

  • February 2, 2023
featured image - Create Your Sanctuary
View Post

Create Your Sanctuary

  • February 1, 2023
Fetured image - 8 Things You Can Expect When Moving to Texas
View Post

8 Things You Can Expect When Moving to Texas

  • February 1, 2023
Dream Lands Design
  • Privacy Policy
  • Terms of Use
  • Disclosure
  • Sitemap
  • Contact Us

Input your search keywords and press Enter.

Add Dream Lands Design to your Homescreen!

Add