• Home Improvement
    • DIY
    • Remodeling
    • Woodworking
    • Accessories
    • Home Design
      • Furniture
      • Organize
      • Tips
      • Decor
        • Interior
        • Exterior
    • Design Ideas
      • Bathroom
      • Bedroom
      • Dining Room
      • Living Room
      • Kitchen
  • Gardening
    • Backyard
    • Front Yard
    • Landscaping
  • Building Staircase
  • Categories
    • Home Improvement
    • Decor
    • Gardening
    • Woodworking
    • Lifestyle
    • Green Living
    • Real Estate
Dream Lands Design
  • Home Improvement
    • DIY
    • Remodeling
    • Woodworking
    • Accessories
    • Home Design
      • Furniture
      • Organize
      • Tips
      • Decor
        • Interior
        • Exterior
    • Design Ideas
      • Bathroom
      • Bedroom
      • Dining Room
      • Living Room
      • Kitchen
  • Gardening
    • Backyard
    • Front Yard
    • Landscaping
  • Building Staircase
  • Categories
    • Home Improvement
    • Decor
    • Gardening
    • Woodworking
    • Lifestyle
    • Green Living
    • Real Estate
Featured image - How to use Sandwich Cutters for Better Results
You're here: Home Tips How to use Sandwich Cutters for Better Results

How to use Sandwich Cutters for Better Results

  • Perla Irish
  • February 12, 2023
Total
1
Shares
0
0
1
0
0
Table of Contents Show
  1. Choose the Right Cutter for Your Needs
  2. Prepare Your Ingredients
  3. Assemble Your Sandwich
  4. Experiment with Different Fillings

Sandwich cutters are a great tool for making sandwiches that are not only delicious but also visually appealing.
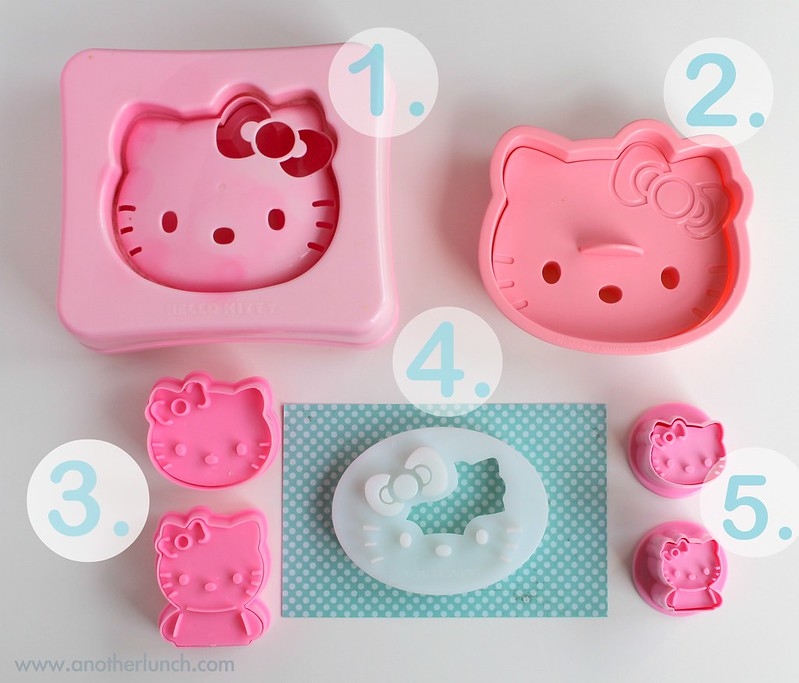
Image - How to use Sandwich Cutters for Better Results
How to use Sandwich Cutters for Better Results

They come in a variety of shapes and sizes, making it easy to find one that suits your needs and preferences. Whether you’re making lunch for yourself or preparing a meal for a crowd, using a sandwich cutter can make your work easier and more efficient.

In this article, we’ll go over some tips and tricks for using sandwich cutters to get the best results possible.

Choose the Right Cutter for Your Needs

Before you start using your sandwich cutter , it’s important to choose the right one for your needs. There are cutters that are designed specifically for crustless sandwiches, while others are made for cutting sandwiches into shapes such as stars, hearts, and squares. Some sandwich cutters even come with multiple blades, allowing you to make different shapes and sizes of sandwiches.

When choosing a sandwich cutter, consider the type of bread you’ll be using and the fillings you’ll be putting in your sandwich. If you’re using soft bread like white bread, you may want to choose a cutter with a rounded edge, as this will prevent the bread from getting crushed or torn.

On the other hand, if you’re using denser bread like whole grain bread, you may want to choose a cutter with a sharp edge, as this will make it easier to cut through the bread.

Prepare Your Ingredients

Once you’ve chosen the right cutter for your needs, it’s time to prepare your ingredients. The key to making a great sandwich is to have all of your ingredients prepped and ready to go before you start assembling your sandwich.

This will allow you to work efficiently and ensure that your sandwich is made to your liking. When preparing your ingredients, consider the fillings you’ll be using and make sure they’re sliced or diced into bite-sized pieces.

This will make it easier to get all of the flavors into each bite of your sandwich. You may also want to consider marinating your meats or vegetables in advance, as this will add extra flavor to your sandwich.

Assemble Your Sandwich

Once you’ve prepared your ingredients, it’s time to assemble your sandwich. Start by laying out two slices of bread and spreading a layer of condiments, such as mayonnaise or mustard, on one of the slices.

Then, add your fillings on top of the condiments, making sure to distribute them evenly. Finally, top your sandwich with the other slice of bread and press down gently to seal the sandwich together.

At this point, you’re ready to use your sandwich cutter. Simply place the sandwich on top of the cutter and press down firmly to cut through the bread and fillings.

Depending on the type of cutter you’re using, you may need to wiggle the cutter slightly to make sure it cuts through the entire sandwich. Once you’ve finished cutting your sandwich, remove the excess bread and enjoy!

Experiment with Different Fillings

One of the best things about using a sandwich cutter is that it allows you to be creative and experiment with different fillings.

You can use a variety of meats, cheeses, vegetables, and condiments to create unique and delicious sandwiches. Some popular fillings include turkey, ham, cheese, lettuce, tomato, and pickles.

When experimenting with different fillings, consider the flavors and textures of the ingredients you’re using. For example, you may want to pair a tangy cheese like cheddar with a sweet condiment like honey mustard. Or, you may want to add some crunch to your sandwich by adding a layer of lettuce or sliced cucumber.

Total
1
Shares
Share 0
Tweet 0
Pin it 1
Share 0
Share 0
Related Topics
  • bread
  • cutter
  • sandwich
Previous Article
featured image - Declutter Your Home with Professional House Cleaning Services

Declutter Your Home with Professional House Cleaning Services

  • Perla Irish
  • February 12, 2023
View Post
Next Article
featured image - How Much Does a Home Propane Tank Cost?

How Much Does a Home Propane Tank Cost?

  • Perla Irish
  • February 12, 2023
View Post

Subscribe

Subscribe now to our newsletter

You May Also Like
A color guide showing the best house paint by climate zone
View Post

The No-Nonsense Guide to Picking Exterior Paint Colors for Every Climate

  • August 2, 2025
Row of Minneapolis-style houses showcasing different exterior paint colors including warm neutrals, navy blue, forest green, terracotta, and white with red accents—illustrating seasonal contrast and weatherproof finishes.
View Post

Minneapolis Exterior Paint Guide: Colors and Prep for Extreme Weather

  • July 26, 2025
Tidy family living room with kid-friendly furniture and organized toy storage
View Post

Tips for Creating a Tidy Home with Kids: Day-to-Day Guidance for Everyday Families

  • July 26, 2025
Best flooring for home value in a modern staged living room
View Post

Which Flooring Adds the Most Value to Your Home?

  • July 25, 2025
Modern open-concept kitchen with quartz countertop, stainless appliances, and kitchen island with bar seating
View Post

Kitchen and Bathroom Upgrades That Add the Most Value in 2025

  • July 24, 2025
Woodworker in a home workshop using a power drill on a wooden board, surrounded by tools and shavings, showcasing focus and precision in DIY craftsmanship.
View Post

Top 5 Tips for Choosing the Right Router Bit for Your Project

  • July 24, 2025
exposed pipes, water heater, and neatly arranged plumbing tools including a wrench and plunger for beginner maintenance.
View Post

Plumbing for Beginners: A Must-Read for First-Time Homeowners

  • July 23, 2025
Roofers St George installing a new energy-efficient metal roof in a sunny desert home
View Post

Smarter Roofing for St. George Homes: What Homeowners Really Need to Know

  • July 18, 2025
  • About Us
  • Privacy Policy
  • Terms of Use
  • Disclosure
  • Sitemap
  • Contact Us

Input your search keywords and press Enter.