Table of Contents Show
The most common reason to replace a garage door is that an existing wooden swing gate is worn out. When removing, you never know how heavy the wings are. A tipping gate leaf can lead to serious injuries.

Therefore, before unhinging, all hinges and hinges must be as smooth-running as possible. If this is no longer possible, the gate leaves are initially locked in place with clamps or by screwing.
Then all hinges are removed, destroying them if necessary. Only then are all the locks removed and the sashes can be tilted out of the frame by several people.
The frame is removed by exposing and loosening the anchors as much as possible. This work can be a bit tedious. However, it protects the masonry from being damaged during removal.
Otherwise, time-consuming rebuilding or repairing would be the result. Caution! Old wooden swing gates are almost always provided with several coats of paint.
Your wood is therefore classified as hazardous waste, which must be disposed of properly and must not be burned. The local waste disposal company will be happy to provide information on how to proceed.
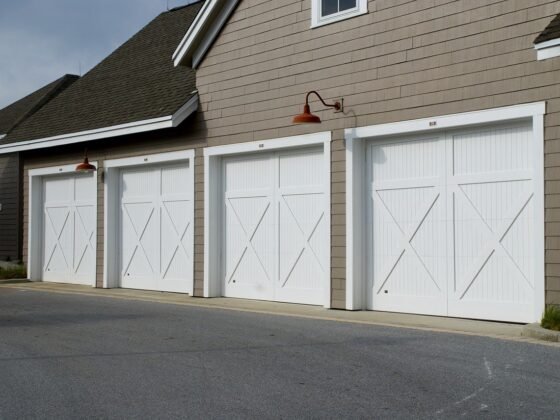
Old up-and-over doors or sectional doors are easier to remove. They are removed in the reverse order of installation.
Extreme caution is required here, as all tension springs must be unhooked first at the beginning of the disassembly. A spring that springs back can cause serious injury.
The Garage Door Installation – Unpack and Sort
An up-and-over door or sectional door is usually delivered in two or more packages. In the case of up-and-over doors, these are the door leaf in its frame, all guide rails, rollers, springs, and other operating elements as well as the installation accessories.
In the case of sectional doors, the door leaf, which consists of several panels, is divided into individual segments delivered. After unpacking and checking that all components are complete, the assembly site is like unmanageable chaos.
Professionals deal with it every day and will quickly sort out the mess. Do-it-yourselfers, on the other hand, quickly become helpless at this moment.
Will each part find its place and will it be mountable as intended? No panic! Well-known manufacturers enclose detailed and detailed assembly drawings with their assembly packages.
The installation is a step-by-step explanation. A basic rule for all do-it-yourself installers: Laying out all components clearly on the floor helps.
If each of them is in its place, where it is to be mounted later, the assembly principle is already clear. Add some spatial thinking and the installation can begin.
Read Also:
The Right Fastening Material for Installing The Garage Door
Up-and-over doors and sectional doors are manufactured by their manufacturers with as little weight as possible. Nevertheless, they generate high tensile and compressive forces when opening and closing. A loosely attached guide rail can damage the door or, in the worst case, lead to unintentional detachment.
The Installer Fastens the Frame To The Wall When Installing The Garage Door
It is therefore important to select the fastening material to match the existing building structure. The manufacturer supplies all the appropriate screws for assembly.
If the right screw is not available for the existing building structure, the local fastening specialist or the hardware store will help.
When drilling in with the impact drill, you only have to make sure that you use the exact carbide drill bit specified for its diameter. Heavy-duty dowels with an expanding function must not be used in masonry.
They would split the stone and they would not find a secure footing. In the building materials trade, there are bricks, clinker bricks, aerated concrete, sand-lime bricks, and dowels, which are selected according to the existing masonry.
In particularly critical situations, however, it may also be necessary to use spread mounting plates for the guide rails with cement mortar in the masonry.
The Door Leaf of An Up-And-Over Door Is Installed
How an up-and-over door is installed depends on the existing wall opening on site. Some are equipped with one top and two side stops into which the up-and-over door is placed.
Other wall openings are smooth and the gate can be mounted in the opening. The desired form of installation had to be taken into account when measuring. Two people are required for assembly.
The gate is first set up and behind or in the wall opening aligned. Wooden wedges are used for fixation and the goal is brought into an exactly horizontal position with spacer blocks of different thicknesses.
Both sides must be precisely aligned vertically so that the up-and-over door can later close without torsion. To do this, the alignment must be checked several times during wedging.
Most of the up-and-over doors are already fitted with mounting straps around the frame or they must be removed before installation screwed on. The screw holes are marked after the gate has been aligned, and the dowel holes are drilled using a percussion drill and the appropriate carbide drill.
In the case of plastered walls, the plaster should be removed in the area of the mounting strips so that they are no longer visible later. The gate can now be screwed to the masonry using these assembly straps.
Locks are located on the left and right in the lower area of the door leaf. To ensure that these later function smoothly, the lock with its pull cables or rods is now installed and checked for these locking mechanisms.
With garage doors, are already pre-assembled. Also, repair garage doors by professionals.
The Assembly of The Horizontal Rails
The assembly kit includes two rails, in which the rollers of the up-and-over door are guided when opening and closing. These are now screwed to the pre-drilled mounting holes in the frame.
These are also already pre-assembled and only have to be folded up. A second person fixes the rear end of the rail using a suitably long lath and a screw clamp.