Dream Lands Design
  • Home Improvement
    • DIY
    • Remodeling
    • Woodworking
    • Accessories
    • Home Design
      • Furniture
      • Organize
      • Tips
      • Decor
        • Interior
        • Exterior
  • Design Ideas
    • Bathroom
    • Bedroom
    • Dining Room
    • Living Room
    • Kitchen
  • Gardening
    • Backyard
    • Front Yard
    • Landscaping

Categories

  • Accessories
  • Backyard
  • Bathroom
  • Beauty
  • Bedroom
  • Cars
  • Decor
  • Design Ideas
  • Dining Room
  • DIY
  • Entertaining
  • Exterior
  • Finance
  • Front Yard
  • Furniture
  • Gardening
  • Green Living
  • Home Design
  • Home Improvement
  • Interior
  • Kitchen
  • Landscaping
  • Lifestyle
  • Living
  • Living Room
  • Organize
  • Photography
  • Real Estate
  • Remodeling
  • Tips
  • Uncategorized
  • Wall Improvement
  • Woodworking

Archives

  • March 2023
  • February 2023
  • January 2023
  • December 2022
  • November 2022
  • October 2022
  • September 2022
  • August 2022
  • July 2022
  • June 2022
  • May 2022
  • April 2022
  • March 2022
  • February 2022
  • January 2022
  • December 2021
  • November 2021
  • October 2021
  • September 2021
  • August 2021
  • July 2021
  • June 2021
  • May 2021
  • April 2021
  • March 2021
  • February 2021
  • January 2021
  • December 2020
  • November 2020
  • October 2020
  • September 2020
  • August 2020
  • July 2020
  • June 2020
  • May 2020
  • April 2020
  • March 2020
  • February 2020
  • January 2020
  • December 2019
  • November 2019
  • October 2019
  • September 2019
  • August 2019
  • July 2019
  • June 2019
  • May 2019
  • April 2019
  • March 2019
  • February 2019
  • January 2019
  • December 2018
  • November 2018
  • October 2018
  • September 2018
  • August 2018
  • July 2018
  • June 2018
  • May 2018
  • April 2018
  • March 2018
  • February 2018
  • January 2018
  • December 2017
  • November 2017
  • Privacy Policy
  • Terms of Use
  • Disclosure
  • Sitemap
  • Contact Us
29K
98K
0
Dream Lands Design
  • Home Improvement
    • DIY
    • Remodeling
    • Woodworking
    • Accessories
    • Home Design
      • Furniture
      • Organize
      • Tips
      • Decor
        • Interior
        • Exterior
  • Design Ideas
    • Bathroom
    • Bedroom
    • Dining Room
    • Living Room
    • Kitchen
  • Gardening
    • Backyard
    • Front Yard
    • Landscaping
Featured of How to Stain and Brighten Your Wooden Fence
You're here: Home DIY How to Stain and Brighten Your Wooden Fence

How to Stain and Brighten Your Wooden Fence

  • Perla Irish
  • February 8, 2019
Total
9
Shares
8
0
1
0
0
Table of Contents Hide
  1. How to Stain and Brighten Your Wooden Fence
    1. Materials You Need
    2.       1. Preparing the Fence
    3.       2. Protect the Surroundings
    4.       3. Timing is Everything
    5.       4. Apply the Stain
  2. Helpful Tips

A wooden fence is the best way to contain your property and add some much-needed privacy. If you want your fence to last a long time, you need to stain the wood.

Staining your fence protects it from the elements, reduces rotting, and adds a bit of color to your property. This is also a project that you can tackle yourself. Applying a stain is something that even an inexperienced novice can handle.
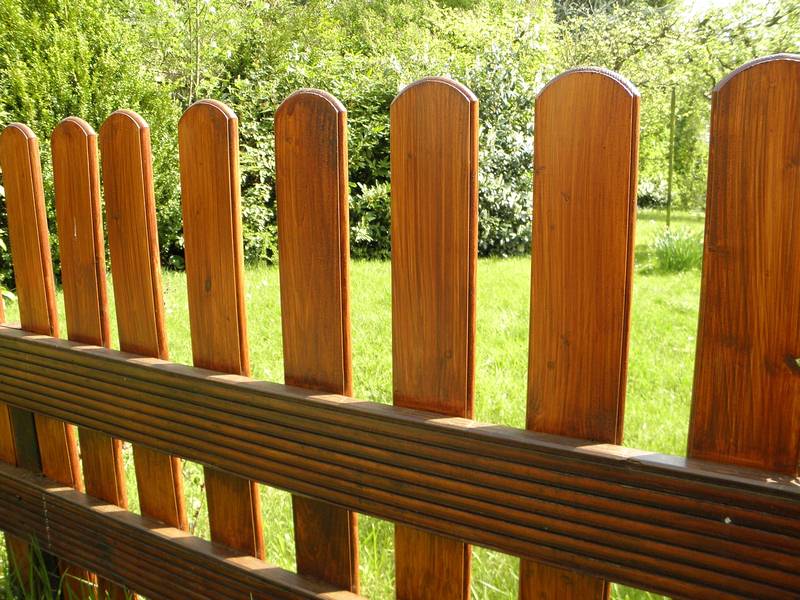
How to Stain and Brighten Your Wooden Fence

How to Stain and Brighten Your Wooden Fence


Read Also:

  • Getting Back the Privacy in Your Yard: 8 Ways to Do It Aesthetically
  • Stain Deck Weekend the Sherwin Williams Way – Staining a Deck
  • Reasons Why You Need to Use Wooden Pallets to Move Items
  • Here’s Why You Need a Snake Fence

Materials You Need

If you’re planning on staining your wooden fence, you’ll need to gather all the proper materials. These should be readily available at any local shop. Make sure you have:

  • Can(s) of stain
  • Paintbrushes, both large and small
  • Paint rollers
  • Tarp
  • Clean rags
  • Paint tray
  • Wooden stirrer
  • Sandpaper
  • Power-washer

      1. Preparing the Fence

Before applying the stain, the wood must be properly cleaned. This will make sure the stain can adhere to the wood. Failure to do this step may result in an uneven stain that needs to be redone.

Begin preparing the fence by sanding down any noticeable rough spots. It’s not imperative that the fence is completely smooth, but you will want to sand any broken edges to prevent splintering. It’s also necessary to completely sand a fence if it’s been previously painted.

The wood should then be cleaned with a power washer. You want to fully remove any dirt and debris. If you notice black mold, scrub it with bleach and water to kill the mold and prevent regrowth. Allow enough time for the fence to fully dry before moving on to the next step.

      2. Protect the Surroundings

Place a tarp around the fence to protect the area from any drips. It’s also smart to cover any garden furniture or plants in the surrounding area. If it’s windy, it may be necessary to use rocks or bricks to hold the tarp in place.

      3. Timing is Everything

Check the weather forecast before you begin staining the fence. Avoid staining if it’s humid or rainy outside. It’s also not wise to stain wood on a cold day. All these situations may prevent the stain from fully drying.

It’s best to stain a wooden fence when it’s dry and warm outside. If the wood is too hot, you may find the stain dries too quickly.

Try staining the wood in a shaded area. Windy days are also not ideal for applying a stain. The wind may cause dirt or grass to get stuck in the wet stain before it has a chance to dry.

      4. Apply the Stain

Now you’re finally ready to apply the stain. This is easily done with paintbrushes and a paint roller. Large areas of the fence are easy to stain with a paint roller.

Use paintbrushes on edges, tips, trellis, and other small areas, as brushes allow for more precision.

When applying the stain, never go against the wood grain. Always move the brush or roller in the same direction. This will prevent streaking. It’s also wise to always keep a wet edge. This is done by brushing into the wet area and back brushing.

Always apply a liberal amount of stain to the fence. You need to use enough stain so that it’s able to penetrate the wood. Use a paintbrush or clean rag to blot away any drips. Start at the top of the fence and work your way down to prevent drip marks.

Most wooden fences require two coats, but you should always refer to the manufacturer’s instructions for the best results. The manufacturer will also recommend how long to wait before applying the next coat.

Helpful Tips

Every fence is different, and some stains are easier to work with than others. There are a few things to consider so that you get the best results.

  • If you want to cover a large fence with stain, consider using a paint sprayer. You will still need to use a paintbrush to stain any hard-to-reach areas.
  • Choose your stain color carefully. Stains come in a vast array of colors, from bright to dark. Stain a small, inconspicuous area first to test the color.

Consider staining before the fence is installed. If you have a new fence, it’s easier to apply a stain before it’s erected. This may also reduce the chance of missing a spot or applying an uneven stain.

Total
9
Shares
Share 8
Tweet 0
Pin it 1
Share 0
Share 0
Related Topics
  • fence
  • staining wood
  • wood
  • wood stain
  • wooden

Subscribe

Subscribe now to our newsletter

You May Also Like
featured image - Happy Hosting: 6 Things Guests Wish You Had in Your Airbnb
View Post

Happy Hosting: 6 Things Guests Wish You Had in Your Airbnb

  • March 25, 2023
featured image - The Benefits of Installing a Water Filtration System with the Help of a Plumber in Point Cook
View Post

The Benefits of Installing a Water Filtration System with the Help of a Plumber in Point Cook

  • March 24, 2023
How to Save Money and Streamline Operations on Next Construction Project
View Post

How to Save Money and Streamline Operations on Next Construction Project

  • March 23, 2023
Featured image - New Country? Home Moving and Remodeling Tips
View Post

New Country? Home Moving and Remodeling Tips

  • March 23, 2023
featured image - Efficient and Effective The Advantages of Trusting Experts for Residential Window and Door Repairs
View Post

Efficient and Effective: The Advantages of Trusting Experts for Residential Window and Door Repairs

  • March 23, 2023
featured image - The Benefits of Using High-Quality Paints
View Post

The Benefits of Using High-Quality Paints

  • March 23, 2023
featured image - Cheap Annual Boiler Service from Smart Gas Solutions Edinburgh
View Post

Cheap Annual Boiler Service from Smart Gas Solutions Edinburgh

  • March 23, 2023
featured image - Top Three Advantages of Automatic Pool Cover for Pool Owners
View Post

Top Three Advantages of Automatic Pool Cover for Pool Owners

  • March 23, 2023

Leave a Reply Cancel reply

Your email address will not be published. Required fields are marked *

This site uses Akismet to reduce spam. Learn how your comment data is processed.

Dream Lands Design
  • Privacy Policy
  • Terms of Use
  • Disclosure
  • Sitemap
  • Contact Us

Input your search keywords and press Enter.

Add Dream Lands Design to your Homescreen!

Add