• Home Improvement
    • DIY
    • Remodeling
    • Woodworking
    • Accessories
    • Home Design
      • Furniture
      • Organize
      • Tips
      • Decor
        • Interior
        • Exterior
    • Design Ideas
      • Bathroom
      • Bedroom
      • Dining Room
      • Living Room
      • Kitchen
  • Gardening
    • Backyard
    • Front Yard
    • Landscaping
  • Building Staircase
  • Categories
    • Home Improvement
    • Decor
    • Gardening
    • Woodworking
    • Lifestyle
    • Green Living
    • Real Estate
Dream Lands Design
  • Home Improvement
    • DIY
    • Remodeling
    • Woodworking
    • Accessories
    • Home Design
      • Furniture
      • Organize
      • Tips
      • Decor
        • Interior
        • Exterior
    • Design Ideas
      • Bathroom
      • Bedroom
      • Dining Room
      • Living Room
      • Kitchen
  • Gardening
    • Backyard
    • Front Yard
    • Landscaping
  • Building Staircase
  • Categories
    • Home Improvement
    • Decor
    • Gardening
    • Woodworking
    • Lifestyle
    • Green Living
    • Real Estate
Featured of Engineered Hardwood Flooring Installation – Read This Before You Change Your Flooring
You're here: Home Home Improvement Engineered Hardwood Flooring Installation – Read This Before You Change Your Flooring

Engineered Hardwood Flooring Installation – Read This Before You Change Your Flooring

  • Perla Irish
  • January 22, 2019
Total
3
Shares
0
0
3
0
0
Table of Contents Show
  1. Steps to Install Engineered Hardwood Flooring in Your Space
  2. Clean Your Floor
  3. Layout Tar Sheets
  4. Prep Your Planks
  5. Installation
  6. Nail It In

Flooring is one of the biggest expenditures when setting up your home. There are a number of flooring options available today and your choice largely depends on the weather conditions, ease of maintenance, availability, costing, and various other such considerations.

It is common knowledge that the flooring in an indoor space increases the attractiveness and aesthetic element in a home.

A trend that we increasingly see being widely adopted is that of the engineered hardwood flooring, which involves bonding two or more planks of hardwood together to create a thick, sturdy flooring option.
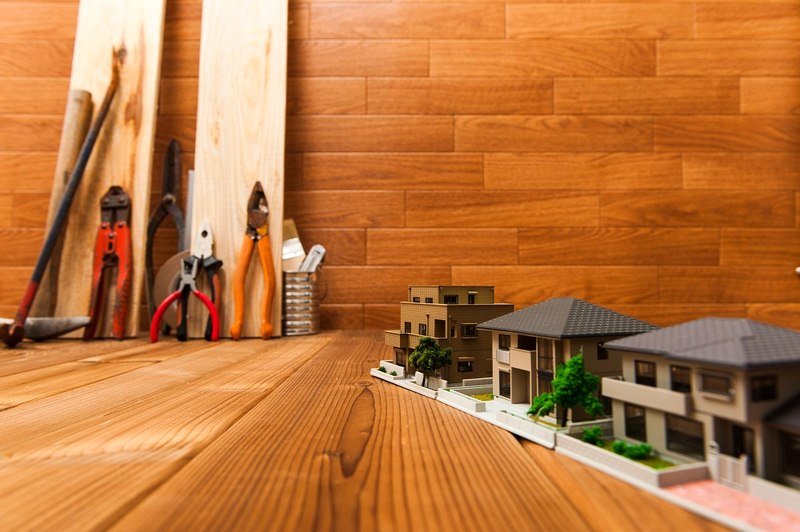
Engineered Hardwood Flooring Installation – Read This Before You Change Your Flooring

Steps to Install Engineered Hardwood Flooring in Your Space

If you are looking to give your interiors a facelift, then consider changing the flooring of your home. Albeit an intensive exercise, changing your flooring is absolutely worth it if you are keen on totally introducing a new look to your home.

You can cash in on the engineered hardwood flooring options available today in textures, colors, and designs of your choice.

Once you zero in on your choice, many may contemplate how to install the hardwood flooring. Well, we’ve got you covered! Following are the steps to install the hardwood flooring:


Read Also:

  • Proper Way to Clean Hardwood Floors – What Are Your Options?
  • Top 5 Factors to Consider When Picking Commercial Flooring
  • Top 5 Best Hardwood Floor Restorer

Clean Your Floor

Prior to installing the engineered hardwood flooring, you need to clean as well as prepare the floor. You need to ensure that the floor is devoid of debris. It is advised that you vacuum or sweep the floor, wash it to remove any unwanted dust to prep it for an all-new look.

Once the cleaning is complete, make sure that the floor is completely dry, without any element of moisture whatsoever. Only then can you begin with the installation process.

Layout Tar Sheets

Steps to Install Engineered Hardwood Flooring in Your Space

Once the floor is thoroughly cleaned, the homeowner needs to roll out sheets of tar paper. You can use a staple to ensure that the tar paper is fixed to the floor.

The tar paper acts as a moisture barrier. It prevents the condensation of moisture beneath the floor. Any moisture lingering can later cause cracks or unevenness in your flooring in the future.

Prep Your Planks

The next step of the installation of engineered hardwood flooring involves the preparation of the planks for installation.

For installing the planks, open multiple boxes of planks, intermix the planks from different boxes to get the right blend while installing the flooring.

Your interior designer can help you find a good blend beforehand and complete this step before installation begins, to save time when you actually get down to doing the job.

Installation

Now we finally arrive at the most important step of installing the flooring. Whenever you are installing flooring, start with the room that has the longest wall.

There is a process to get the installation of your flooring spot on. You can seek the advice of a professional interior decorator to install the flooring. You can use a pneumatic flooring stapler to drive the staples into the flooring.

And you can also employ the use of a rubber mallet to do the floor installation.

Nail It In

Your Engineered hardwood flooring is almost ready. This is the final step of the installation process. Herein, you need to attach a baseboard at the wall bottom using a finish nail.

Once it is installed, it is easier to paint the baseboard. Complete your installation process by ensuring you properly nail in the floor planks.  Voila! Your brand-new flooring is ready!

For more information about installing engineered hardwood flooring, visit relevant resources available online. There are many businesses that offer custom flooring services.

Zelta is a reputable company in the flooring industry and has engineered hardwood available in many styles. You can engage a good flooring expert by scouting online sources. It is recommended that you check the details of the businesses to ascertain their credibility.


Short Bio:

Anna WrenchI am Anna Wrench, a knowledgeable and qualified blogger. Here you can see my skills which give you brief ideas on understanding all the concepts with different themes. I adore writing a blog on many topics, like Home Improvement, Automotive, Business, Health, Lifestyle, Entertainment, Pet, etc.

Total
3
Shares
Share 0
Tweet 0
Pin it 3
Share 0
Share 0
Perla Irish

Perla Irish, who is more familiarly known as Irish, is the Content Manager at Dreamlandsdesign.com. She loves following trends around home and garden, interior design, and digital marketing. Through this blog, Irish wants to share information and help readers solve the problems they are experiencing.

Related Topics
  • engineered
  • flooring
  • hardwood
  • installing
Previous Article
Featured of Best Bereavement Gift Ideas

Best Bereavement Gift Ideas

  • Perla Irish
  • January 21, 2019
View Post
Next Article
Featured of The Best Time of Day to Harvest a Vegetable Garden

The Best Time of Day to Harvest a Vegetable Garden

  • Perla Irish
  • January 22, 2019
View Post

Subscribe

Subscribe now to our newsletter

You May Also Like
Tape measure measuring the thickness of a piece of lumber.
View Post

How to Determine Deck Framing Lumber Sizes: A Complete Guide

  • May 13, 2025
A large pile of mixed construction waste, including broken concrete, wood scraps, and twisted metal, sits in a cluttered urban renovation site on a rainy autumn afternoon.
View Post

Renovating? Here’s What No One Tells You About the Aftermath

  • May 12, 2025
Modern heat pump unit installed outside a cozy home with green grass and clear blue skies, representing energy-efficient heating and cooling technology.
View Post

Heat Pump Repair 101: What Every Homeowner Should Know

  • May 10, 2025
A smiling couple stands confidently in front of a cozy mobile home under clear blue skies with palm trees in a sunny California setting.
View Post

California Mobile Home Loans: A Guide for First-Time Buyers

  • May 8, 2025
Sleek wooden sliding barn door on metal track with drill, measuring tape, and level nearby in a modern home interior, featuring Scandinavian design elements, with a neutral color palette and diffused lighting on a cloudy spring morning.
View Post

How to Install an Interior Barn Door

  • May 8, 2025
Cozy suburban home showing roof leak, cracked foundation, and flickering lights, portrayed warmly to highlight common homeowner challenges.
View Post

Homeowner Headaches: 8 Common Issues & When to Call a Professional

  • May 7, 2025
Modern house with multiple extensions, large windows, a second-storey addition, and a neat garden shrouded in fog under a misty morning sky.
View Post

Understanding the Different Types of Home Extensions

  • May 6, 2025
Transform your reading area with cozy decor, effective lighting, and technology that enhances your library experience.
View Post

Create Your Dream Home Library: A Step-by-Step Guide

  • May 5, 2025

Leave a Reply Cancel reply

Your email address will not be published. Required fields are marked *

This site uses Akismet to reduce spam. Learn how your comment data is processed.

  • About Us
  • Privacy Policy
  • Terms of Use
  • Disclosure
  • Sitemap
  • Contact Us

Input your search keywords and press Enter.