• Home Improvement
    • DIY
    • Remodeling
    • Woodworking
    • Accessories
    • Home Design
      • Furniture
      • Organize
      • Tips
      • Decor
        • Interior
        • Exterior
    • Design Ideas
      • Bathroom
      • Bedroom
      • Dining Room
      • Living Room
      • Kitchen
  • Gardening
    • Backyard
    • Front Yard
    • Landscaping
  • Building Staircase
  • Categories
    • Home Improvement
    • Decor
    • Gardening
    • Woodworking
    • Lifestyle
    • Green Living
    • Real Estate
Dream Lands Design
  • Home Improvement
    • DIY
    • Remodeling
    • Woodworking
    • Accessories
    • Home Design
      • Furniture
      • Organize
      • Tips
      • Decor
        • Interior
        • Exterior
    • Design Ideas
      • Bathroom
      • Bedroom
      • Dining Room
      • Living Room
      • Kitchen
  • Gardening
    • Backyard
    • Front Yard
    • Landscaping
  • Building Staircase
  • Categories
    • Home Improvement
    • Decor
    • Gardening
    • Woodworking
    • Lifestyle
    • Green Living
    • Real Estate
featured image - How is Epoxy Coating Made?
You're here: Home Home Improvement How is Epoxy Coating Made?

How is Epoxy Coating Made?

  • Perla Irish
  • June 12, 2021
Total
2
Shares
0
0
2
0
0
Table of Contents Show
  1. Steps for Installation of an Epoxy Floor Coating
    1. 1. Cleaning the Floor
    2. 2. Preparing the Floor Surface
    3. 3. Base Coat Application
    4. 4. Adding Decorative Chips
    5. 5. Applying the Top Coat
  2. Conclusion:

If you want your garage or exercise area to be attractive with less effort then an Epoxy floor coating is just perfect for you.

It gives an attractive look and is cost-saving. You can also use An Epoxy floor coating as preventative maintenance for concrete flooring.

To prepare and apply an epoxy floor coating you just have to follow a few steps. But remember to use personal protective equipment for your safety.

As the installation of the floor takes several days, therefore, you have to keep an eye on the weather conditions; the temperature should be moderate and there should be no rain and high humidity. So, you have to plan a reasonable schedule for this project.
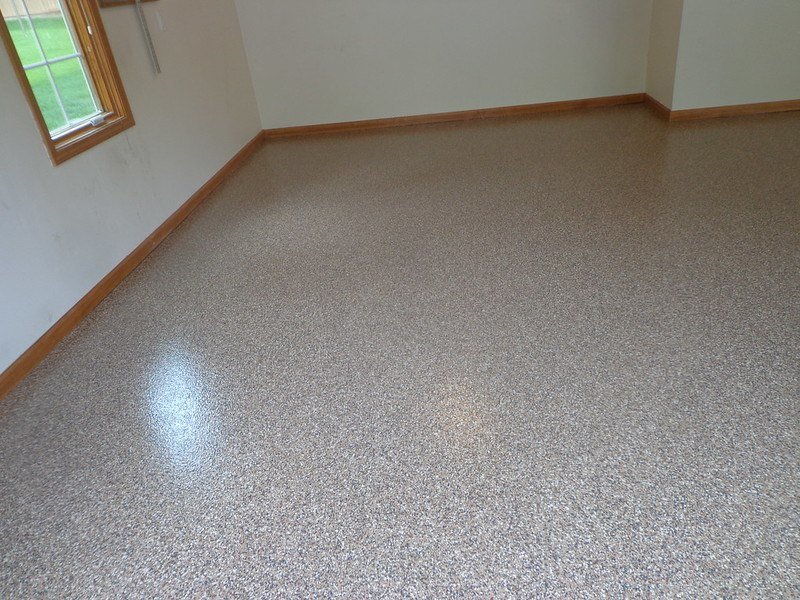
image - How is Epoxy Coating Made?
How is Epoxy Coating Made?

Steps for Installation of an Epoxy Floor Coating

You do not need any professional workers to install it; you can easily install it by yourself without any hassle. Here is the list of steps:

1. Cleaning the Floor

To make the floor ideal for epoxy coating, the first thing is to clear the furniture and other items from the floor and then clean it properly.

See if there are any stains present on the floor, if there are any then you have to clean that. There are Concrete cleaning products available in the markets for tougher stains such as oil stains, grease, and other conditions.

Use the product and a stiff nylon bristle brush to remove stubborn stains. Another thing to remember is that there should be no moisture. If there is moisture present then that area should be properly treated for best results.


Read Also:

  • What Is Epoxy Flooring? Is It Really Worth the Cost?
  • What Are the Benefits of Epoxy Garage Floor?
  • Epoxy Floor Coatings – All You Need to Know
  • What Are the Benefits of Epoxy Floor?

2. Preparing the Floor Surface

The next step is the repairing of the floor. If there are any chips or cracks present on the floor then you need to repair them. Level out the surface with the help of a self-leveling sealer.

Also, acid etches the concrete which will increase the surface roughness, and then the epoxy coating will have a good bond to the concrete. Be sure that the surface is thoroughly dried before applying the base coat application.

3. Base Coat Application

Once the whole surface is well prepared for coating then you have to apply the base coat. Make sure there is no dust present on the floor. You have to tape the areas where you do not want base coat-like walls.

Now start mixing the proper proportions of coating and hardener. Follow the instructions and be careful while mixing the product. Start applying and use a paint roller for a smooth finish.

4. Adding Decorative Chips

Make sure that there are no bubbles present and then apply decorative flakes or chips to the flooring. To spread chips on the floor uniformly, throw them upwards toward the ceiling. Apply the flakes to the flour until you achieve the result that you desire.

5. Applying the Top Coat

The last step is to apply an epoxy finisher. It is applied in the same manner as the base coat. You can add anti-slip abrasives such as aluminum oxide powder to make your surface less slippery. Let the coat dry for 24hours and then apply Acetone or MEK to clean up any spills.

Conclusion:

It is really easy to install an Epoxy floor without any professional help. You have to clean the floor thoroughly and apply then apply the mixture. Have a perfect and attractive floor with just a few steps.

Remember safety comes first so use protective equipment. Decorate your floor with chips or flakes and have your little perfect space. You can also connect us at https://www.a1epoxyflooring.com/melbourne/ for any expert help.

Total
2
Shares
Share 0
Tweet 0
Pin it 2
Share 0
Share 0
Perla Irish

Perla Irish, who is more familiarly known as Irish, is the Content Manager at Dreamlandsdesign.com. She loves following trends around home and garden, interior design, and digital marketing. Through this blog, Irish wants to share information and help readers solve the problems they are experiencing.

Related Topics
  • coat
  • coating
  • epoxy
  • floor
  • surface
Previous Article
featured image - Does Fencing Add Value to Your House

Does Fencing Add Value to Your House?

  • Perla Irish
  • June 12, 2021
View Post
Next Article
featured image - Do Concrete Cutting Machinery Cut Through Concrete

Do Concrete Cutting Machinery Cut Through Concrete?

  • Perla Irish
  • June 12, 2021
View Post

Subscribe

Subscribe now to our newsletter

You May Also Like
Switching to LED bulbs can boost home efficiency easily.
View Post

Energy Heroes – 6 Genius Hacks to Make Your Home More Energy Efficient

  • July 9, 2025
Anti-fatigue mats cushion feet and support balance, helping seniors stay active and independent.
View Post

Why Seniors Should Consider Anti-Fatigue Mats at Home

  • July 7, 2025
Outdoor patio with natural flagstone pavers, surrounded by lush greenery and bathed in soft sunlight, highlighting a rustic garden setting.
View Post

Flagstone Pavers – A Natural Choice for Timeless Outdoor Beauty

  • June 30, 2025
Professional commercial movers save time, money, and reduce risks better than DIY options.
View Post

Commercial Moving Services vs. DIY: What’s Better for Your Business?

  • June 27, 2025
Digital dashboard showing HOA management tools with calendars, documents, chats, and board members collaborating around a table in a suburban neighborhood.
View Post

How Anyhoa is Simplifying HOA Board Management for Communities

  • June 26, 2025
Transform traditional interiors into modern spaces.
View Post

How to Reinvent Classic Styles for Today’s Home

  • June 24, 2025
Close-up of a clean gutter system on a house with clear water flowing smoothly.
View Post

When to Repair vs. Replace Your Gutters

  • June 19, 2025
Bright modern kitchen with textured white oak cabinets, light speckled quartz countertops, and soft, diffused ambient lighting during a cloudy afternoon, showcasing a minimalist design with a farmhouse sink and subway tile backsplash.
View Post

Light Warm and Luxurious: The Rise of White Oak Kitchen Cabinets in Kitchen Design

  • June 19, 2025
  • About Us
  • Privacy Policy
  • Terms of Use
  • Disclosure
  • Sitemap
  • Contact Us

Input your search keywords and press Enter.