Table of Contents Show
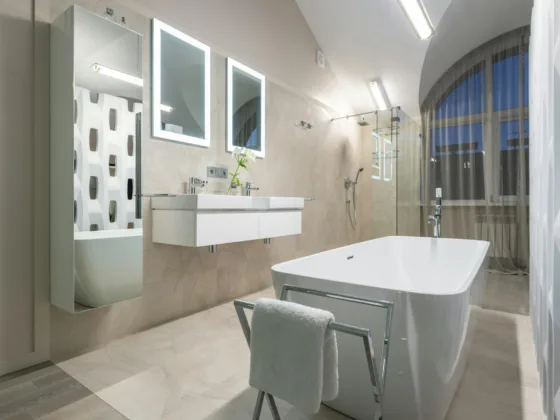
Want your driveway or patio to look modern and sophisticated? If so, then you should definitely consider installing honed concrete. Honed concrete is a type of concrete that’s externally polished to achieve a smooth, mirror-like finish.
Because of its looks, honed concrete is taking over modern homes and give them a major boost in curb appeal. Honed concrete is quite similar to exposed aggregate. However, the surface is grinded, cut, and polished instead of being pressure washed to achieve that smooth finish honed concrete is known for.

There are plenty of advantages to installing honed concrete. Aside from its visual appeal, honed concrete is hard-wearing and is able to maintain its colour and style for many years.
This makes honed concrete ideal for patios, verandas, poolsides, and other surfaces where you want an attractive flooring to stand out. When sealed properly, it’s extremely stain-resistant and hard-wearing. You won’t have to worry about mould growth and maintenance is relatively hassle-free.
If you’re interested in installing honed concrete on your property, consider these 5 tips from Fluid Concrete to ensure you get the desired finish that you’re looking for.
Read Also:
Source a Reputable Honed Concrete Installer
Laying down honed concrete requires a bit of skill and experience. For this reason, you want to work with a reputable honed concrete installer that is well-versed at executing this type of project.
This helps prevent issues from happening down the line and ensures that you’re getting high quality honed concrete that’s built to last.
We recommend checking out the company’s portfolio to get a good idea of their work and see if it meets your expectations.
A reputable honed concrete installer will be proud to showcase their projects and offer you plenty of options in terms of your desired finish and aggregate selection.
Site Preparation
Prior to installing honed concrete, the site will need to be prepared. This takes a lot of work and is crucial to successfully installing honed concrete. The installers will survey the site to ensure the surface is suitable enough and is ready to accept concrete work.
From there, the substrate is compacted and the excavation begins. The floorboards are removed one by one and the floor height is marked out with a line for reference.
The next step is to pour a layer of sand on the bottom to drive out moisture and is then topped off with a sheet of plastic. A wire mesh is then applied to increase the strength and rigidity of the concrete to help reduce cracking and shifting.
Pouring the Concrete
The general recommendation is to pour concrete during good weather conditions to avoid rapid drying and cracking. The concrete mix is poured carefully and levelled out using afloat. Depending on how large the site is, pouring the concrete mix can take anywhere from 2-3 days.
It’s the longest waiting period out of the whole project and patience is the key to getting it right. Once the concrete has cured, the concrete grinding can begin.
Polishing the Concrete
This part of the installation process is where honed concrete comes to life. Polishing the concrete is what reveals the stones and the aggregates and is done by using a planetary grinder.
Slowly but surely, the workers will start grinding the concrete from top to bottom, paying close attention to walls and avoid bumping them as much as possible.
If done incorrectly, the lower part of the walls will have visible nicks and scratches. Once the grinding is finished, a transitional hybrid tool is used to remove the tool marks left on the surface as a result of all the polishing.
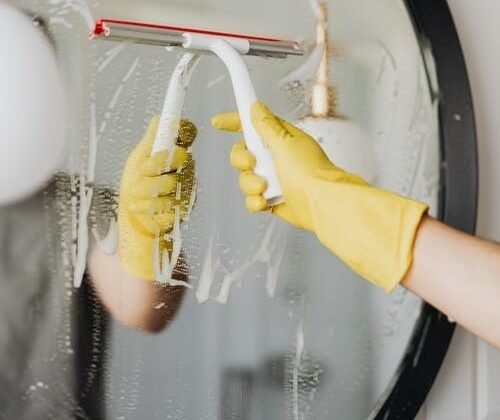
Sealing
Sealing honed concrete is perhaps the most crucial step of the installation process. Since honed concrete is porous by nature, sealing is absolutely necessary to keep dirt, oil, and other contaminants from ruining its finish.
Surface coatings work great when applied to honed concrete as it provides excellent resistance to stains and is visually appealing. Coatings include urethane, epoxy, and acrylic. Even non-slip granules can be added to a coating to help boost its slip ratings.
When sealing honed concrete, it is critical that nothing touches the area. Even the smallest of elements can ruin the finish and the whole sealing process will have to be repeated. The good news is it only takes 30 minutes for the seal to dry. Any windows are blacked out to ensure that the sealed surfaces dry out evenly from top to bottom.
Honed concrete installation is not for the inexperienced and it requires skill and precision to achieve. These 5 tips are the fundamentals of installing honed concrete and having the right team with you is an absolute must. Make sure to contact a reliable honed concrete installer so you can achieve the desired look you’re aiming for.