Table of Contents Show
The effectiveness of a wet room’s drainage system hinges on the correct installation of the linear drain. This guide provides a thorough walkthrough to help you install your linear drain with precision for the best possible performance.
Pre-Installation Planning
Embarking on the installation of a linear drain requires meticulous pre-installation planning to ensure every step unfolds without a hitch. This phase is as crucial as the installation itself, setting the stage for a successful and efficient setup.
Understanding Your Components:
Start by identifying all the parts of your linear drain kit. Lay out the channel, adjustable legs, waste trap, and any additional components that come with your specific model. It’s essential to understand how these pieces fit together and their role in the overall system.
Assessing Your Space:
Evaluate the area where the drain will be installed. Consider the size and shape of your wet room, the existing plumbing layout, and how the new drain will integrate with these elements. This assessment will help you determine any potential challenges, such as the need for additional piping or adjustments to the floor structure.
Slope Calculation:
The efficiency of a linear drain is dependent on the correct slope of the shower floor towards it. Calculate the necessary gradient to ensure water will flow naturally to the drain. This may involve consulting building codes or a professional to understand the required specifications for your area.
Floor Preparation:
Inspect the condition of the shower floor where the drain will be fitted. It should be clean, level, and free of any debris. If you’re working with a pre-existing surface, make any necessary repairs to ensure a flat base for the drain installation.
Drain Positioning:
Decide on the exact location for the drain within the wet room. The positioning will affect both the functionality and the aesthetics of your space. Whether it’s along the shower’s edge or centrally located, the placement should complement the room’s design and provide the most efficient drainage.
Gathering Tools and Materials:
Compile all the tools and materials you’ll need for the job, including the screed, waterproofing membrane, sealing materials, and any specific tools required for your drain model. Having everything on hand before you begin will streamline the installation process.
By taking the time for thorough pre-installation planning, you’re laying the groundwork for an impeccable and foolproof linear drain installation. This preparatory step is the key to a wet room that not only looks great but functions flawlessly, providing peace of mind and a foundation for lasting quality.
Gathering the Right Tools and Materials
A seamless installation of a linear shower drain begins with the careful selection of the appropriate tools and materials. Assembling everything you need before starting the job is essential for efficiency and to avoid interruptions. Here is a comprehensive checklist to prepare for the installation:
Tools Checklist:
- Measuring tape for precise measurements
- Level to ensure your shower tray and drain are perfectly horizontal
- Marker or pencil to mark the floor and walls for cutting and placement
- Screed or a similar product for creating a level base
- Trowel for applying the screed and waterproofing materials
- Waterproofing membrane to prevent leaks
- Pipe cutter or saw for adjusting the waste pipe if necessary
- Silicone sealant and caulking gun for sealing the joints
- Protective gloves to handle materials safely
Materials Checklist:
- The linear drain kit, which should include the channel, adjustable legs, and waste trap
- Sealing membrane to reinforce the waterproofing
- Liquid waterproof membrane for the initial waterproofing layer
- Flexible sanitary silicone to match the tile and grout for the final seal
During installation, it’s vital to protect the drain’s grating. Keep the protective foil on until you’ve completed all other work. This not only protects the finish from scratches or damage but also prevents construction debris from entering the drain.
Read Also :
For those seeking the highest quality in both product and performance, the linear drain models from wetroomsdesign.co.uk are recommended.
The installation instructions provided are tailored to these premium models, ensuring that users can follow a clear, step-by-step process to achieve a perfect fit and optimal functionality.
Using these trusted models as a basis for the installation guide ensures that every step is calibrated for the specific features and benefits that wetroomsdesign.co.uk’s shower trays offer.
Step-by-Step Installation Guide
- Setting the Level: Determine the final level of your shower floor, marking it clearly to indicate where the drain will be fitted, accounting for the appropriate slope.
- Connecting the Drain: Fit the channel to your existing drainage system, adjusting the height with the adjustable legs to ensure proper alignment with the floor surface.
- Preparing the Base: Fill the area beneath and around the channel with a screed to create a stable base that is flush with the drain flange.
- Applying Waterproofing: Use a liquid waterproofing membrane across the flange and surrounding area to establish an initial waterproof barrier.
- Membrane Application: While the first membrane layer is still tacky, lay down the sealing membrane for additional protection against water ingress.
- Second Membrane Layer: Apply another layer of the liquid waterproofing membrane over the entire area to ensure comprehensive coverage.
- Finishing the Surface: After the waterproofing membrane has cured, proceed with tiling the shower floor. Complete the installation by sealing the edges around the drain with a flexible, color-matched sanitary silicone.
Maintenance and Care
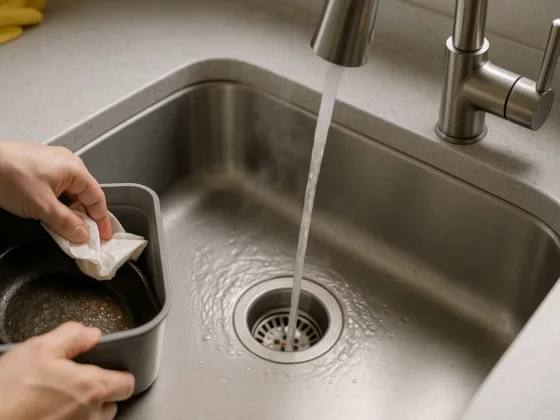
After the successful installation of a linear drain, diligent maintenance is key to preserving its efficiency and sleek appearance. Regular cleaning should be an integral part of your bathroom routine.
This involves removing any debris, such as hair or soap residue, that can accumulate over time and potentially clog the drain. Using a mild, non-abrasive cleaner will keep the drain looking new without damaging the material.
Occasional inspections are also essential. Checking for any signs of wear and tear, such as loosening components or a deteriorating seal, can help catch minor issues before they escalate into major problems. It’s advisable to inspect the drain whenever you clean your bathroom thoroughly, which should ideally be every few weeks.
For those drains installed in areas with hard water, be mindful of limescale buildup. Regularly treating the drain with a limescale remover will keep it functioning smoothly and prevent blockages.
If you have a removable grate, take the time to soak it in a limescale removal solution to keep it pristine and functioning properly.
The care you put into maintaining your linear drain will ensure it continues to perform at its best, offering reliable drainage and contributing to the overall hygiene and comfort of your wet room for years to come.
Conclusion
Ensuring the proper installation of your linear drain is pivotal for the functionality and longevity of your wet room. By taking the time to install your linear drain correctly, you will benefit from an efficient, sleek drainage system that complements your wet room design.
Regular maintenance will keep it performing at its best, creating a wet room that is as practical as it is sophisticated.