Table of Contents Show
The desire to refresh and rejuvenate your living space can stem from various motivations. For many, it’s the aspiration to cultivate a more inviting and pleasant environment for themselves and their loved ones. Undeniably, owning a comfortable and aesthetically pleasing home not only enhances your living experience but also boosts your confidence when it comes to welcoming guests.
Why Renovate?
Additionally, embarking on a renovation project could be an advantageous move if you aim to put your house on the market in the near future. As anyone with experience in the real estate industry would affirm, tasteful upgrades can significantly inflate the value of your property.
However, it’s crucial to note that without careful planning and budgeting, home renovations can quickly become a costly affair. As such, many homeowners view the renovation process as an extra expenditure. However, only a handful are aware of the options available for financing these upgrades.
You might find it interesting that there exist clever renovation ideas designed specifically to show you how to renovate a house with no money or on a very limited budget (under 1000 AED/Dollar/Pounds).
Deciding Between Renovation and Demolition
Before you start allocating funds towards this project, it’s essential that you evaluate all factors involved. This will help you make an informed decision about whether to renovate or demolish parts of your house. It’s important to remember that sometimes, the current condition of your home may not be conducive for renovations. In such instances, demolition followed by rebuilding might be the most beneficial approach.
On the other hand, if you determine that renovation is the more suitable path, then the following section of this article will be immensely beneficial to you. We will delve into several strategies that can help you implement impactful renovations at a minimal cost. So, let’s uncover these budget-friendly ideas together!
21 Budget-Friendly Tips on How to Renovate a House With No Money
The journey of home renovation can be long and challenging, especially when you’re working with a tight budget. However, it doesn’t mean that it’s impossible. We’ll start by focusing on one of the most visible elements of your home – the front door.
1. Start with the Front Door

- Identification of Needs: Before you start, determine what needs to be done to improve your front door. Does it need a new coat of paint or a complete makeover?
- Engage with Professionals: Consider hiring a reputable home builder who understands your vision and respects your budget. They can guide you on cost-effective materials and design choices.
Remember, the front door is one of the first things that visitors see when they come to your home. Therefore, it has to be as appealing as possible.
- Paint vs Renovation: While painting the front door is an affordable option, renovating it can have long-term benefits. A newly renovated door not only enhances the aesthetic appeal but also improves functionality and security.
- Boost Resale Value: Keep in mind that an attractive front door can increase the resale value of your house significantly. It makes a strong impression on potential buyers and sets the tone for what they might expect inside.
- Choose Cost-Effective Materials: Opting for a customized or bespoke model made from quality wood or faux wood can cut costs without compromising on style or durability. This not only gives your entrance a fresh look but also increases the lifespan of your property.
By starting with the front door, you set a precedent for the rest of your home renovation journey. It’s about making smart, budget-friendly decisions that amplify beauty and value at every turn.
2. Opt for Full-Length Curtains

When considering a budget-friendly home makeover, full-length curtains are a wonderful choice. These aren’t your standard window treatments; they are typically 0.5 mm longer than standard curtains. This slight increase in length may seem insignificant, but it can have a transformative impact on your living space.
Here are a few reasons why you should consider full-length curtains:
- Atmosphere Enhancement: Full-length curtains can create a fantastic and positive atmosphere in any room. They have the power to add an element of elegance and sophistication, making your space feel more inviting and cozy.
- Versatility: Full-length curtains come in a wide range of colors, textures, and materials to suit any decor style. So whether your home has a traditional or modern theme, there’s bound to be a set of full-length curtains that match perfectly.
Note: While selecting the color of your curtains, it’s recommended to avoid black. Although black can add a touch of boldness and drama to your room, it also absorbs more heat which could make your room warmer.
- Customization: One of the best things about full-length curtains is their potential for customization. Whether you’re a fan of subtle patterns or bold prints, you can personalize your curtains to reflect your unique style.
Full-length curtains offer an affordable yet stylish solution for revamping your home decor. Not only do they enhance the aesthetic appeal of your rooms, but they also provide functionality by offering privacy and controlling light.
3. Reinvent Your Kitchen with Tiles

One of the most effective ways to breathe new life into your kitchen is by changing up the worktop and choosing tiles as your material of choice.
Why Choose Tiles?
Tiles offer a myriad of benefits:
- Ease of Maintenance: Tiles are notoriously easy to clean, making them an ideal choice for an area that frequently deals with spills and splatters. Opt for a smart, tiled worktop that requires minimal cleaning and care so you can focus more on cooking up delicious meals.
- Versatility: The variety of colors, textures, and patterns available in tiles means you can customize your kitchen to your heart’s content. You’re not restricted to traditional designs; tiles allow you an extensive range of creative freedom.
- Durability: Tiles are known for their hard-wearing nature, making them a long-lasting choice for a kitchen worktop. They resist stains, scratches, and high temperatures, ensuring they maintain their appeal over time.
Laminate as an Alternative
If you’re not too keen on dealing with tile cutting, consider using laminate to build your worktop. Laminate is a cost-effective material that still exudes a sense of luxury. With the right design choices, it can create tiles that look strikingly similar to high-cost alternatives.
Pro Tip: To make your kitchen appear brighter and more welcoming, consider installing windows near the worktop. This will allow natural light to flood in – creating an uplifting atmosphere while also enhancing visibility during meal prep.
Remember: renovating kitchen tiles can be a DIY project if you’re comfortable handling tools like saw blades and equipment. If this is the case, ensure you have all the necessary items at hand – check out this collection of cutting accessories for everything you might need.
Whether you choose tiles or laminate for your kitchen worktop, both options offer a fantastic way to refresh your space and make it more functional and stylish. Consider your lifestyle, budget, and aesthetic preferences when making your decision.
4. Change Your Rug for a Fresh Look

Giving your home a fresh look can be as simple as changing your rug. This small change can make a significant difference in the overall appearance and feel of your space.
- Custom and Bespoke Rugs: For those who prefer a personalized touch, you could consider getting a custom and bespoke rug designed. This allows you to choose the size, shape, pattern, and color that best suits your tastes and complements your home decor. Not only does it make your space feel more comfortable, but it also adds a lively splash of color or pattern that can tie the room together.
- Texture and Finish Options: When choosing a rug, don’t forget to take into account its texture and finish. A rug’s texture can greatly influence how it feels underfoot – some people prefer the softness of shag rugs, while others might prefer the sleekness of flatweave rugs. Similarly, finishes can range from glossy to matte depending on the material used.
- Color Samples: If you’re unsure about which color would work best for your space, most rug retailers provide color samples. This way, you can bring them home and see how they look under different lighting conditions before making a decision.
Remember: The right rug not only enhances your room’s aesthetic appeal but also provides comfort and warmth.
- Carpet Cleaners: If you have pets at home, investing in a good carpet cleaner is crucial. A carpet cleaner can help get rid of pet urine stains and keep your rugs looking clean and fresh.
One popular trend these days is Bohemian-style rugs. These rugs feature vibrant colors and bold patterns that can add a unique touch to your interiors. Whether you prefer traditional or contemporary designs, there’s a Bohemian rug out there to suit your style.
5. Hang Amazing Chic Shutters: A Step Toward an Elegant Home

Transforming your living space into a chic and elegant home isn’t as daunting as it might seem. One simple yet effective way to achieve this is by installing stylish shutters on your windows.
Not only do these shutters enhance the visual appeal of your interiors, but they also offer an excellent solution for privacy concerns without compromising on natural light.
Collaborate with a trusted home or house builder to install small shutters that can fit perfectly with your window dimensions. These aren’t just ordinary shutters; they are plantation shutters. Renowned for their wide louvers, plantation shutters give you complete control over privacy and light filtration.
Interesting Fact: Plantation shutters originated in the southern states of the U.S., hence the name. They were designed to provide maximum ventilation while blocking out the scorching sun, making them ideal for warm climates.
Beyond installing shutters, you can also consider making changes to your window treatments to further enhance your space.
Light voile drapes make an excellent addition if you wish to add a touch of softness and romance to your room. These drapes filter sunlight gently, casting a warm and inviting glow across your space.
If you’re feeling adventurous, you could even do away with conventional window treatments altogether! Opt for innovative window treatment alternatives such as frosted glass or stained glass panels that can make a bold statement while still serving practical purposes.
Remember, when it comes to interior design, it’s all about balancing aesthetics with functionality. And adding chic shutters can be a great starting point on this exciting journey!
6. Time to Upgrade the Shower System

When it comes to home improvements, one area that’s often overlooked is the shower system. If your shower pressure feels more like a drizzle than a downpour, it might be time for an upgrade.
- Low water pressure can hamper your shower experience, leaving you feeling less clean and refreshed. This issue is common in older homes or those with outdated plumbing systems.
- Fortunately, improving water pressure in your shower isn’t as daunting as it may appear. One solution is installing a pump to increase the pressure. Pumps work by boosting the flow of water, thus enhancing the overall shower experience.
- Along with a pressure-boosting pump, consider installing a thermostatic shower valve as well. These valves regulate water temperature, ensuring a consistent and comfortable shower experience despite any fluctuations in your home’s hot or cold water supply.
Interesting Fact: The term ‘thermostatic’ refers to something (in this case, a valve) that keeps the temperature constant. It’s derived from ‘thermostat’, a device that maintains desired temperature by controlling heating or cooling systems.
The best part? These upgrades won’t break the bank! Believe it or not, you can make these enhancements to your shower system for less than 500 bucks. That’s a small investment considering the improved comfort and potential increase in property value.
Remember, even seemingly minor home improvements can drastically improve your living space’s functionality and aesthetic appeal. So why wait? It’s time to make your shower system work for you!
7. Install Alcove Shelving

Alcove shelving is a fantastic way to utilize the underused spaces in your home. They are perfect for creating additional storage without consuming valuable floor space. These shelves can be customized to fit your needs and can be an excellent addition to any room in your house.
- Organize Your Content: Alcove shelves provide an effective solution for de-cluttering your living space. Whether you want to display your favorite books, picture frames, or decorative items, these shelves help to tailor-make and fit the content in an organized manner.
- Create Your Own Library System: Transform your alcove into a mini-library! With the right shelving system, you can organize your books by author, genre, or even color. It’s a super-efficient way to create a personal library that reflects your reading habits and preferences.
- Versatile Design Options: Alcove shelves can be designed to match any interior decor style. From sleek modern designs to rustic wooden finishes, there are countless options available. You can also choose from fixed or adjustable shelving systems depending on what you plan to store.
- Easy Installation: Installing alcove shelves is a relatively straightforward process that even DIY beginners can tackle. It only requires some basic tools and materials – and of course, the right measurements!
Interesting Fact: The term ‘alcove’ originated from the Arabic word ‘al-kubba,’ which means dome or vaulted chamber.
Despite the numerous benefits they offer, alcove shelves won’t burn a hole in your pocket. You can have them installed for less than $500 – making it a cost-effective solution for maximizing storage while enhancing the aesthetic appeal of your home.
Remember: Every bit of space in your home counts! With alcove shelving, you can make use of those awkward spaces and turn them into functional and stylish storage areas. Don’t wait any longer – it’s time to get organized with alcove shelving!
8. Incorporate a Skylight

Brighten up Your Home with a Skylight
An excellent way to infuse natural light into the darker corners of your home is by installing a skylight. The Velux skylight or new flat-room system are popular choices that can transform your space and create an airy, open feel.
Why Install a Skylight?
- Natural Light: A skylight offers the perfect solution to brighten up dark, gloomy rooms or areas in your home that lack windows.
- Energy Efficiency: By allowing more sunlight into your home, a skylight can help reduce the need for artificial lighting during daytime hours, potentially saving energy and lowering your electricity bills.
- Aesthetics: Besides being functional, skylights add an architectural element that can enhance the overall aesthetics and value of your home.
- Cost-Effective Solution: Skylights are also relatively inexpensive. If you hire a professional home builder, the cost for installation can be less than $500. However, it’s crucial to remember that costs may vary based on factors such as size, type of skylight, and any additional features.
Interesting Fact: Skylights have been used in architecture since ancient times. The Romans, for instance, used early versions of skylights in their bathhouses to allow more natural light in.
So if you’re looking for an affordable and effective way to bring more light into your home while adding an element of style, consider installing a skylight.
9. Restore Old Tiles to Elevate Your Home’s Appeal

When the tiles in your house begin to show their age, they not only lose their visual appeal but also their functionality. This is a tell-tale sign that it’s time to breathe new life into your floor and restore it to its former glory.
There are two primary ways you can go about this restoration process:
- Replacing the Floor: If the tiles are significantly damaged or outdated, you may want to consider replacing them altogether. This will give you an opportunity to update the look of your home and choose a flooring option that better suits your current style and needs.
- High-End Cleaning Services: If your tiles are still in decent condition but just need a bit of a refresh, professional cleaning services can work wonders. These experts have specialized tools and techniques to deep clean your tiles and grout, removing any dirt, stains, or mildew that has built up over time.
If you’re considering replacing the floor, remember that this task will require some heavy-duty tools. In particular, a high-quality tile saw is essential for cutting through tough materials and ensuring precise cuts for a professional-looking finish.
However, if you prefer a more hands-on approach, you could opt to deep clean the tiles yourself. Here’s a simple step-by-step guide:
- Start with sweeping or vacuuming your floor thoroughly.
- Apply a mixture of warm water and mild detergent.
- Scrub the surface using a stiff brush.
- Rinse thoroughly and dry.
Remember: Tile restoration is not just about improving aesthetics—it also helps maintain the durability and longevity of your floors. Furthermore, well-maintained floors can add value to your home if you ever decide to sell.
Interesting Fact: Tiles have been used as a flooring material for thousands of years. Ancient civilizations like the Egyptians and Romans utilized tiles in their architecture for their durability and aesthetic appeal.
So whether you choose to replace your old tiles or give them a deep clean, restoring your floor can significantly enhance the look and feel of your home.
10. Upgrade to Sash Windows

Upgrading your home’s windows to sash windows can bring about a significant improvement to both the performance and aesthetic quality of your property.
Sash windows, also known as hung sash windows, consist of one or more movable panels or “sashes” that form a frame to hold panes of glass. These windows are not only beautiful but also functional, providing superior ventilation and easy cleaning.
Here are some key reasons why you might consider sash windows for your home:
- Improved Performance: Sash windows are designed for optimal airflow. The upper and lower sashes can be opened simultaneously, allowing warm air to escape at the top while drawing in cooler air at the bottom.
- Increased Visibility: With their large, often floor-to-ceiling design, sash windows allow for an abundance of natural light to permeate your home. This can enhance your living space’s overall ambiance and even save on lighting costs during the daytime.
- Added Aesthetic Appeal: Sash windows offer a classic look that can complement many architectural styles, from traditional Georgian homes to modern minimalist designs.
To further improve the quality of your indoor environment, you can also opt for professional sealing. This service typically involves applying a sealant around the window frames to prevent drafts, noise intrusion, and dirt accumulation. It’s like bringing the comfort and tranquility of a 5-star hotel experience into your own home!
Interesting Fact: The origins of sash windows date back to the 16th century in England. They became particularly popular during the Georgian and Victorian eras due to their elegant design and practical functionality.
Remember: Investing in quality sash windows not only enhances your day-to-day living experience but may also increase your property’s overall value. After all, who wouldn’t appreciate beautiful, efficient, and easy-to-maintain windows?
11. Enhance Your Living Experience with a New Sofa

Upgrading your living room furniture, especially the centerpiece sofa, can make a huge difference in the overall comfort and aesthetics of your home. Today’s sofas are designed with both style and functionality in mind.
- Experience Luxury: Modern-day sofas are not just pieces of furniture; they’re a statement. Lightweight and crafted to perfection, these sofas can make you feel like royalty right in your own living room. Some top-end furniture stores even offer bed-shaped sofas, providing you with ultimate relaxation without compromising on style.
- Affordable Renewal: If purchasing a brand-new sofa seems too much for your budget, consider opting for new upholstery instead. This relatively small investment, typically ranging from 300 to 500 bucks, can breathe new life into your old sofa, giving it an entirely new look and feel.
- Alternative Investment: Should you already own a stylish sofa that perfectly meets your needs, consider investing in a quality mattress instead. A comfortable and supportive mattress is crucial for good sleep health, making it an equally important investment.
Before making any significant investments, it’s always wise to conduct thorough research online. Look for customer reviews and comparisons to ensure you’re getting the best value for your money.
Interesting Fact: The term ‘sofa’ comes from the Arabic word ‘suffah’, which originally referred to a wooden bench covered in cushions and blankets.
Remember: Investing in quality living room furniture or mattresses not only enhances your day-to-day living experience but also contributes positively to the overall aesthetic appeal of your home.
12. Opt for Smart Appliances

Transform your living space into a modern, efficient home by opting for smart appliances. These devices not only add convenience to your daily life but also contribute to the overall aesthetics of your home, thereby increasing its Wow factor.
Examples of Smart Appliances
- OTG (Oven, Toaster, Grill): A versatile kitchen appliance that’s perfect for baking, grilling, and toasting. It comes with multiple cooking modes and temperature controls, allowing you to prepare a variety of dishes.
- Chimneys: A smart kitchen chimney ensures a smoke-free and odor-free cooking experience. Some advanced models even come with auto-cleaning features and touch control panels.
- Fridge-Freezers: Modern fridge-freezers offer a twin cooling system that allows the freezer and refrigerator components to be controlled and cooled independently. This feature helps maintain optimal humidity levels, keeping your food fresh for longer periods.
Interesting Fact: Did you know the first refrigerators for home use were invented in 1913?
Besides these, there are other smart appliances like washing machines with Wi-Fi connectivity, dishwashers with automatic detergent dispensers, and robotic vacuum cleaners that can be programmed to clean at specific times.
Additional Features to Consider
In addition to basic functionalities, many modern appliances come equipped with extra features for added convenience:
- An ice cube dispenser and crusher with a built-in filter can be an excellent addition to your fridge freezer.
- Look for appliances that offer free UK mainland delivery to save on shipping costs.
Before making a purchase decision, remember to read customer reviews and compare prices online. This will ensure you get the best return on your investment.
Remember: Opting for smart appliances not only enhances functionality but also adds an element of sophistication to your home decor.
13. Use a Stylish Stair Runner

Stairs are an often overlooked part of your home, but with a little bit of creativity, they can become a stunning design element. A simple and effective way to do this is by using a stylish stair runner. With its ability to update the stairs, it makes them look cool and smart at the same time.
A stair runner is essentially a carpet for your stairs. But unlike regular carpets, stair runners don’t cover the entire staircase – they leave some space on each side, allowing the beauty of your stairs to shine through.
Here’s how you can use a stair runner to enhance your home:
- Choose the Right Style: There are countless styles of stair runners available in the market today. You can go for something traditional like Persian designs or opt for something modern like geometric patterns. The choice depends entirely on your personal style and the overall decor of your home.
- Consider the Material: Stair runners come in various materials including wool, nylon, polyester, and more. Wool is durable and soft but can be expensive, while synthetic materials like nylon and polyester are cheaper and easier to clean.
- Get Professional Help: Installing a stair runner can be quite tricky. It’s recommended to hire a professional to ensure that it’s fitted perfectly and securely. A poorly installed runner can lead to accidents on the stairs.
- Maintain Your Runner: Regular vacuuming will keep your runner looking fresh and new. You should also consider getting it professionally cleaned once or twice a year.
Interesting Fact: Did you know that in addition to aesthetic appeal, stair runners also provide safety? They offer better grip than bare stairs, reducing chances of slipping or falling.
Using a stylish stair runner is an excellent way to combine functionality and design. Not only does it add a touch of elegance to your home, but it also provides a safer and more comfortable surface for you and your family to walk on.
14. Elevate Your Space with Wall Panels

Adding wall panels to your interior can significantly enhance the aesthetic appeal and overall atmosphere of your home. They offer an excellent way to introduce texture, depth, and character to otherwise bland rooms.
Benefits of Wall Panels
Here are a few reasons why you might want to consider installing wall panels:
- Visual Interest: Wall panels can transform a tasteless room into a space full of charm and personality. From intricate wainscoting to minimalistic shiplap, there’s a style for every taste.
- Durability: Unlike paint or wallpaper, wall panels are resistant to wear and tear. They’re an excellent option for high-traffic areas like hallways and living rooms.
- Insulation: Wall panels provide an additional layer of insulation, helping keep your home warm in the winter and cool in the summer.
Choosing the Right Wall Panels
When selecting wall panels, consider the following factors:
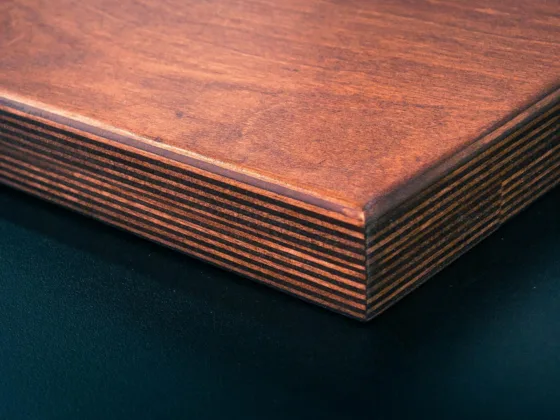
- Material: Wall panels come in various materials, including wood, vinyl, MDF (medium-density fibreboard), and PVC (polyvinyl chloride). Wood offers a classic look while synthetic materials are often more budget-friendly.
- Style: The style of wall paneling you choose should complement the rest of your home decor. For a traditional look, opt for beadboard or wainscoting. For something more modern, consider sleek acrylic or glass panels.
- Color: Light-colored wall panels can make a room feel larger and brighter while darker tones add drama and sophistication.
Interesting Fact: Did you know that wall paneling dates back to the late 15th century? It was originally used as insulation in cold stone buildings but quickly became popular for its decorative properties.
Remember – adding wall panels is not just about improving aesthetics; it’s also about enhancing the functionality and comfort of your home. So take your time to research, plan, and choose the right panels for your space.
15. Use Glass Panels for a Sleek and Sophisticated Look

High-gloss glass panels represent a modern, stylish alternative to traditional bathroom materials, such as tiles. Not only do they add a touch of elegance to your bathroom area, but they also come with practical benefits that can make your life easier.
Easy to Maintain
One of the key advantages of high-gloss glass panels is their ease of maintenance. Unlike tiles, which have grout lines that can be difficult to clean, glass surfaces are smooth and non-porous. This means that you can simply wipe them down with a damp cloth to keep them looking fresh and clean. No need for scrubbing or using special cleaning products!
Professional Installation
While colored glass can be somewhat pricey, it’s possible to find affordable options with the help of a professional home builder or renovation expert. They possess the necessary knowledge and industry connections to source quality materials at competitive prices. For instance, you may be able to get a panel for $800 or less.
Interesting Fact: Did you know that glass has been used in architecture and interior design since ancient times? It was especially popular in Roman buildings due to its aesthetic appeal and practical properties.
Whether you’re planning a complete bathroom makeover or simply want to update your existing decor, high-gloss glass panels could be an excellent choice. They blend well with various styles, from minimalist modern designs to more traditional settings, providing a unique combination of beauty and functionality.
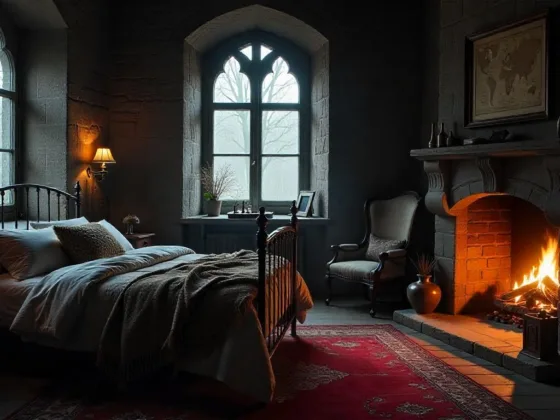
16. Opt for a Fireplace

Adding a fireplace to your living space can create a warm and inviting atmosphere. One of the most cost-effective options is a cast-iron model-based fireplace, which combines functionality with vintage charm.
Why Choose A Cast-Iron Fireplace?
Here are some reasons why a cast-iron fireplace could be your ideal choice:
- Durability: Cast-iron fireplaces are known for their lasting power. They can withstand heat better than other materials and don’t wear out easily.
- Heat Efficiency: These fireplaces ensure efficient heat distribution in your room, making them a practical choice for colder seasons.
- Affordability: Despite their numerous benefits, cast-iron fireplaces come at reasonable prices, making them accessible to homeowners on a budget.
Installation and Maintenance
Once you’ve decided on a cast-iron fireplace, the next steps are installation and maintenance:
- Professional Installation: To ensure safety and efficiency, it’s best to hire professionals for fireplace installation. They have the necessary equipment and expertise to install the fireplace correctly.
- Regular Maintenance: Proper upkeep of your fireplace will prolong its lifespan. This includes regular cleaning to remove ash and soot, as well as periodic inspections to check for any damage or necessary repairs.
Interesting Fact: Did you know that the cast-iron trend dates back to the Victorian era? It was during this time that cast iron started being used extensively in home design due to its durability and aesthetic appeal.
Opting for a cast-iron model-based fireplace can bring both style and comfort to your home. Not only is it an affordable option, but it also offers long-term value due to its durability and efficiency.
17. Restore the Period Cornicing: A Touch of Elegance

Opting for period cornicing can be a fantastic way to bring character and elegance into your home. However, restoring these architectural features requires sound expertise, attention to detail, and lots of patience.
To successfully restore period cornicing, you’ll need to:
1. Inspect the Condition: Start by thoroughly inspecting the existing cornices for any signs of damage or wear. This could include cracks, discoloration, or missing sections. Identifying these issues early on can save time and effort in the long run.
2. Seek Professional Help: Restoring period cornicing is a task that typically requires professional help due to its intricate nature. Trained professionals can recreate the original designs with precision, ensuring that the restored cornices blend seamlessly with the rest of the building.
3. Choose Suitable Materials: The materials used for restoration must match those originally used as closely as possible to maintain authenticity. Commonly used materials include plaster, wood, and resin.
4. Patient Restoration Process: Remember that restoring period cornicing is a delicate process that can’t be rushed. It involves careful removal of damaged areas, meticulous molding and casting of new pieces, and precise installation.
Interesting Fact: Cornices date back to ancient Greece where they were used not just for aesthetic purposes but also to protect buildings from rainfall.
By choosing to restore period cornicing in your home, you’re not only preserving a piece of architectural history but also adding a touch of timeless elegance to your living space.
18. Opt for On-Trend and Creative Carpeting

Revamp your living spaces with a fresh and innovative approach to flooring: creative carpeting.
Tip: Consider hues inspired by ice cream flavors – they’re currently on-trend, emanating positivity and a sense of comfort.
Choosing the Right Material
When it comes to selecting the perfect carpet, consider opting for a wool blend. Not only does this material offer an exquisite balance of softness and durability, but it also adds a touch of luxury to any room.
Why Wool Blend?
- Durability: A wool blend carpet is known for its long-lasting nature, making it an ideal choice for areas with high foot traffic like living rooms or hallways.
- Softness: Despite being durable, wool blend carpets are incredibly soft underfoot—offering a plush texture that amps up the comfort factor.
- Insulation: These carpets provide excellent insulation, both in terms of heat and sound, making your space cozy and peaceful.
Interesting Fact: Wool is naturally flame-resistant, adding an extra layer of safety to your home!
Avoiding Bulkiness
While you may be tempted to go for thicker carpets for their luxurious feel, they can make a room feel smaller and cluttered. Instead, opt for a less bulky option that still offers the plush feel you desire but also helps maintain spatial balance.
By choosing the right carpet – considering both aesthetics and practicality – you can transform your living space into an inviting, stylish area that mirrors your personality while ensuring comfort.
19. Concentrate on Lighting
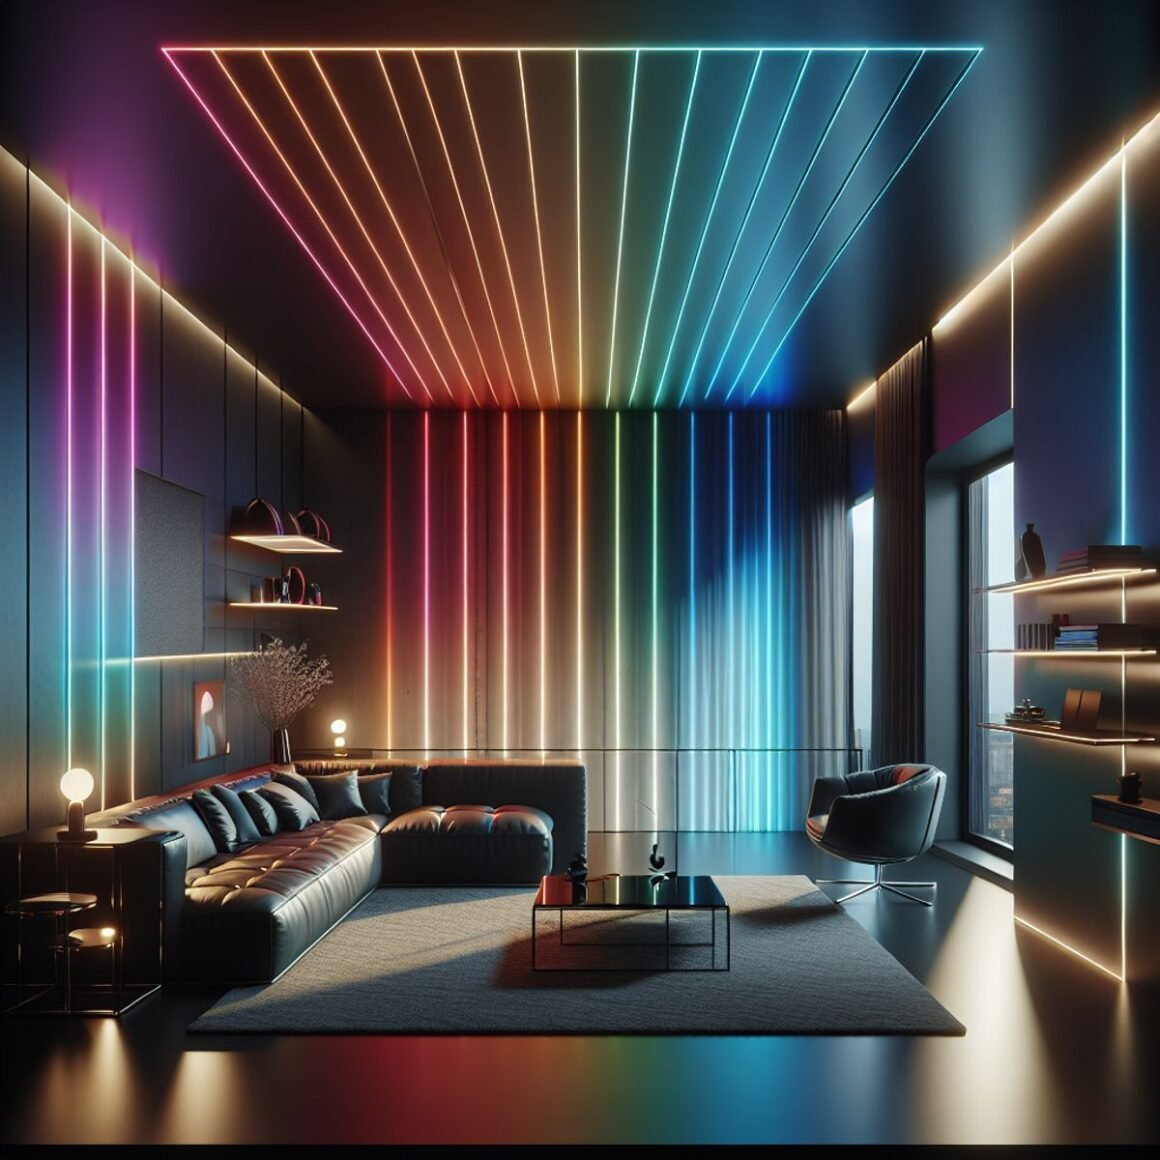
Improving your home doesn’t have to be expensive or labor-intensive. A simple, yet impactful strategy is to focus on the lighting. Not only can this change drastically enhance the ambiance of your space, but it’s also one of the most cost-effective home improvement methods.
One excellent option is to install LED lights. These are energy-efficient and long-lasting, making them both an economical and environmentally friendly choice.
Here’s how you can do it:
- Safety first: Always use a ladder to reach high places while changing lights. Make sure the ladder is sturdy and properly positioned.
- Choose your LED lights: There are various types of LED lights available in the market – from soft white to daylight options.
- Decide on the color scheme: Different color schemes can be chosen based on the mood or occasion you want to create, such as relaxed, vibrant, or festive.
Note: It’s always wise to turn off power at the circuit before changing any light fixtures for safety reasons.
Interesting fact: Did you know that LED lights use at least 75% less energy, and last 25 times longer, than incandescent lighting according to the US Department of Energy?
Remember, altering your lighting setup isn’t just about practicality—it’s also about creating an environment that reflects your personal style and enhances your home’s overall aesthetic appeal.
20. Paint Your House: A Budget-Friendly Home Makeover

Repainting your house or even just a single room can be an effective and affordable way to breathe new life into your home. Not only does it freshen up the overall look, but selecting specific colors can also influence the ambiance and mood of the space.
Here’s a step-by-step process to guide you through this DIY project:
1. Set Your Budget
Before you get started, decide on your budget. This will determine whether you’re painting your entire house or focusing on one or two rooms. Remember, painting a room is much more than just buying paint – also factor in the cost of brushes, rollers, primers, drop cloths, and other supplies.
2. Choose Your Color
The next step is choosing your color scheme. Certain colors can influence our mood and thought processes. For instance, blue hues are often associated with calmness and relaxation, making them ideal for bedrooms or bathrooms. On the other hand, vibrant reds can stimulate energy and creativity, suitable for living rooms or home offices.
Interesting fact: According to color psychology, different shades can induce varying emotional responses. That’s why choosing the right color palette is crucial in setting the right atmosphere in your home.
3. Prepare Your Space
Before you start painting, take some time to prepare your space. Move furniture away from walls and cover them with drop cloths to protect against paint splatters. Also, remember to repair any wall imperfections such as cracks or holes for a smoother finish.
4. Start Painting
Once everything’s set up, it’s time to start painting! Begin with applying a coat of primer if necessary, then proceed with applying your chosen paint color.
Note: Always follow safety guidelines when painting indoors – ensure adequate ventilation and wear appropriate protective gear.
Repainting is a budget-friendly way to revamp your home’s interior. It not only enhances the aesthetic appeal but also allows you to create an environment that reflects your personal style and preferences. So grab a brush, choose your color, and let your creativity shine!
21. Create an Instant Lawn and Grow Your Own Vegetables

Growing your own food is becoming an increasingly popular trend for health-conscious individuals and families. One way to do this in urban settings is by creating an instant lawn where you can cultivate your own vegetables.
The Concept of Instant Lawns
Instant lawns, also known as ready-made lawns, are small, easy-to-maintain green spaces that can be installed in your home by a lawn provider or a home builder. This concept has already gained popularity in countries like China, offering homeowners the opportunity to enjoy fresh, homegrown produce right from their balconies or patios.
Did you know? Instant lawns not only provide fresh produce but also contribute to reducing carbon footprint and improving air quality.
The Process
- Contact a Lawn Provider or Home Builder: Reach out to a professional who offers ready-made lawn services. They will assess your space and suggest the best possible setup.
- Installation: The provider will install the lawn for you, ensuring it is ready for planting.
- Choose Your Plants: Decide on what vegetables or herbs you’d like to grow based on your food preferences and the climate conditions of your area.
Costs Involved
While installing an instant lawn does come with its costs, it’s important to consider these expenses as an investment toward a healthier lifestyle. Regular maintenance may include costs for watering, fertilizing, and pest control measures.
However, the benefits of having access to fresh, pesticide-free produce that you’ve grown yourself are immeasurable.
Benefits of a Homegrown Compact Lawn
- Health: Consuming homegrown vegetables ensures that you’re eating the freshest and most nutrient-rich food possible.
- Sustainability: Growing your own food reduces reliance on commercially farmed produce which often involves harmful agricultural practices.
- Therapeutic: Gardening can be a relaxing and rewarding hobby.
Setting up an instant lawn on your balcony or patio is a budget-friendly way of enhancing your lifestyle. Not only does it provide fresh produce, but it also offers environmental and therapeutic benefits. It’s an investment that pays off in more ways than one.

FAQs (Frequently Asked Questions)
Renovating your house can help refresh and rejuvenate your living space, making it more comfortable and enjoyable to live in.
Before allocating funds towards a renovation project, it’s important to consider whether renovation or demolition would be the best option for your specific needs and goals.
Some budget-friendly tips include starting with the front door, opting for full-length curtains, reinventing the kitchen with tiles, changing rugs for a fresh look, hanging chic shutters, upgrading the shower system, installing alcove shelving, incorporating a skylight, restoring old tiles, upgrading to sash windows, enhancing living experience with a new sofa, opting for smart appliances, using a stylish stair runner, elevating space with wall panels, using glass panels for a sleek look, opting for a fireplace, restoring period cornicing, choosing on-trend carpeting, concentrating on lighting, painting the house for a budget-friendly makeover, and creating an instant lawn to grow your own vegetables.
Tiles offer benefits such as ease of maintenance and durability, making them an effective way to breathe new life into your kitchen.
A skylight offers the perfect solution to bring in natural light and brighten up darker corners of your home.
A cast-iron fireplace could be a great choice as it can create a warm and inviting atmosphere in your living space.