Table of Contents Show
Complete instructions on building stairs in your home, or easily adaptable to decks and other outdoor steps and stairs. Learn how to plan, layout, and frame a stairway to meet building codes and provide a safe, comfortable stairway to use. Part of a series on stairways and staircases.

If you’re planning to build a stairway or replace an existing stairway, this is the place to start. Step-by-step instructions include planning, layout, and the easy math steps to cut perfect stringers and frame your stairs, add support framing, and put everything together.
Stairs
A set of stairs, or stairway, provides access between areas with different elevations. In a home, stairways between floors allow access to basements and second and third stories. Stairway building codes are specific and building inspectors often provide little latitude when enforcing codes of steps and stairs.
Stairways have the potential for danger. A person climbing up or down a stairway can easily fall down the stairs and sustain serious injury. Handrails, even step heights, and step heights that fall between a minimum and maximum are three factors that contribute the most to stairway safety.
Let’s take a comprehensive look at how to do stairs, including the planning and building required. Before we get started, you might want to take a look at stairway terminology to familiarize yourself with the terms.
Planning
Planning a stairway mainly concerns itself with three dimensions. The step height, or rise. The step length, or run, and the headroom which is a concern on enclosed stairways with a ceiling. Measure the total rise between the upper and lower level finished floors.
Divide this by the approximate desired step height. 7 1/2 inches is a comfortable height. Unless the answer is a whole number, round the result up to the nearest decimal to obtain the number of steps on the stairway. Divide the total rise by the number of steps for the individual step height, or rise.

The tread length is set by the building code at eleven inches. The tread will overhang the stringer by 1 1/2 inches, and you must also include the thickness of the riser. Calculate the run by subtracting the overhang from the tread length and adding the riser thickness. If your risers are 1/2 inch thick, then 11 – 1 1/2 + 1/2 = 10 inches (very common).
Headroom is the distance between the bottom of the floor framing and the top of the thread where the floor framing begins over the stairway, and code requires a minimum of 80 inches of headroom.
Measure from the front wall of the stairwell to the top of the steps, divide by 11 inches, and round down. Multiply the result by the step rise height. If the result is less than 80, you’ll have to decrease the number of steps and increase the step rise height. The maximum rise is 7 3/4 inches in many localities, some allow less, some more.
In some older homes, it might be impossible to meet all the code requirements if you’re replacing a stairway. Talk to your building inspector for guidance.
Cutting Stringers
A handy add-on for your framing square is stair buttons, which allow you to make repeatable measurements quickly. Fasten one on the short leg at the ride height, and the other on the long leg at the run length. Look at the sketch to the left. Place the square on a 2-by-12 with the buttons on the front edge of the plank. Place the long leg as close to the end as possible.

Draw lines along the long and short legs on the plank with a pencil to make a triangle and mark an “X” in each triangle. Move the square to align the long leg with the line drawn along the short leg. Draw two more lines, move the square, and continue repeating until all the steps are drawn.
Extend the line at the top and the line at the bottom across the full width of the plank. At the bottom line, draw a new line that is offset from the original and closer to the top by the thickness of the treads. This shortens the riser height at the bottom of the stairs.
Cut the top and bottom lines first with a circular saw. Make cuts into the plank from the edge along the lines, but stop when the blade reaches the apex of each triangle. Use a hand saw or jig saw to finish the cuts on the stringer.
At the bottom, cut a 1 1/2-by-3 1/2 inch notch in each stringer. This accommodates a toe plate to attach the stringers to the lower level floor.
Note: If you plan to use a ledger to attach the stringers to the header, decrease the top run length by the thickness of the ledger.
Make additional stringers using the first as a template. You can add a landing to your stairs to make the stairway turn or provide a resting point.
Stairway Framing
Set the stringers in place and use a short level to level the step run from front to back. Attach a stringer hanger to the top of each stringer using the required nails for the hanger.
Recheck the level and attach the hanger to the header using the same nails. Hang subsequent stringers 16 inches on center. Make sure the stringers are level front to back and across the tread cutouts from stringer to stringer.
Alternate Attachment Method
Attach the ledger to the stringers first with the top edge of the ledger aligned with the top edge of the top tread. Drill three evenly spaced 7/64-inch, countersunk pilot holes through the ledger and into the leading edge of each stringer.
Screw the ledger to the stringers with 1/4-inch wood screws that reach into the stringer at least 1 1/2 inches. Place a 2-by-4 into the notches cut in the front of the stringers. Recheck the center-to-center spacing and screw the stringers to the 2-by-4, then screw the 2-by-4 to the floor.
Lay two 2-by-4s under the two outside stringers to use as bottom plates. Use a plumb line to align them with the stringers. Screw the 2-by-4s to the floor. Place vertical 2-by-4s from the floor to the outside stringers spaced 16 inches on the center and nail or screw them to the stringers and bottom plate. These provide additional support for the stringers.
Treads and Risers
Install treads and risers beginning at the bottom of the stairway. The bottom riser is shorter measured from top to bottom.
Start at the bottom and cut the bottom riser to fit on the front of the stringers. Attach it to the front of the stringers at the very bottom, with the lower edge resting on the floor, with two nails or screws through the riser and into each stringer. Add the second riser to the stringers the same way. Drill pilot holes if you use screws.
Place the first tread on the stringers in front of the second riser. Drill three, evenly spaced, countersunk pilot holes through the tread and into each stringer. Screw the tread to the stringers with wood screws.
Work your way up the stairway, installing a riser, and then a tread on each step. Using wood screws will decrease the likelihood of future squeaks when you climb your stairs.
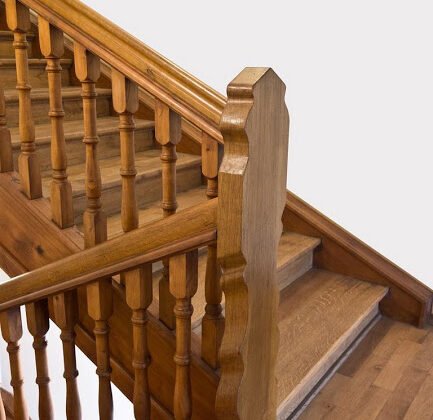
Building a Staircase
A staircase can be the focal point of a room or entryway and you want to show it off. Architects often place the main stairway of a home near the main entrance so it can be seen. With patience and attention to detail, you can build your own finely crafted staircase yourself.