Table of Contents Show
DIY Curtains – Want some new kitchen curtains, but don’t want to pay designer prices for them? This article will give you several cost effective solutions of diy curtains for your kitchen windows! Read on to find out where to begin.

Why Make Your Own DIY Curtains?
Making your own kitchen window curtains or diy curtains doesn’t have to be a long tedious process. There are lots of pluses of making your diy curtains. By making your own curtains you aren’t limited to the ready-made store bought curtain styles and patterns plus, you can personalize them to your style. You may also find that if you’re a savvy shopper you can make them for much less than store bought curtains as well.
Getting Started, How to Make Custom DIY Curtains
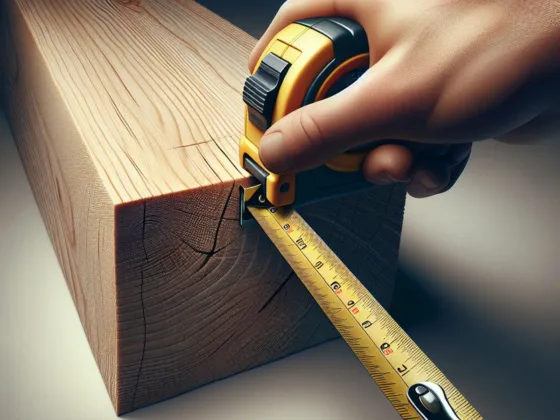
The first thing to do before starting to make diy kitchen curtains is to measure your kitchen window(s) so you know how much fabric you will need to purchase. Be sure to decide if you will be mounting the diy curtains inside or outside the frame of the window, as it will make a slight difference on how much fabric you will need to buy.
You will also need to consider what type of fabric you want to use and what style of diy curtains you are looking for. Do you want diy curtains from floor to ceiling, do you want kitchen curtains and valances, do you want to line the diy curtains to block out extra sun and heat, and do you want the fabric to be machine washable for easy cleaning? These are all questions you must answer before going fabric shopping.
Buying Fabric for DIY Curtains
Once you know how much fabric you will need to buy, it’s time to head to the fabric store. When having fabric cut make sure to add an extra 1 ½ to 2” on each side seam and bottom seam and add an extra 3” for the top seam and rod pocket. Be sure to pick up some coordinating thread and a curtain rod or tension rod to hang your finished diy curtains up when you’ve finished. Make sure to buy a double rod if you plan to make diy kitchen curtains and valances.
It is probably best to choose a fabric that is machine washable, especially if your window is near where you cook and prep food regularly or you have young children who often wipe their dirty hands on anything they can find.
Making Your Window DIY Curtains
Before beginning your diy curtains, you will want to gather all the tools you will need for this project.
- Sewing Machine
- Scissors
- Fabric
- Thread
- Pins
- Iron
- Measuring tape
- Fabric chalk/pencil
- Window measurements
- Buttons (optional)
- Lace/Beaded Trim, etc (optional embellishments)
Cut your fabric based on the measurements you took earlier. Be sure to allow for an extra 1 ½’’ on each side seam and the bottom seam. Now fold each side seam over 5/8’’ and press. Now fold them over again 5/8’’ and pin. Sew the side seams. Repeat with the bottom seam.
For the top seam fold over 5/8’’ and press. Then fold over an additional 2’’ (more if you have a larger rod. You should allow for about ½’’ extra wiggle room for the rod when sewing the rod pocket seam) and pin. Sew the seam.
If you are making 2 curtain panels for each window you should cut your fabric in two equal halves, one for each side of the window and hem as stated above. Once all the hemming is complete, you are ready to hang your custom made diy curtains !
Additional Ideas for Custom DIY Curtains
You might also consider making a matching or coordinating valance. You already know the width of the window, but you must decide the length you want your kitchen valance to be. Hem as stated above and hang.
If you aren’t as good at sewing you may consider using alternative fabric choices which require less sewing. By using bed sheets, shower curtains, napkins, bandanas, etcetera you eliminate the need for some of the hemming. You would only need to hem the bottom if you had to cut the diy curtains shorter and any other seam you had to cut. If you used napkins or bandanas you may need to sew the pieces together depending on how you wanted to hang them.
If you use something like a shower curtain you could just use the button holes already there for you to hang the diy curtains with clips, rings or hooks. You could do something similar if you didn’t want to sew in a rod pocket seam on a bed sheet. Instead of the seam you could add button holes equally spaced across the top seam to allow the diy curtains to be hung with hooks.
If you want extra sun and heat blocked out, you should consider lining your diy curtains. To do so, purchase lining or blackout liner in the same quantity as the fabric you bought (according to your measurements). Attach lining to the backside of the fabric with pins and then proceed with the assembly steps above.
You might also like to add some beaded fringe or lace to your valances or diy curtains to add some additional pizzazz.
Tie backs are quick and easy to make as well. Simply take two strips of fabric 2 x 10-20’’ long; (depending on how long they need to be and how much fabric they are holding back) pin wrong sides together and sew all but 2’’ of the seam. Flip right sides out and finish sewing the seam shut. Make a button hole in each end of the band and voila, you have a tie back you can use with a hook. You could also make one button hole and sew a button onto the other end for closing.
Conclusion of DIY Curtains
You may find that you would like to make different valances or these easy to make diy kitchen curtains for different seasonal times of the year. The possibilities are endless when you are your own custom designer!








4 comments
I appreciate, result in I found exactly what I used to be
taking a look for. You’ve ended my 4 day lengthy hunt! God Bless you man. Have a great day.
Bye
Thank you dear ! 3
Great post. I used to be checking continuously this blog and I’m impressed!
Very helpful information particularly the last section :
) I maintain such info a lot. I used to be looking for this particular information for
a long time. Thank you and best of luck.
This kitchen design looks great! It has a modern and sleek look, with plenty of counter space and storage. I will be using this tips for my own clients so that there Half Price Cabinets go smoothly.