Table of Contents Show
Want to increase the value of your home while also making it more functional overall for your family?
Remodel one of the bathrooms in it. You can get a 70 percent return on investment when you install a new bathroom. You can also make the bathroom work better for those who live in your home at the same time.
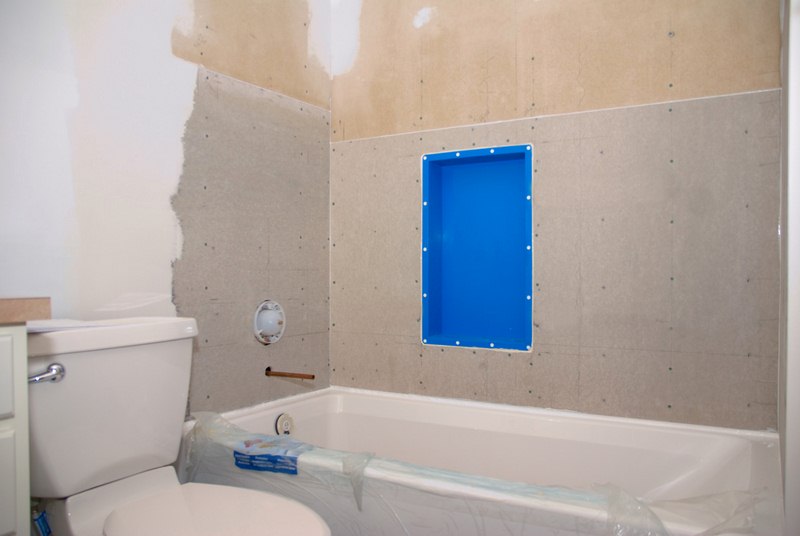
Before you can remodel a bathroom, though, it’s important to do bathroom demolition. It’s actually one of the best parts about renovating a bathroom since it gives you an opportunity to let out all your frustrations with the current space.

10 Tips to Prepare for Bathroom Demolition
Here are 10 tips that’ll help you prepare for your bathroom demolition.
Read Also:
Remove Personal Items From the Bathroom
The last thing you want to do is start a bathroom demolition when you still have personal items lying around inside of it. These items might include:
- Soap
- Shampoo and conditioner
- Toothbrushes and toothpaste
- Makeup
- Scale
Get a big basket and toss all these things into it. You should also clear out anything you have in cabinets and closets so that they don’t get in the way during your demo project.
Gather the Right Tools
There are a number of tools you’ll need to finish your bathroom demolition. Get your hands on tools like:
- Hammer
- Crowbar
- Pliers
- Putty knife
- Reciprocating saw
Without these tools, you’ll have a tough time taking down walls and ripping up tiles or wall panels (reference: Floors To Walls UK). Make sure you have all of them handy in a toolbox near your bathroom. Be sure to put the tools away when you’re done using them to avoid losing them in the mess you’re going to make.
Put on the Right Gear
Whether you’re doing demolition in a bathroom, a kitchen, or another part of your home, you should always wear heavy-duty clothes that can take a beating. A durable pair of jeans and a flannel shirt or hoodie should do the trick.
There is other gear you should wear during a bathroom demolition, too. Put on work gloves, a dust mask, and protective glasses to keep yourself safe while you’re working.
Rent a Dumpster or a Dumpster Bag
There’s a good chance that you’re not going to be able to toss the contents of your bathroom out on the curb and have the garbagemen pick it up. Most cities and towns won’t take that much garbage at once.
Instead of taking that approach, rent either a small dumpster or a dumpster bag that will fit everything you’re going to throw away. It’ll make it much easier for you to haul away the debris from your bathroom after your demo is done.
Seal Air Ducts
Most bathrooms only have a single air duct in them. But that air duct could send dust flying everywhere if it comes on during a demo job. Close it before you get started.
It’s also a good idea to seal the duct up so that a bunch of dust doesn’t go flying into your HVAC system’s ductwork. That could cause dust from your bathroom to spread out throughout your entire home.
Protect Your Bathtub
If you’re going to throw your old bathtub out and get a new one, you obviously don’t need to worry about protecting it. But if you’re going to keep your old tub, protecting it during your demo will be of the utmost importance.
Put a piece of tape over the drain for the tub, just in case debris is able to find its way into the tub during a demo. Place a piece of plywood over the tub as well to stop tiles and other debris from falling into the tub in the first place.
Shut Off the Water to Plumbing Fixtures
You’re not going to need to use any of your plumbing fixtures during your bathroom demolition, so you don’t need for the water to be turned on.
If you leave your water on, it could lead to someone accidentally leaning on a knob and turning on the shower or sink. Turn off your water to be on the safe side.
Empty Water From Your Toilet
The toilet in your bathroom is going to be one of the first things to go during a bathroom demo. Empty all the water out of it before you start trying to take it apart.
After you’ve shut off the water for your toilet, flush it and use a plunger to remove as much water from the tank and the bowl as you can. It’s almost impossible to remove all the water, but you can get rid of most of it in just a few minutes.
Clear a Path to the Outside of Your Home
Once your bathroom demolition begins, you and whoever is helping with your demo are going to be carrying all sorts of rubbish to the outside of your home. From your toilet (which, remember, will have a little bit of toilet water left in it) to your cabinets, there is going to be a lot to bring outside.
Clear a path inside your home so that it’s easy to get from your bathroom to the exterior of your house. Put down drop cloths, too, to prevent water and dirt from coming into contact with your flooring.
Let the Demolition Begin
As long as you’ve followed all the other tips listed here, you should be ready to start your bathroom demo!
You should also be ready to start planning out the remodeling portion of your project. You can find out more about the possibilities for your new bathroom before you take out your toilet, your cabinets, your tiles, your drywall, and anything else that’s getting tossed.
Within just a day or two, you should have the bathroom space emptied and prepped for remodeling.
Get Your Bathroom Demolition Done Today
If you’ve never done a bathroom demolition before, you’re in for a treat.
Remodeling a bathroom can be a long and tedious task, which is why it’s best to leave it to the professionals. But you can demo a bathroom on your own and let your old bathroom know how much you hated it in the process.
Check out our blog to get more information on how to rip out old countertops and other things in your bathroom.


