Table of Contents Show
You probably have seen embroidery designs on the hat. Any custom design or print looks trendy on hats. Stitching makes it more creative. Cap Factory charges considerable money to embroider any custom design or text on a hat or cap. But, I don’t find it convenient to spend anything on such easy crafting.
Yeah, you have read it right; it’s much easier than you think. Even if you don’t have any stitching experience before, this guide will help you learn how to embroider a hat by hand.
People with little experience will find it quite easy and can earn some money by taking orders, whether it’s online or offline.
If you want to customize hats for your company with your logo embroidered on them, consider contacting Colorado Springs Embroidery professionals for this purpose.
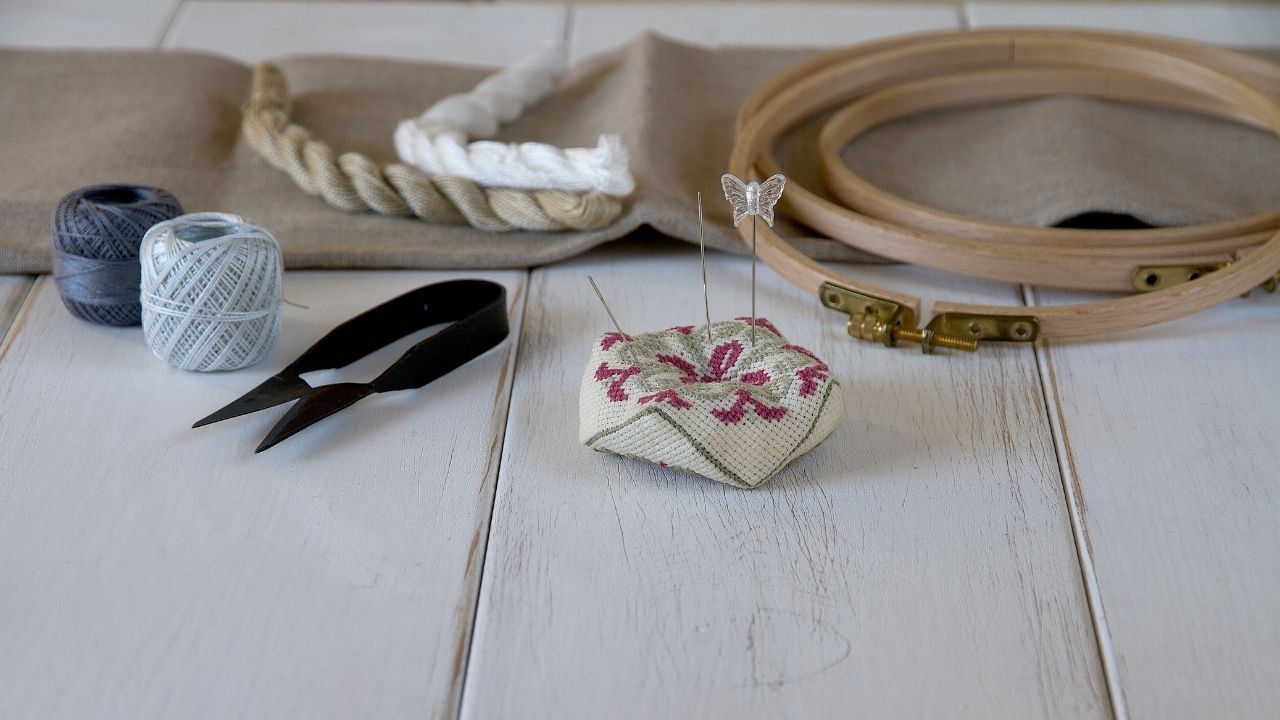
Things You Will Need
The thing is, embroidering a hat doesn’t cost much. All you need is to spend 10 bucks on the supplies, that’s all. Whereas the cost to embroider a hat is at least 4 to 5 times more if you ask any professional to do it for you.

If you think it’s too expensive to have a designer embroider a hat professionally for you, you can choose some custom patches. Beautiful custom patches from GS-JJ can meet any of your requirements and have professional designers design any style for you. You can stick these patches on the hat or sew them directly on. These patches can be reused. If you’re in an organization, you can customize your teammates with a custom patch with the same logo attached or sewn to the hat or fabric.
Be sure to collect the following items –
- Hand embroidery thread of 6 strands of thickness.
- A needle with a skinny eye. You should be able to put a thread of 3 strands.
- Crafting foam to puff out the embroidery. You can pick any color; it doesn’t have to be the same color as the thread. Make sure the foam is 3mm thick.
- A thread locker to make sure the threads don’t loosen and set securely on the cap.
- The cap itself.
Note that embroidering a hat will take hours, depending on your stitching skill and experience. You might not be able to finish the work within a sitting. Most likely, it will take several sittings.
So, do it with patience if you are a beginner. So, if the design is complicated, or you are thinking about something commercial, get the best hat embroidery machine to ensure efficiency.
Make the Design

You can print out any design or draw your design. Then perforate the paper around the outline of the design or pattern. You can use an Exacto knife to do it.
So, now the design or pattern outline of the shape is on the foam. Don’t go deep or too close for perforating. As long as it’s separable, the excess paper from the logo, you are good to go. Use a knife to cut the excess bits of the foam.
Start Embroidery

Although it’s not necessary, you can separate the thread strands and recombine them. This will make the threads lie flat on the foam and look smoother.
Now, with a single stitch, pin down around the design. Start from the simplest section that is easier to stitch. Once you’ve got them covered, move to the other sections of the design. You might need to stitch the thread between different parts of the design to cover the foam properly.
Make sure you are stitching in one direction. Either it’s from top to bottom or left to right. If you mix the stitching pattern, it will look odd.
Consider doing an alternating weave to cover an area if needed. If this is the first time you are doing hand embroidery, it’s normal to leave some gaps. Alternating weave is great at covering such areas.
Depending on the design or pattern, you should be able to complete stitching and embroidery within a few hours. Look closely to see if any part of the design requires further stitching for coverage.
Finalize the Embroidery
When you are nearly done, check for areas that require trimming loose ends and locking threads. Consider using a commercial liquid seam sealant on the lumps of threads to prevent the threads from fraying and make them more secure.
It will roughly take 30 minutes to dry. It might smell bad while still wet. Once the sealant dries, you will notice that the threads are no longer loose anymore, and are ready to withstand pretty much everything you throw at them.
If you see any foaming parts stuck around the thread, consider using a hairdryer. It will melt the foam away. However, if you are not familiar with this trick, don’t try it.
Frequently Asked Questions
With some hand embroidery techniques and practice, it’s pretty much doable regardless of stitching skill. However, hand embroidery isn’t ideal for complicated designs unless you have no other option.
You will need an embroidery hoop, scissors, floss, needles, liquid seam sealant, and the fabric you want to do the embroidery on.
Hand embroidery requires several hours to be done properly. Any small design would take roughly 3 hours. Larger and complicated designs will take 10 to 30 hours.
The Bill of any hat should be embroidered before the manufacturing is complete. If you still attempt to do so, you will most likely ruin your hat. Better not try this.
It’s the same thing as the rest of the other hand stitching or embroidery processes. You need to write or print out the text on the fabric you want to stitch letters on. And stitch as you would normally. Make sure that the threads aren’t loose once you are finished. Consider using a liquid seam sealant to overcome this loose thread issue.
Final Words
Now that you know how to embroider a hat by hand and successfully finish doing it, go out and show off your crafting or stitching skills to others.
You will surely get a warm appreciation for stitching on hats. People might ask you to embroider a hat for them. If you are not interested in this business, at least you can teach them how to sew designs on hats.