• Home Improvement
    • DIY
    • Remodeling
    • Woodworking
    • Accessories
    • Home Design
      • Furniture
      • Organize
      • Tips
      • Decor
        • Interior
        • Exterior
    • Design Ideas
      • Bathroom
      • Bedroom
      • Dining Room
      • Living Room
      • Kitchen
  • Gardening
    • Backyard
    • Front Yard
    • Landscaping
  • Building Staircase
  • Categories
    • Home Improvement
    • Decor
    • Gardening
    • Woodworking
    • Lifestyle
    • Green Living
    • Real Estate
Dream Lands Design
  • Home Improvement
    • DIY
    • Remodeling
    • Woodworking
    • Accessories
    • Home Design
      • Furniture
      • Organize
      • Tips
      • Decor
        • Interior
        • Exterior
    • Design Ideas
      • Bathroom
      • Bedroom
      • Dining Room
      • Living Room
      • Kitchen
  • Gardening
    • Backyard
    • Front Yard
    • Landscaping
  • Building Staircase
  • Categories
    • Home Improvement
    • Decor
    • Gardening
    • Woodworking
    • Lifestyle
    • Green Living
    • Real Estate
Featured image - How to Repair a Toilet Flush Button
You're here: Home Home Improvement How to Repair a Toilet Flush Button

How to Repair a Toilet Flush Button

  • Perla Irish
  • June 14, 2020
Total
3
Shares
0
0
3
0
0

A toilet flush button will cause several problems. Before you can repair it, you must learn about how it works, and you must first realise what its purpose is.

The flapper, which is also known as the desert, is located inside the bowl of the toilet. It is the part that contains the event. When the water flows through the flapper, the detent is released, allowing the water to flush the bowl.

The flapper, when pressed, causes the event to push back against the mechanism inside the bowl. In effect, the mechanism inside the bowl pushes the detent back up, stopping the water from flowing out.

Most flappers will have a metal or plastic plate on it, which holds the detent in place. Pressing the button releases the detent, allowing the water to flow through.

image - How to Repair a Toilet Flush Button
How to Repair a Toilet Flush Button

Normally, a flapper is secured at the bottom of the bowl. This means that if the flapper gets pressed, the bottom of the flapper will press against the flapper plate and will in turn press the flapper plate away from the bowl.

A cistern contains a flush valve which can be activated by pressing the toilet flush button. Once the button is pressed water is sent into the bowl to wash the waste away.

One of the first steps that should be taken while fixing a toilet flush button, involves checking the inside of the tank and pushing the button several times. While testing the button the rest of the mechanism must be thoroughly checked for faults.


Read Also:

  • Flush or Bust? 5 Considerations When Deciding to Hire a Pro or DIY Your Bathroom Remodel
  • Factors to Consider When Choosing the Best Flushing Toilet
  • What Causes Toilet to Keep Running After Flushing
  • Best Bidet Seats for Round Toilet

The lever or the rod that fits into the mechanism are the two common things that generally make a toilet flush button malfunction. These two can be temporarily fixed using adjustable pliers, screwdrivers and a sturdy stick which acts as a replacement for the rod.

If the lever is damaged you may choose to pull it out of the mechanism and get it replaced. In case the lever is okay it is important to check the rest of the system.

However, sometimes you may see the grommet used to seal the water inside the tank as the cause behind the malfunction. One of the easiest methods to fix this is to clean and spray lubricant around the rubber section of the grommet.

A flush button that has been damaged can cause water to spray out of the bowl, and the water might cause some damage to the mechanism inside the bowl. In effect, the water might break a part of the mechanism, and this is the reason why it is always a good idea to inspect your toilet once in a while.

Even if your toilet is in perfect condition, there might be a complete set of parts missing. You should try to determine the problem, and you should then try to determine where the problem might lie.

You should then know how to repair the problem. Once you find the problem, you can determine whether the problem can be repaired or not.

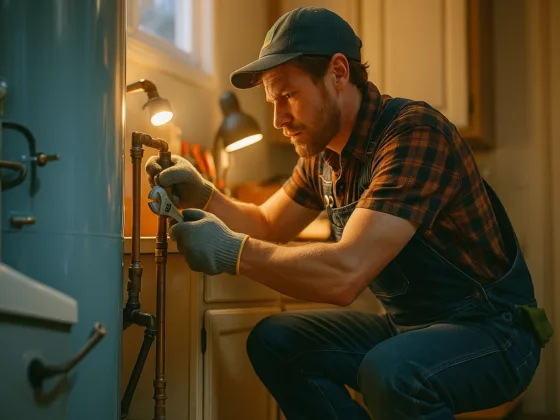
When you’re trying to replace or repair your flush button it is important to drain the tank before you start working on it.

The metal clamp that is attached to the bottom of the button should also be checked. Daily use can make this clamp loose which results in a loose connection between the flushing mechanism and the button.

If you are able to fix the problem yourself, you can then fix the toilet. Once you repair the problem, you should then replace the parts that are missing.

It is extremely important to perform repeated tests after reinstalling or fixing the flush button. Faults in the installation process can be checked by using the button.

When you can’t repair the flapper yourself, then you should get it replaced. If the flapper is faulty, then replacing it might be the best thing that you can do for your toilet.

If you decide to replace the flapper, you should purchase it from the same manufacturer that supplied the flapper when it was manufactured. Otherwise, you might end up getting a faulty flapper. Read more useful toilets related topics at lueliving .

Toilet flush buttons are usually situated near the toilet. They are normally activated by pressing a button, and then they simply allow water to flow through the flapper to flush the bowl.

Total
3
Shares
Share 0
Tweet 0
Pin it 3
Share 0
Share 0
Related Topics
  • repair
  • toilets
Previous Article
Featured image - What Types of Sprinkler Systems Are Best for my Yard

What Types of Sprinkler Systems Are Best for my Yard?

  • Perla Irish
  • June 14, 2020
View Post
Next Article
Featured image - Best Ways to Hire an Asbestos Company

Best Ways to Hire an Asbestos Company

  • Perla Irish
  • June 14, 2020
View Post

Subscribe

Subscribe now to our newsletter

You May Also Like
How to clean a house professionally: color-coded microfiber caddy, mop, and HEPA vacuum in a spotless living room and kitchen.
View Post

How to Clean a House Professionally: A Step-by-Step Checklist

  • November 5, 2025
Louisiana coastal home with rooftop solar panels at golden hour, live oaks draped in Spanish moss, bayou in the background.
View Post

What to Know Before Choosing a Solar Provider in Louisiana

  • November 5, 2025
High-efficiency 95% AFUE condensing gas furnace with sealed PVC venting and condensate drain in a tidy utility room.
View Post

80% vs 95% Furnace: What Changes, What You Save, and When to Choose Each

  • November 4, 2025
Licensed HVAC technician replacing a residential gas boiler; verifying flue joints and gas connections during commissioning
View Post

How Professional Boiler Replacement Ensures Safety and Peace of Mind

  • November 4, 2025
Aosu vs Ring doorbell comparison 2025 — resolution, storage, alerts, ecosystem
View Post

Aosu vs Ring Doorbell (2025 Comparison Guide)

  • November 3, 2025
How to market business online as a tradesman — team filming tech-tip video beside service van
View Post

Effective Ways to Market Business Online as a Tradesman (2025 Guide)

  • November 1, 2025
Professional water heater installation: technician tightens copper water-line connections on a residential storage tank, wearing gloves for safety.
View Post

Why Professional Water Heater Installation Is Essential for Home Safety and Efficiency

  • October 31, 2025
HVAC technician commissioning a high-efficiency gas furnace with a digital manometer in a residential utility room.
View Post

Why Professional Furnace Installation is Essential for Home Safety and Efficiency

  • October 30, 2025
  • About
  • Privacy Policy
  • Terms of Use
  • Disclosure
  • Sitemap
  • Contact Us

Input your search keywords and press Enter.