Table of Contents Show
Lawnmowers are a great option to keep the environment near you safe and clean. They are used to trim, slice, cut, and chop grasses or weeds in your lawn/garden.
According to clean your garden, you can easily use Ariens Ikon X 52 to get a fantastic service.
Most of people have a misconception about lawn mowers that it is only used by farmers in agriculture land. It is also used in small lawns and gardens to trim weeds and big grasses.
In fact, there are a lot of lawnmowers designed especially to cut weeds and trim grass in a lawn such as Greenworks Corded Lawn Mower. However, after a certain amount of time, you will need to change the blades to get the best results.
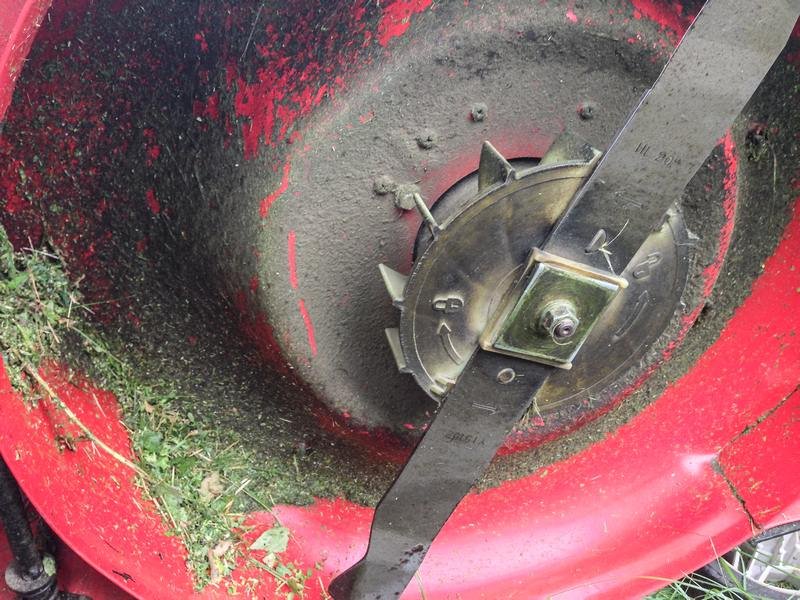
Eventually, after long use over the occasional rock and cutting of the grass, lawn mower’s blades begin to dull and to chip. As a result, it will not cut the grass properly anymore.
How Will You Know it’s Time to Change Blades?
When the blades are dull or when you start facing difficulty while mowing the grass. Usually, the engines will start producing more noise.
Another way to know if you need to change the blades or not is by looking if there are patches or lines of grass in the areas that have just been mowed. If yes, then you must change the blades as soon as possible.
Also, if you own the right tools you can easily change the blades within half an hour.
Read Also:
Tools Required to Change the Blades
You need the following tools to change the blades without any hassle.
- Sharp blades
- Work gloves
- Ratchet
- Socket or a wrench
Now that, you have all the required tools, it’s time to change the blades. Follow the below-mentioned steps to properly change the blades.
-
Find a Proper Place to Change the Blades
Having ample space in the area you’re changing the blades is very important. In fact, when the mower is raised to the top, it will give you enough room while working and to change the blades effectively.
Depending on the type of mower, you must move it to get the maximum room. For example, if you have a small push mower, flip it on its side on top of a cement pad after draining the oil and gas whereas if you’re using a big machine mower in which the deck raises from the front, drive the mower to a raised piece of ground in order to get more space while working.
Follow these instructions when parking a big machine mower.
- Find a place to park
- Use the parking brake and switch it on
- Turn the engine off and let the engine cool
- Place a brick or a block in front of and behind the tires of the mower
-
Use the Correct Size of Tools
Have a look at the user manual of your lawnmower to know the exact size of the tools you need. You can also browse on the internet using your lawn mower model.
Once you have all the proper tools in hand, you will need to determine the proper size. In order to do that, put the socket or the wrench onto the bolt.
Also, when crawling under the deck of the lawnmower, always place an old sheet in order to protect your back from minor scrapes and scratches.
-
Take Off the Blade
Always wear gloves when removing the blade to protect your hands from being cut or from getting grease in them.
- Once you’ve figured out the right socket for your lawnmower, turn the ratchet’s switch to its right.
- Place both the ratchet and the socket on the bolt and grab the blade with your empty hand
- Twist the ratchet counterclockwise to loosen the bolt. Remove the bolt using your hand once it is loose enough
Similarly, remove all the blades from your lawnmower.
-
Switch the Blades
Once you’ve removed the dull blades, it’s time to switch it with the sharp ones. Put the new blade on. Ensure that the side with the long edge is facing the sky.
Another way to make sure that the blades are in the correct position is by checking if the blades are moving clockwise while cutting the grass or not.
-
Put the Blades Back
Once you’ve replaced the dull blades with the sharp ones, it’s time to put the blades back on to the mower.
- Crawl under the lawn mower deck with the correct length blade and insert the bolt into the hole
- Tighten the bolt clockwise using your hand. Once the screw is hand tightened you will need to use the ratchet or wrench.
- Flip the ratchet switch to the left
- Place the socket onto the bolt and grab the blade with your free hand and turn counterclockwise until you can no longer turn the ratchet
Follow the above-mentioned steps to properly change the blade without harming yourself.