Table of Contents Show
Seven steps Change door lock.
1. Determine The Size of The Lock Cylinder
At a glance
- Measure the old lock cylinder
- Determine the dimensions of the old door fitting
That’s how it is done
Open the door and look at the lock on the edge, also called the door fold. The adjusting screw is located there directly under the bolt at the height of the cylinder. Starting from the screw, measure in both directions to the end of the fitting.
Make a note of the inside length and the outside length. These values result in the required size of the lock cylinder. Here you can go if you want professional locksmith solutions.
Note: Door leaves are usually asymmetrical and require cylinders with sides of different lengths. That is why it is important to measure both sides. However, you can later insert the lock cylinder in both directions.
For example, you can buy a double cylinder with the values 30/40 or 40/30. The only exception is the knob cylinder: Here the inside length must correspond to the knob side length.
If you want to replace the door fitting at the same time as replacing the door lock, then also determine the distance from the center of the cylinder up to the doorknob or the center of the door handle.
Tip: The value is often 72 mm or 92 mm.

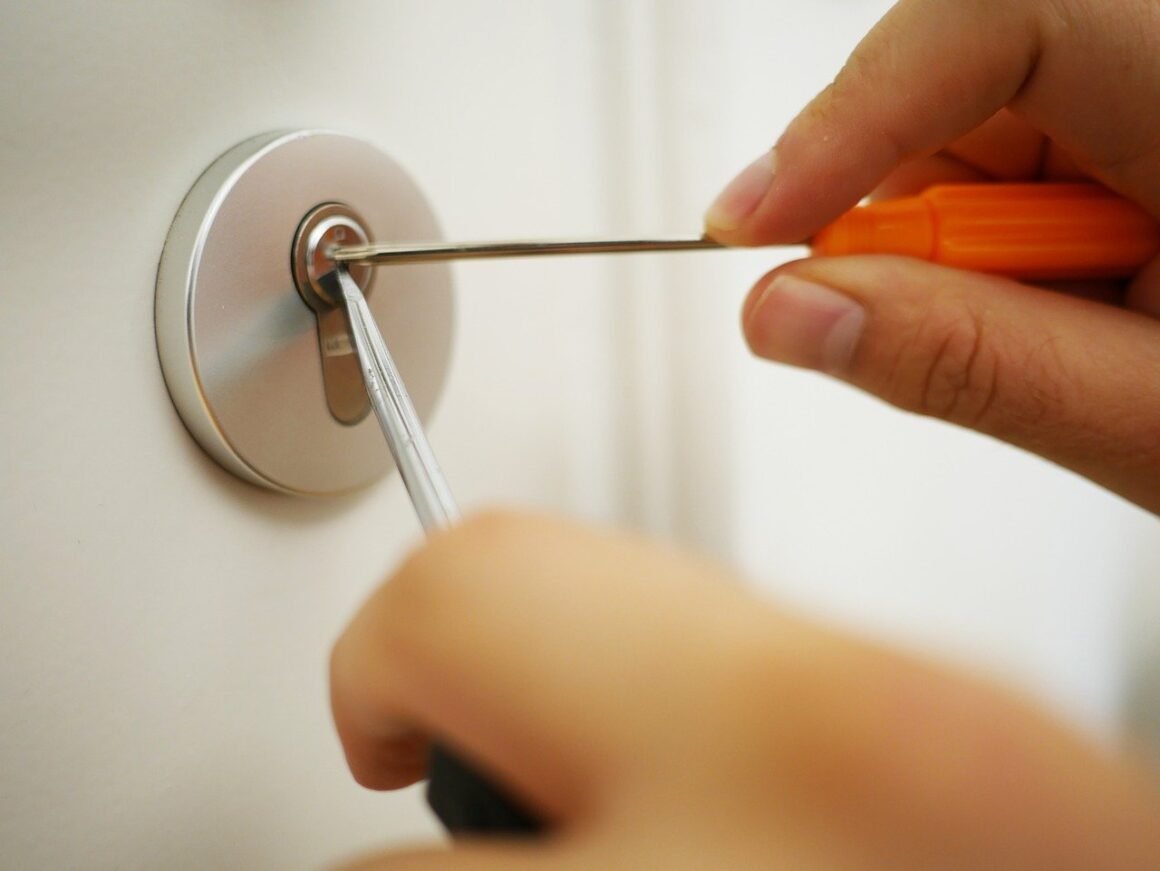
2. Loosen the Adjusting Screw and Remove the Lock Cylinder
At a glance
- Unscrew the adjusting screws
- Remove cylinder with key
That’s how it is done
When replacing the door lock, you now completely unscrew the adjusting screw. Then you remove the lock cylinder by turning the key about 20 ° to the right or left.
If the lock cylinder jams, you can loosen it by gently shaking it. If the cylinder is really stuck, it often gets stuck on the fitting. Slightly loosen the screws on the fitting and try again to remove the lock cylinder.
If the removal does not work at all, you have to remove the fitting – depending on the door fitting and lock, this may be necessary anyway.
Read Also:
3. Remove the Door Handle and Square
At a glance
- Remove the door handle
- Remove square
- If necessary, unscrew the door fittings
That’s how it is done
Now you remove the door handle and the key and take out the attached or individually inserted square. The latter runs through the entire thickness of the door, the lock, and the fittings and moves the lock via the handle.
If necessary, remove the protective fittings to remove the square. To do this, loosen the screws and pull off the fittings. Depending on the manufacturer, the covers of the security fittings are attached or fastened with small screws, which you also unscrew.
The same applies to the possible hexagon socket screw on the underside of the handle with which the square is fixed.
4. Remove the Mortise Lock
At a glance
- Remove the screws on the lock
- Remove the door lock
That’s how it is done
You can pull out the lock and take it with you as a sample to buy a new one.
5. Mount A New Lock
At a glance
- Insert the door lock
- Fix the screws
That’s how it is done
The installation of the new lock is carried out in reverse order to the removal. So you first insert the new door lock into the milling of the door rebate side and fix it with the upper and lower screw. Here you go for 24 Hour Locksmith Support.
6. Mount Fittings And Square
At a glance
- Screw on protective fittings
- Insert the square, fix it and test it
That’s how it is done
Now you mount the removed fittings and put the square or the handle together with the square back on. If necessary, fix it with the Allen screw at the bottom of the pusher when installing. Then you test whether the square rotates when you press it.
7. Tighten the Adjusting Screw
At a glance
- Insert cylinder with key
- Tighten the adjusting screw
- If necessary, drill holes for new door fittings
That’s how it is done
Now reinsert the cylinder the right way round according to the values determined before removal. Test all locking functions with the key and then tighten the adjusting screw. Want the same time the door hardware exchange, they often need other drill holes. Use a drilling template to drill these holes.
Note:
When choosing new door fittings, make sure that existing holes are covered and that enough door material remains for fastening.
Tip:
Increase the security of your front door with an additional lock and a peephole. Both elements are easy to assemble and you make your apartment or house even more secure.