Table of Contents Show
Hedges, or less commonly referred to as hedgerows, are very common features of landscaping. While hedges come in all shapes, sizes, colours, and types, they all serve common functions.
They add texture and depth to a yard or lawn. They can also provide privacy, and sound-proofing as well.
They’re also good for the environment, providing nesting habitats for birds, as well as the O2 production via photosynthesis.
Hedges can also be a much more affordable, and aesthetically appealing alternative to fences – if you have the patience to allow them to grow, and if you plant and maintain them correctly.

Choosing the Right Plants
Many plants can be grown as hedges, though are there some that are more commonly seen. This is due to their growth characteristics, light tolerance, water requirements, drought and pathogen resistance and more.
The hedges you decide on are also largely dependent on where you live. Here’s 3 we typically recommend.
There are a few different online marketplaces you can purchase hedges and have them shipped to you, but we’d recommend looking around for a local nursery and buying from them!
Boxwood
- Low maintenance
- Tolerant of all sun levels
- Easy to prune, shape
- Great for all uses
- The classic hedge look
Portuguese Cherry Laurel
- Easy to maintain
- Full sun or Partial sun
- Drought tolerant
- Deer resistant
Leyland Cypress
- Coniferous evergreen tree
- Perfect for tall hedges
- Very fast growth
- Great for privacy
When to Plant
It’s typically recommended to plant hedges between November and March, depending on where you live. This may seem counterintuitive to do it in winter/early spring, but it’s actually preferable for a few reasons.
The tree/bush you plant will be dormant, so it’s not going to be stressed out during this planting event, confused whether or not it should grow buds or roots.
Doing it closer to March to avoid a heavy frost is also a good idea if you live in a cold area.
Read Also:
- Why Do You Need to Opt-in for a Professional Tree Trimming and Removal Service?
- Smart Tricks and Tips to Keep Deer Out of Your Yard and Garden Space
- New Home Have a Big Backyard? You’ll Want These 3 Tools
- Deck the Halls With Christmas Clover Alternanthera
- 5 Frugal Gardening Tips for Beginners
- Tree Removal – Why Is It Required?
- 5 Tree Pruning Mistakes to Avoid
How to Plant Hedges
Now that you’ve hopefully selected a plant species, it’s time to plant them! Here are some basic steps to follow to make sure you do it right.
What you’re going to need:
- Your chosen plants
- A shovel or trowel
- A measuring tape (optional)
- Wooden stakes (optional)
- String or twine (optional)
Prepping Your Area
Since the plants will be rooting down in the following season, you want to make sure you do this right from the get-go to ensure the hedges are straight and organized.
As a result, many people may use stakes planted in the ground at the furthest points of where you’d like to plant, with strings tied to them to mark out straight lines.
If you’re working along an already-defined edge like a sidewalk, garden bed or other, you may not need to do this step.
Spacing the Plants
Next, depending on how perfect you want this to be, you’ll want to grab a measuring tape.
The exact spacing recommended for your plant may vary depending on the species, but generally, a 4 or 5 plant per meter spacing is standard.
Mark out the ground using your shovel 4 or 5 marks, evenly spaced within each meter.
Planting
To get your plant into the ground, start by digging a small hole along the line you set out on each mark.
You want to dig down far enough you can cover the plant’s root collar – the part where you see the trunk become roots.
Plop in the plant to the hole you just dugout, and use the dirt to cover up to the collar, patting down lightly. Repeat across the entire row, until all of your plants are in the ground.
The plants are in a delicate stage during this planting event, so you want to ensure you handle them with care.
The plant can’t eat or drink without its roots, so if you damage the roots during this step, they may not grow properly when they come out of their dormant state.
Breaking twigs or branches off the plant creates open wounds that pathogens may enter the plant’s circulatory system and cause disease or death. In other words, just be gentle, and take your time.
Retouches
Step back and have a look at your entire row you just planted from a distance. It can sometimes be hard to make sure you’ve been following the line properly.
If you notice any plants that are slightly off, or the spacing could be a bit better, just redo those couple plants, digging a new hole and replanting it.
It’s better to do it now than later, but remember, these hedges will soon fill out the spaces between each plant and you’ll barely even notice the separations between them, so it doesn’t have to be perfect.
Post-Planting Activities
Once you’ve got your hedges planted, you’ll want to consider many other things like pest control, mulching, and irrigation.
Mulching is part aesthetic, part functional, and more than we can get into in this article alone. Irrigation is a crucial part of proper hedge care but also a topic for another time.
You can also speak to someone at your local nursery or a landscaper for some help with this. Most hedges are specifically selected for their resistance to drought and pests, but it can still happen.
It’s important to inspect your hedges regularly for any sign of stress that could lead to a full-on the infestation of blight.
Maintaining Your Hedges
Whether you’re hoping to maintain the hedges you just planted, or you have some on your property that needs some TLC, we’ve got you covered.
There are a few key tenants to adhere to when trimming hedges, and once you understand each step and why it’ll be a breeze.
In general, though, it’s first important to understand the distinction between pruning and trimming.
Pruning your hedges involves using pruning shears to selectively remove some of the branches of your tree or bush before the growing season begins to focus the plants’ growth on selective areas.
Trimming hedges is when we use a hedge trimmer (either manual or electric) to essentially shave off excess foliage that has grown in during summer to shape and manicure the plant into exactly what we want it to look like.
Pruning Hedges
We want to prune hedges in the winter and early spring for the same reason we plant them during this time – to do so while the plant is dormant.
If the plant is producing buds already, it’s already invested energy and resources to that new growth, and pruning it now can cause stress or permanent damage.
If nothing else, it will stunt the plant and prevent it from filling out properly. If you just planted your hedges, it’s best to let them grow at least one or two seasons before any heavy pruning since the plants are still so young.
While pruning, it’s important to remember that this can be a stressful event for the plant. That’s why you typically never want to remove more than 30% of the plant’s weight.
When in doubt, stay on the conservative side – you can always do more next year. Using your pruning shears, make a clean cut through the branch by squeezing firmly, and then remove the cut end from the bush.
If you want to cut back a certain area that’s getting overgrown, use your shears to cut back the branch right at the base of the trunk. That will remove that branch entirely.
But, pruning is not just important to shape the plant by removing those branches, it’s also essential to stimulating the plant to fill out.
When you cut the extending branch of a plant, it stimulates the plant to grow to more branches from that cut section.
So, if you want the plant to fill out in a specific area, do some light pruning in that area, cutting back just a little bit off of branches in that spot in order to stimulate growth – not all the way at the base.
So, remember, for pruning:
- Do it in the winter or early spring, before buds form
- Use pruning shears to cut back areas that are too thick or overgrown by removing branches at the base of the trunk
- Use pruning shears to cut back areas that are too thin, by removing the tips of the branches in that area, to stimulate new growth.
- Never remove more than 30% of the plant in one pruning season.
Trimming Your Hedges
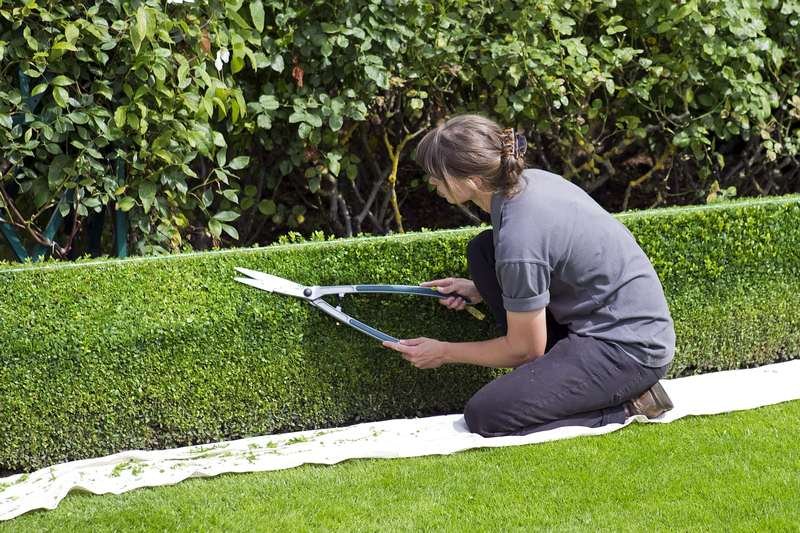
Trimming your hedges is something you’ll want to do in the summer, and is basically just giving your hedge a haircut.
Different branches of the bush will grow at different rates, and we just want to shave off those fast-growing bits to give the hedge its uniform shape.
Remember, it’s essential to both prune and trim your hedges to make sure you’ve got healthy, filled out the hedge.
Also, you should use the best gas powered hedge trimmer that helps you to get the best result.
Using a Visual Guide
Trimming is a skill like anything else, and if you’re doing it for the first time, it may make sense to use a guide. If you feel confident in your abilities, you can skip over that step.
One way to trim is similar to how we planted them – and what we recommend for first-timers – is using stakes and strings that are levelled to set out very clear straight lines around the hedge in the shape you’d like it to be in.
Then, anything that falls outside of those strings gets chopped off using either pruning shears or a hedge trimmer.
This works great for rectangular shapes, but if you want rounded edges you will need to free-hand that part.
Using a Hedge Trimmer
There are manual hedge trimmers, which are basically just giant scissors, and there are powered hedge trimmers.
These may be cordless, electric or gas-powered. We typically recommend using an electric hedge trimmer since it’s much faster, and you can make small changes fast.
Safety is paramount when using a hedge trimmer, as the blades are very sharp and they can be loud. Make sure you wear gloves, hearing protection and eye protection to avoid any injury.
The way this work is that two reciprocating blades move back and forth, so it doesn’t require any work from you, your only job is to keep the hedge trimmer flat, and level.
When hedge trimming, you’ll want to remember that you can always take off more, but you can’t put the branches back on.
If you make a mistake, don’t worry too much – it will grow back next year, but just like a bad haircut, you may be frustrated for a while until it does. Start small, take a step back and look at it, then continue.
Start by trimming the top of the hedge making it flat and level. Once you’re satisfied with the top, move to the sides. Finish up with the ends.
One thing to always consider is making the base of the hedge slightly wider than the top of the hedge. You can make this happen with such a small taper that you can’t really notice.
But what happens if you make the top wider than the bottom, is that the top foliage will take all of the sunlight, leaving nothing for the base of the hedge, which will dry up and thin out leaving you with an ugly, unbalanced hedge. Shaping your hedge to have a slightly A-frame shape avoids this issue.


