Table of Contents Show
Vinyl plank flooring is a type of flooring that is very popular for both commercial and residential use.

It has a glamorous, expensive look to it with its natural beauty and elegant style. And because it is made of vinyl, it doesn’t require much maintenance and can last for decades.
The only downside to vinyl plank flooring is that it is very difficult to cut in the traditional sense they are not designed like wood floors which can be snapped easily by hand.
They can also adhere to shapes without any deviation, so it’s of critical importance to cut once and cut right. With that being said, there are easier ways some have discovered to cut vinyl plank flooring without breaking your nails or getting a callous on your hands!
How to Cut Vinyl Plank Flooring
Vinyl flooring is easy to work with when you handle it systematically. Here are some quick tips and tricks, one step at a time to make everything easier and with later tasks building on prior ones.
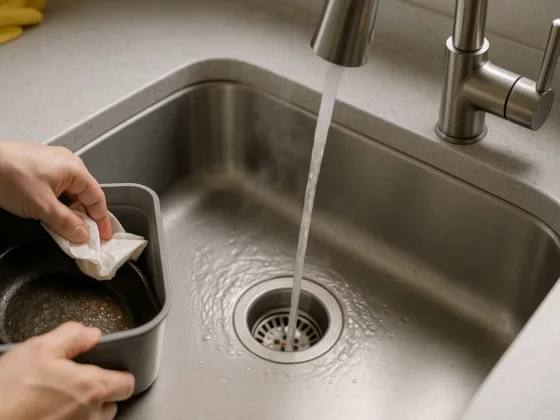
Wipe The Vinyl Flooring with a Wet Wipe to Remove the Moisture
Begin by wiping down the vinyl flooring with a wet wipe. This will help remove any dust or dirt that is on the vinyl and allow it to be cut.
In addition, using a wet wipe will help prevent your cuts from appearing dull or splintery, as it will make it easier to see where you are going.
Roughly Measure the Width and Length of Your Vinyl Plank Flooring Piece
Roughly measure the width and length of your plank piece. Take the measurement from the center of the flooring plank and measure from one end of your plank to the other.
Set the Vinyl Planks to the Side
Lay down some newspapers or newspapers underneath your planks. This will protect your flooring during your cutting process and prevent it from getting damaged by any stray pieces of knives that may be left on the floor.
It is also a good idea to have some sort of “guide” to help you keep track of which plank goes where during this process. So, take another strip of cardboard and place it across each plank where they meet at the corners.
Read Also:
Set the Guide Next to the Flooring
Next, you will want to set your guide or guideboard across the vinyl plank. The distance between the two strips of cardboard is your cut line.

This way, you can see where you are cutting and what pieces you are keeping separate. If you do cut right through a plank, just put a piece of tape on that spot to mark where it went and continue to measure from the other side of that piece.
Using a Utility Knife and Flat Surface, Cut Out Your Pieces (For Longer Lengths)
Using the same technique as described in step one above, measure from one end of the flooring plank to the other and set aside each piece.
If you have measurements at least 1/2 inch longer than your cut size, you can use a utility knife to make the cuts. This will give you a straighter cut and is more accurate than using your fingers.
If you are unsure how to make the right angle with the blade, watch this tutorial on how to cut vinyl plank flooring with a utility knife:
Use a Sawtooth Blade & Calculator to Divide the Pieces into Strips of Various Sizes
If the total length of your vinyl plank piece is going to be shorter than an inch or two, you will need to use a sawtooth blade on your utility knife. These blades are generally easier for beginners to use, though the blades can be a bit more difficult to cut with.
Just be sure that you do not cut too short of a length as it will inhibit the ability of your planks to fit together. If you need to know how to tell when your cuts are longer than your available pieces, watch this video on how to cut vinyl plank flooring with a sawtooth blade:
For shorter lengths, such as 1-3 inches in length, you will need an online calculator and some easy math. You will want to find a calculator that allows you to insert measurements in inches or fractions of inches and then outputs the needed dimensions in feet or fractional dimensions.
You will need to input the measurements and then multiply those numbers by each other. For instance, if you had a 15-inch plank and wanted to cut it into two pieces, you would multiply 15 inches by 1/2 of an inch, which is 7.5 inches. However, to be fair with your measurement system, you will want to cut the board into strips that are 1/2 inch shorter as well.
This way, when you put them together, they will adhere perfectly lengthwise and give you a nice flat surface where the seams won’t be noticeable or show up at all.
Use this online calculator to find out how short to cut all of your various lengths. Once you get the cuts perfectly right, installing your vinyl plank flooring becomes a cinch! Happy flooring, and keep this information in mind.