• Home Improvement
    • DIY
    • Remodeling
    • Woodworking
    • Accessories
    • Home Design
      • Furniture
      • Organize
      • Tips
      • Decor
        • Interior
        • Exterior
    • Design Ideas
      • Bathroom
      • Bedroom
      • Dining Room
      • Living Room
      • Kitchen
  • Gardening
    • Backyard
    • Front Yard
    • Landscaping
  • Building Staircase
  • Categories
    • Home Improvement
    • Decor
    • Gardening
    • Woodworking
    • Lifestyle
    • Green Living
    • Real Estate
Dream Lands Design
  • Home Improvement
    • DIY
    • Remodeling
    • Woodworking
    • Accessories
    • Home Design
      • Furniture
      • Organize
      • Tips
      • Decor
        • Interior
        • Exterior
    • Design Ideas
      • Bathroom
      • Bedroom
      • Dining Room
      • Living Room
      • Kitchen
  • Gardening
    • Backyard
    • Front Yard
    • Landscaping
  • Building Staircase
  • Categories
    • Home Improvement
    • Decor
    • Gardening
    • Woodworking
    • Lifestyle
    • Green Living
    • Real Estate
Featured of How to Install a Shower Tray
You're here: Home Bathroom How to Install a Shower Tray?

How to Install a Shower Tray?

  • Perla Irish
  • March 14, 2019
Total
1
Shares
0
0
1
0
0
Table of Contents Show
  1. How to Install a Shower Tray
    1. Step 1: Put on Safety First
    2. Step 2: Choosing a Shower Tray
    3. Step 3: Plan Your Work
    4. Step 4: Install and Fix Drain Line
    5. Step 5: Install Vent Line
    6. Step 6: Install the Shower Tray
    7. Step 7: Cover the Shower Area

This is an easy job if you have the floor and wall side leveled properly. You just need to have a collection of all essential tools and you are ready to go. In this article, you will be guided on what equipment you would require plus how exactly you should move forward step by step, so as to make sure you get it right.

Just before we dive right into the topic, it is important to note that a performed shower tray/base is leak proof and installation process is much more simplified than the traditional solid mortar trays/bases.

How to Install a Shower Tray

But if you are willing to remodel your entire bathroom than it is a bit challenging as you have to revamp your old plumbing structure. Then once the drain line, venting line for the shower tray is ready, you are good to go.

How to Install a Shower Tray

Make sure you are familiar and comfortable working with plastic pipe and fittings where you might need to cut them on an exact measurement to fit into the place. And now let’s have a look at the required tools and materials for this project.


Read Also:

  • How to Clean Clogged Drains Without Assaulting Your Septic System?
  • How Can You Maximize the Use of Your Small Bathroom?
  • How to Fix Tiles Over Tiles at Home: How to Tile a Floor
  • 5 Wallet-Friendly Tips to Improve Your Bathroom
  • How To Take Care Of Your Drains In Winters?

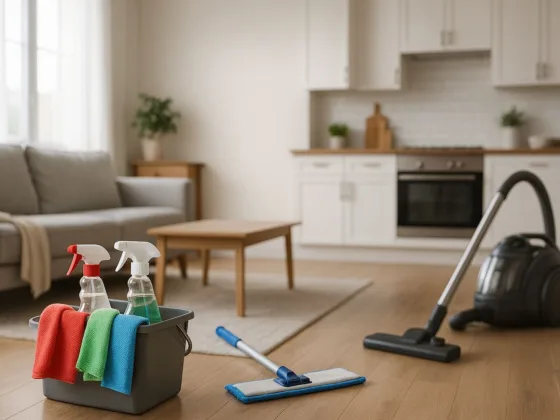
Tools required for installing a shower tray:

  1. Safety glass, Dust mask, Hand gloves
  2. Screwdriver, Adjustable wrench, Pipe wrench
  3. Miter saw, Reciprocating saw
  4. Hammer, Nut driver,
  5. Drill machine
  6. Framing square
  7. Knee pads
  8. Level, Tape measure
  9. Slip joint pliers
  10. Tube Cutter, Utility knife
  11. Mortar mix, Trowel

Step 1: Put on Safety First

Make sure you put on the dust mask, safety glass, and hand gloves to avoid any kind of injury.

Step 2: Choosing a Shower Tray

The most important part is to make the right choice of the perfect shower tray based on your bathroom space.

Step 3: Plan Your Work

If you are about to replace your old shower tray or, the old bathtub then make sure you remove them carefully and level the floor and walls perfectly for the shower tray to sit on. Plan to place the tray at a minimum required distance from the toilet and sink.

Step 4: Install and Fix Drain Line

You might need to rework on the water lines and install a new drain line if the existing line does not fit the drain hole of the new shower tray. Hence first take note the actual position of your drain hole and set drain line pipe accordingly and place the reducer coupling, riser pipe in position. While doing this you would require using the appropriate fittings of pipe to make their turns.

Remember, when you buy a shower tray there might be drain adapter coming along. But if you don’t see one, you might need to purchase drain kit separately. So, it is better to read the manufacturer’s direction before choosing one.

Step 5: Install Vent Line

Besides, you should create the vent line with transition couplings to the main stack. The vent must join the main line at a minimum of 6 inches above any spill lines that are sharing the vent line.

Now, remember if the main line is a plastic pipe then it is easier to cut and join the vent. But cast icon would require pipe snapper to cut. Then join the other side of the vent line to the drain line that is heading towards the shower tray hole.

Step 6: Install the Shower Tray

Now, it’s time to cover up the pipelines with creamy mortar mix and just before that make sure the drain line gets enough support to stay on its position perfectly. And now carefully install the shower tray in its position.

Setup the drain hole with washers and screws and then put the rubber gasket in place. Put clamp to the base lip to hold it up with the walls and avoid drilling through the base as it leaves the possibility of cracking. But don’t forget to put the drain strainer on the drain hole.

Let it be untouched overnight so as to allow the mortar to cure properly.

Step 7: Cover the Shower Area

Now, you can cover the area with your shower enclosures. And put some shower caulk around the tray and the shower surround to avoid water seeping through and prevent mold and mildew. But, caulking is another important task in terms of choosing the appropriate one for the shower and bathroom. And covering that entire topic in this short tutorial would be a waste of time for you.

But don’t worry; you might check this website to learn more it.

Total
1
Shares
Share 0
Tweet 0
Pin it 1
Share 0
Share 0
Related Topics
  • installation
  • installing
  • shower
Previous Article
Featured of Does Window Film Really Reduce Heat? Five Facts You Didn't Know

Does Window Film Really Reduce Heat? Five Facts You Didn’t Know

  • Perla Irish
  • March 14, 2019
View Post
Next Article
Featured of How to Make Your House a Smart Home

How to Make Your House a Smart Home

  • Perla Irish
  • March 14, 2019
View Post

Subscribe

Subscribe now to our newsletter

You May Also Like
How to clean a house professionally: color-coded microfiber caddy, mop, and HEPA vacuum in a spotless living room and kitchen.
View Post

How to Clean a House Professionally: A Step-by-Step Checklist

  • November 5, 2025
Louisiana coastal home with rooftop solar panels at golden hour, live oaks draped in Spanish moss, bayou in the background.
View Post

What to Know Before Choosing a Solar Provider in Louisiana

  • November 5, 2025
High-efficiency 95% AFUE condensing gas furnace with sealed PVC venting and condensate drain in a tidy utility room.
View Post

80% vs 95% Furnace: What Changes, What You Save, and When to Choose Each

  • November 4, 2025
Licensed HVAC technician replacing a residential gas boiler; verifying flue joints and gas connections during commissioning
View Post

How Professional Boiler Replacement Ensures Safety and Peace of Mind

  • November 4, 2025
Aosu vs Ring doorbell comparison 2025 — resolution, storage, alerts, ecosystem
View Post

Aosu vs Ring Doorbell (2025 Comparison Guide)

  • November 3, 2025
How to market business online as a tradesman — team filming tech-tip video beside service van
View Post

Effective Ways to Market Business Online as a Tradesman (2025 Guide)

  • November 1, 2025
Professional water heater installation: technician tightens copper water-line connections on a residential storage tank, wearing gloves for safety.
View Post

Why Professional Water Heater Installation Is Essential for Home Safety and Efficiency

  • October 31, 2025
HVAC technician commissioning a high-efficiency gas furnace with a digital manometer in a residential utility room.
View Post

Why Professional Furnace Installation is Essential for Home Safety and Efficiency

  • October 30, 2025

Leave a Reply Cancel reply

Your email address will not be published. Required fields are marked *

This site uses Akismet to reduce spam. Learn how your comment data is processed.

  • About
  • Privacy Policy
  • Terms of Use
  • Disclosure
  • Sitemap
  • Contact Us

Input your search keywords and press Enter.