Table of Contents Show
It doesn’t matter if you’re a professional woodworker or just a DIY enthusiast; a sander is always an efficient and convenient tool to have around.
Now, there is a large variety of sanders that shine at specific functions, be it removing material, smoothing edges, or polishing surfaces, but we’re here to talk about the most versatile and beginner-friendly one – the palm sander.
The fact is that, if used correctly, this tool can really help you tackle some house projects and renovate the overall look of your place.
What is Palm Sanders
As the name states, palm sanders are powered sanders that can be controlled using only your palm, comfortably.
Because of that, they’re one of the most lightweight and smaller machines of this type. You can work with them for long periods of time without feeling numbness or sore hands.
On the other side, if you’re dealing with more industrial-type projects, you might want to take a look at other options.
Not all palm sanders are the same.
You can find ones that use circular shaped sandpaper, others that work with belts, and some that have a triangular-shaped pad, even though the most common ones use a quarter of a 9″ x 11″ (23cm x 28cm) square-shaped sandpaper sheet – that’s why they are also called ¼ sheet sanders.
You can find some of the best palm sanders, on the market, at the moment, right here.
How They Help You Improve Your Home
1. Smooth Those Dangerous Edges
If you enjoy following interior design trends, you’ll know by now that hard angles, uptight silhouettes, and sharp edges belong to the past – plus, they can be dangerous for you and your family so smoothing them out can be tremendously helpful.
But why go shopping and break the bank if you can take your own furniture, some even carrying a large sentimental value, and take the matters into your own hands – or in this case, your own palms!
If that doesn’t convince you, we’ve got another point to make.
How many of us remember, as kids, hitting, head-first, against a sharp edge of a table? Painful memories, we know.
That’s why, if you have small kids running around, this safety measure can save a trip to the doctor and some hard-to-see tears.

How To
- First things first, make sure you give your furniture a good cleaning – you don’t want small pieces of material getting between the surface and the sander. A simple wet cloth should do the trick.
- Then, to make it easier to clean the dust, place your piece over a table with a cloth or, if it’s too big, just try to cover the ground under it with some large sheet.
- With the proper safety measures (goggles and mask), turn on the palm sander and gently work your way around the edge, with slow movements – try working with the wood grain, because if you leave scratches, they will be much less visible. Take advantage of its small size and portable characteristics to smooth also those hard-to-reach edges.
- Regarding the sandpaper’s grit, it depends on a variety of variables, like the wood’s type, the edge’s sharpness, and your personal feel with the sander. Nevertheless, starting with the 80-grit and following the scale (100-grit, 120-grit, 150-grit) until you hit the 180-grit is a good way to go on about it.
2. Fill Your Shelves With Beautiful Wooden Art
Every woodworker will tell you there is no feeling like taking something from nature, like an old piece of a tree trunk, and turn it into a beautiful piece of art.
There are various benefits you can get from woodworking. Not only is it a very relaxing and enjoyable hobby, but also a therapeutic exercise, with proven benefits against mental illness.
In the end, you’ll have something to display on your shelves that not only give you a proud feeling and sense of accomplishment but also gives your home a more exotic and interesting vibe.
Being able to be used one-handed, these palm sanders are ideal for these kinds of projects, as you can shape the piece at hand, effortlessly and efficiently.

How To
- Start by collecting a good chunk of natural wood, a bit larger than your ideal final result, and, using a wet cloth, give it a good cleansing.
- Then, using a low valued grit, sand its bark ’till you reach a uniform texture all around (unless you want to use some of its bark for aesthetic reasons). Remember to sand in a fairly aerated room. If that isn’t possible, you should consider getting a dust collector, avoiding having to clean the dust afterward.
- With a pen, trace the overall shape of your piece and the parts that need material removed. Then, place a rough sandpaper sheet (around 80-grit) on the palm sander’s pad and start sanding!
- Gradually change the sandpaper’s grit until you have reached the desired shape and finish. Then, before painting or varnishing, we recommend sanding one last time, with a light touch, using 180-grit sandpaper. That way, the paint will adhere much better to the surface while still achieving a smooth, good-looking finish.
- Lastly, let it dry and place it on display, so you can wow your guests!
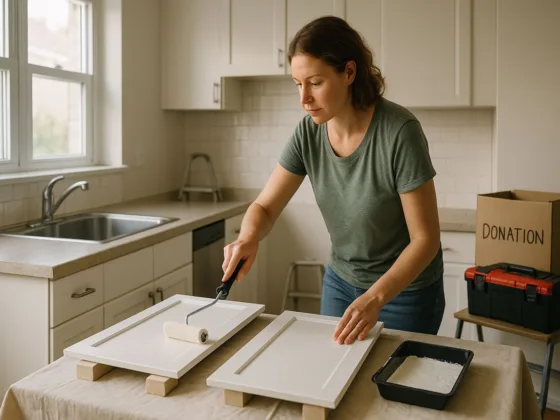
3. Polish Worn-Out Furniture
Maybe you got some wooden furniture with some outdated color palettes you want to get rid of, or maybe it just needs a bit of retouching.
Be it for repainting or for a simple coat of varnish, palm sanders are the ideal tools for these kinds of projects.
You’ll be surprised by how much a room can change with freshly sanded and varnished furniture.
Now, you might be looking at your scratched, worn-out wooden floor and thinking it could also need some work on, but unless you want to get some sore back and days of work, a palm sander might not be the ideal tool for it.

How to
- These projects aren’t that different from the first ones we’ve mentioned (smoothing edges). So, start by cleaning the furniture with a wet cloth.
- If it has some paint, start with a lower grit value (80-grit). Depending on the type of paint, you might need to place a bit of pressure on the sander (not too much) so it successively removes it.
- If it doesn’t have paint, you can jump straight to a higher grit (like the 100) and, in slow, straight movements, sand all surfaces.
- Lastly, work your way to the 180-grit. If it’s only varnishing, usually a coat is enough. If you wish to paint it, give it a light 180-grit sanding between each coat.
How to use Them
Due to the fact that these machines work directly on the piece at hand, you have to be careful about how you use it, as one slight mistake can make irreparable damages.
That’s why you shouldn’t apply that much pressure, as it works better with a light touch. Let its weight do the job instead!
Considering the type of work it does best and the projects it usually tackles, we recommend using sandpaper with a grit range between 120 and 220.
But you should always remember the number one rule when sanding – always start with a lower grit value (more coarse sandpaper) and work your way up (finer sandpaper).
This way, you won’t damage your wood’s surface, but you also won’t have to put excessive effort into it.
Final Thoughts
In conclusion, palm sanders are the ideal tool for people who want to enter the world of woodworking or for the ones who just want to tackle some simpler projects around the house.
Be it one or the other, this is a tool you can get for a fairly low value but that will surprise you with its power and convenience. Thanks for reading and, as always, have a nice day!