Table of Contents Show
Do you have old wood furniture sitting around in your house? Perhaps you’re hesitant to throw it out because the wood is still in excellent condition, but the paint on it needs crucial repainting.

DIY Repainting: How to Paint Your Old Wood Furniture
If you want to paint your furniture yourself, it’s easy enough to do with the proper preparation and materials. So gather your gear and painting materials, and start your DIY painting project.
What Materials Do You Need?
Before you begin anything, prepare your materials so you won’t have to keep looking around once you start painting. For your protective gear, you can wear an old sweater and gloves on top of your clothes to help you prevent staining your clothes with paint. You’ll also need a face mask to protect yourself from paint fumes mainly if you’re not using VOC-free paint.
For your tools, you need a scraper to help you remove the old paint clinging to the wood. You also need a palm or orbital sander to help you even out the surface of the furniture before you start painting. Tack cloth will remove pieces of dirt or dust that will possibly stick to the furniture.
You’ll need sandpaper to help you smoothen out the layers once it’s dry. Excellent paint with the help of a primer will help you achieve a better paint job. You’ll need a brush or foam roller if you’re not using spray paint.
Must Read:
- Indispensable Pieces: 7 Essential Furniture Pieces Every Home Must Have
- This is How You Do It: Excellent Tips to Have the Best Furniture
- How The Right Furniture Can Optimize Your Condo’s Space
- 5 things you need to know before shopping for furniture
- How to Distress Wood Furniture
How Do You Paint Your Furniture Correctly?
Now that everything is ready, you can begin painting your furniture. Here are the steps that you’ll need to follow so you can achieve the perfect finish for your wood furniture.

-
Scrape Off the Old Paint
You can’t start if there are still bits and pieces of the old paint on your furniture. Make sure that you remove all traces with a scraper. So scrape away, but don’t rub too hard. If you do, you’ll end up damaging the wood.
Damaged wood means that you’ll get an uneven surface no matter how much coats of paint you apply on the surface. Remember to scrape with force but scrape gently to protect the wood.
-
Sand It Off
Power up your palm or orbital sander and sand the surface of the furniture so you can paint on an even and smooth surface. Begin with lower numbers, such as 80-grit sandpaper. Switch to higher numbers gradually. Be careful to protect the wood and not damage it with the sander.
Remember to follow the grain of the wood when sanding, and don’t swipe your sander on random streaks on the surface. Wipe with a tack cloth after sanding.
-
Watch the Crevices
If you’re sanding furniture like chairs, it’ll probably have narrow areas on it. Don’t disregard the tight spaces, and make sure to sand it, too. These spaces might be too narrow to reach for a palm sander, so you’d have to use sandpaper and reach the crevices by hand. Wipe with a tack cloth after sanding.
-
Primer Power
Use a white primer if you’re going to paint the furniture with light colors, and go with dark if you’re also using dark paint colors. If you’re painting a chair, begin on the underside. Follow the natural lines or the grain of the wood.
If you’re using spray primer, make sure to cover all areas of the furniture. If not, you can use a mini foam roller to help you reach narrow sections. Apply 2-3 coats of primer but make sure that each layer is thoroughly dry before you apply another coat of primer.
-
Sand Away
Once the final coat is dry, touch the surface. If you’re not satisfied with the quality, or if it feels a bit rough to the touch, sand it again. You can use fine sandpaper (preferably 220-grit). Wipe with a tack cloth after sanding.
-
Paint It Smoothly
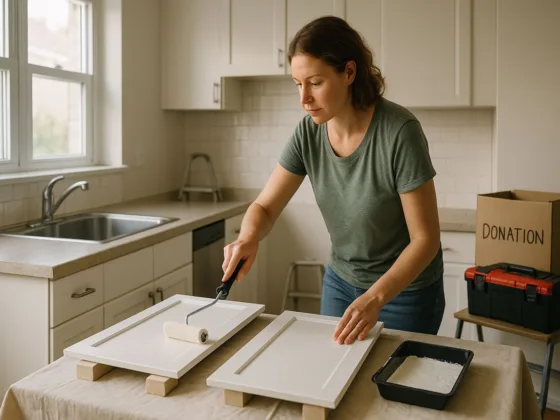
Apply the paint on the furniture. Make sure to follow the natural lines of the furniture for a natural look. You can use a brush or foam roller to apply the paint.
Apply two to three coats of paint. Let each coat dry before you begin applying another layer, and remember to sand after each coat is dry.
Make sure to wipe the surface after you sand so that no pieces of dirt will get stuck on the surface. Dust can ruin the quality of your paint job.
-
Protect With Clear Coat
A clear coat can add shine to your furniture, and it can protect your paint at the same time. If you used oil-based paint, apply an oil-based top coat. You can use one to two layers, depending on your satisfaction with the quality of the surface.
-
Drying Season
Let it dry! If you’re too tired to clean up all the mess left from your painting job, you can call Maid Complete to help you clean your house while you rest.
Takeaway
Repainting old wood furniture is relatively easy. You have to prepare the right materials such as a sander, scraper, brush, primer and paint, and especially your protective gear.

Scrape off the former paint and sand it before you begin painting. Make sure that you sand all the surfaces, including the narrow areas. Use a primer, and sand in between coats. Apply the paint, and sand again after each layer is dry. Protect your paint job with a top coat, and let it dry after.