Dream Lands Design
  • Home Improvement
    • DIY
    • Remodeling
    • Woodworking
    • Accessories
    • Home Design
      • Furniture
      • Organize
      • Tips
      • Decor
        • Interior
        • Exterior
  • Design Ideas
    • Bathroom
    • Bedroom
    • Dining Room
    • Living Room
    • Kitchen
  • Gardening
    • Backyard
    • Front Yard
    • Landscaping

Categories

  • Accessories
  • Backyard
  • Bathroom
  • Beauty
  • Bedroom
  • Cars
  • Decor
  • Design Ideas
  • Dining Room
  • DIY
  • Entertaining
  • Exterior
  • Finance
  • Front Yard
  • Furniture
  • Gardening
  • Green Living
  • Home Design
  • Home Improvement
  • Interior
  • Kitchen
  • Landscaping
  • Lifestyle
  • Living
  • Living Room
  • Organize
  • Photography
  • Real Estate
  • Remodeling
  • Tips
  • Uncategorized
  • Wall Improvement
  • Woodworking

Archives

  • March 2023
  • February 2023
  • January 2023
  • December 2022
  • November 2022
  • October 2022
  • September 2022
  • August 2022
  • July 2022
  • June 2022
  • May 2022
  • April 2022
  • March 2022
  • February 2022
  • January 2022
  • December 2021
  • November 2021
  • October 2021
  • September 2021
  • August 2021
  • July 2021
  • June 2021
  • May 2021
  • April 2021
  • March 2021
  • February 2021
  • January 2021
  • December 2020
  • November 2020
  • October 2020
  • September 2020
  • August 2020
  • July 2020
  • June 2020
  • May 2020
  • April 2020
  • March 2020
  • February 2020
  • January 2020
  • December 2019
  • November 2019
  • October 2019
  • September 2019
  • August 2019
  • July 2019
  • June 2019
  • May 2019
  • April 2019
  • March 2019
  • February 2019
  • January 2019
  • December 2018
  • November 2018
  • October 2018
  • September 2018
  • August 2018
  • July 2018
  • June 2018
  • May 2018
  • April 2018
  • March 2018
  • February 2018
  • January 2018
  • December 2017
  • November 2017
  • Privacy Policy
  • Terms of Use
  • Disclosure
  • Sitemap
  • Contact Us
29K
98K
0
Dream Lands Design
  • Home Improvement
    • DIY
    • Remodeling
    • Woodworking
    • Accessories
    • Home Design
      • Furniture
      • Organize
      • Tips
      • Decor
        • Interior
        • Exterior
  • Design Ideas
    • Bathroom
    • Bedroom
    • Dining Room
    • Living Room
    • Kitchen
  • Gardening
    • Backyard
    • Front Yard
    • Landscaping
Featured image - In Which Correct Angle a Chisel Should Sharpen
You're here: Home Woodworking In Which Correct Angle a Chisel Should Sharpen?

In Which Correct Angle a Chisel Should Sharpen?

  • Perla Irish
  • April 3, 2021
Total
0
Shares
0
0
0
0
0
Table of Contents Hide
  1. Which is the Best Angle to Sharpen
  2. Why Choosing a Steeper is a Bad Idea for Sharpening Chisel?
  3. Which is Beneficial Between 20° to 30?
  4. How to Sharpen Chisel Properly?
  5. Conclusion

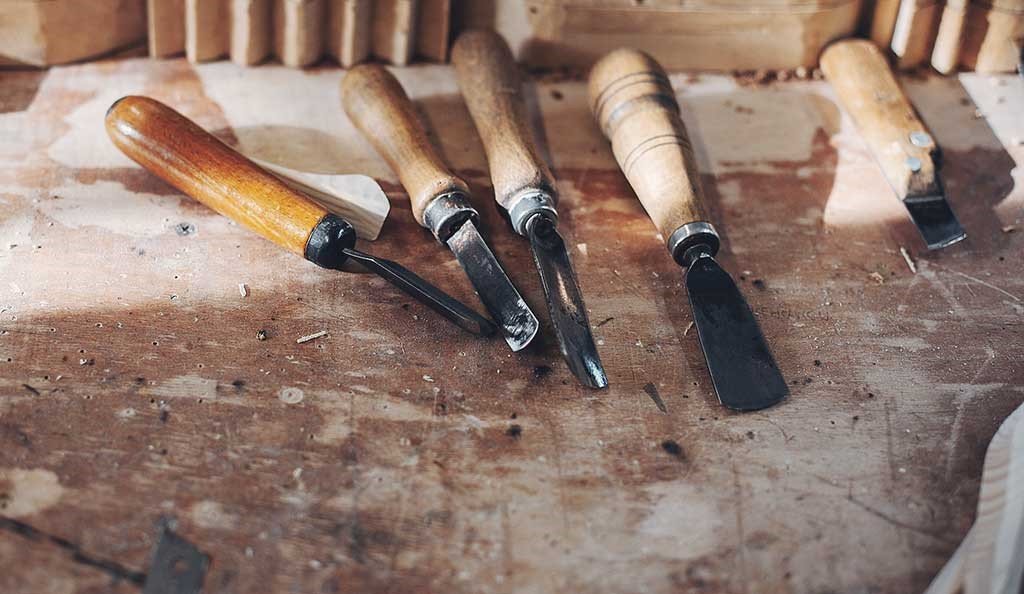
Most carpenters have one or two types of hank chisels: benches and sides. The most common table scissors have blades about 4 to 6 inches long and can strike with a hammer. They come with either an O1 steel blade, which is smooth to sharp, or an A2 alloy, which is sturdy and holds long blades.

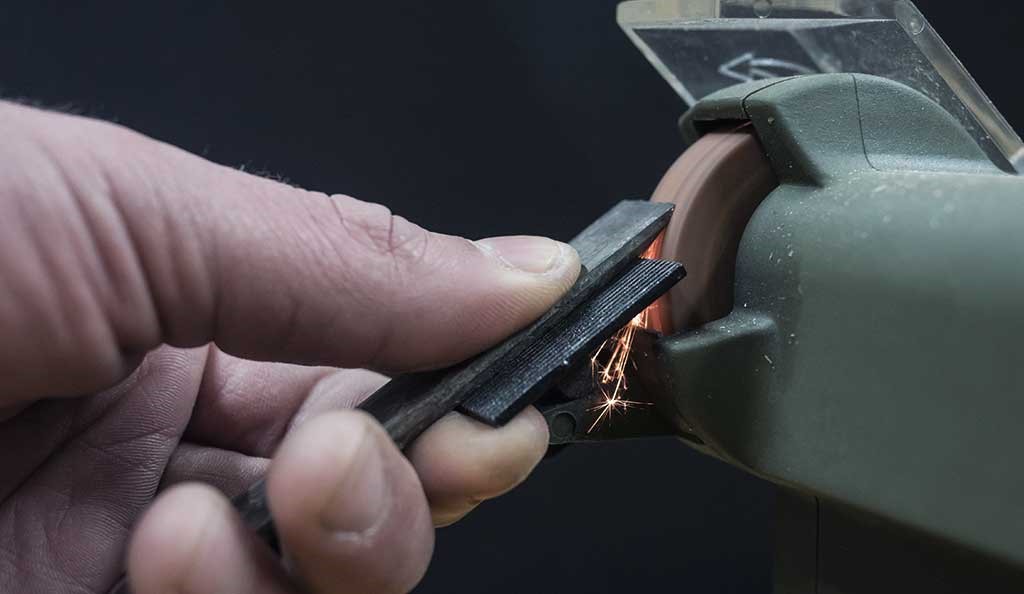
What is the best angle to sharpen a wood chisel? For best results, speed up the drill to a 25° angle. If you want to add a microscopic edge (a thin, light edge on the tip that makes retouching easier), choose 30° for O1 and 35° for A2.

image - In Which Correct Angle a Chisel Should Sharpen
In Which Correct Angle a Chisel Should Sharpen

Keep reading this article to know further information on this topic.

Which is the Best Angle to Sharpen

What is the best angle to sharpen a wood chisel? 25° is the standard grind angle for sharpening irony and chisel, but some people sharpen them at this angle. On the contrary, some people also sharpen their chisel edges at this angle.

You can also speed up at the same angle as long as the user doesn’t damage that thin edge (like with a chisel instead of regular cut wood), but in the west, that’s when it speeds up, slightly most devices at a slight constant angle at the end. Increase Angle 2, that is to say, 30°.

It does not matter if this goal is not achieved at all. Most people who receive the hand get an advantage of about 28-32° depending on the day, the size and shape of the bit, and other factors, and such a small difference in angle does not affect.

Why Choosing a Steeper is a Bad Idea for Sharpening Chisel?

Steeper cutting edges can behave as if they are less sharp (in fact, they’re just sharper, but the wood has more strength, so it looks like they are). This effect is not related to most of the 3 planers, but it is important for most of the bits due to the way they are used.

However, sometimes it is better to go to the stator. For example, you can cut a chisel slightly smaller than a chisel, as it is driven harder into the wood with a hammer or hammer, and may have a molar, as you can imagine, a thinner one.

Can easily damage the blade.

image - Why Choosing a Steeper is a Bad Idea for Sharpening Chisel

Which is Beneficial Between 20° to 30?

Hardly any general-purpose sharping chisels set has been deepened more on 25°, it is the main reason being the brittleness of the cutting edge.

Since you are specifically referring to cheap bits, usually with inexpensive bits, you should sharpen conservatively so that you don’t get very sharp edges that are too blunt and/or are likely to roll or sag. scaling.

You can test it on the working time and adjust it accordingly. Start sharpening at a 25-degree angle and see how the edges stick to the wood you are using.

If they become dull or damaged very easily, the next time you attach them, lift the handle slightly. If around 30 ° is still brittle, bring it a little closer than 35°, which is rarely strong enough.


Read Also:

  • How to Find Cheap Tools Every Carpenter Needs in 2021: A Brief Guide to Your Hand Tools
  • 7 Woodworking Tools Every Woodworker Needs
  • 5 Woodworking Skills to Learn for DIY Projects
  • 3 Fabulous Benefits of Woodworking

How to Sharpen Chisel Properly?

It’s easy to forget that every cutting tool has two aspects that must be maintained. They are just as important but talk about the back of their chisel first. The back should be completely flat so that the tool is straight and smooth like the severed side.

What is the best angle to sharpen a chisel for woodworking? The process of creating a flat, smooth surface is called lapping. Fortunately, you only need to grind the chisel once.

Almost all scissors are needed, even outside of a box, but some require a lot more work than others. Either way, you don’t have to curl your entire back – just the first 2 inches or so.

image - How to Sharpen Chisel Properly

The first step in the lapwing is determining how much metal to remove and the grain to start with. Press firmly and rub the back of the 220 grit chisel several times.

Walk diagonally. Turn the chisel and look back. If it is almost scratched, continue to break in at 220 grit. If only a few tabs are scratched, you need to start with heavy paper.

Try grit 150 first; If it gets too slow, use 80 grit. Whichever grit you start with, continue until the stripes on the back are 2 inches wide.

The next step is to make small scratches with 150 grit. This time push the chisel in the opposite direction; rub it in different directions so that you can track your progress.

Continue until you see 80 grit scratches. Repeat the 220-grit process. This is how you can make your chisel sharp and smooth and flat.

Conclusion

Chisels for cleaning chips should only be used for manual work, never hit with a hammer. These scissors have 6-10 “blades and are great for cutting and woodworking, not chopping. For ease of cutting, sharpen these 20° bevels, mixing 25° micro-bevels as needed.

Total
0
Shares
Share 0
Tweet 0
Pin it 0
Share 0
Share 0

Subscribe

Subscribe now to our newsletter

You May Also Like
Featured image - How to Build a Wooden Planter Box Easy
View Post

Bring Your Deck to Life With These DIY Wooden Planter Boxes

  • February 13, 2023
Featured of DIY Simple Tree House Ideas: How to Make a Treehouse
View Post

DIY Simple Tree House Ideas: How to Make a Treehouse

  • December 13, 2022
Featured of DIY Wishing Well: Easy Directions for How to Make a Wishing Well
View Post

Easy Directions for How to Make a Decorative Wishing Well

  • October 3, 2022
featured image - How to Choose the Right Hardwood Floor
View Post

How to Choose the Right Hardwood Floor

  • September 29, 2022
Featured DIY Pressure Treated Wood Deck Skirting Ideas
View Post

Quick and Easy DIY Pressure Treated Wood Deck Skirting Ideas in 4 Days, Hide Space Under Deck

  • July 25, 2022
featured image - How Different Woods Impact Your Restaurant Furniture
View Post

How Different Woods Impact Your Restaurant Furniture

  • March 13, 2022
featured image - Beginner's Guide to Must-Have Basic Tools for Woodworking
View Post

Beginner’s Guide to Must-Have Basic Tools for Woodworking

  • August 23, 2021
featured image - Things to Look Out for When Selecting an Ideal Joinery and Carpentry Service for Your Home
View Post

Things to Look Out for When Selecting an Ideal Joinery and Carpentry Service for Your Home

  • July 25, 2021
Dream Lands Design
  • Privacy Policy
  • Terms of Use
  • Disclosure
  • Sitemap
  • Contact Us

Input your search keywords and press Enter.

Add Dream Lands Design to your Homescreen!

Add