Table of Contents Show
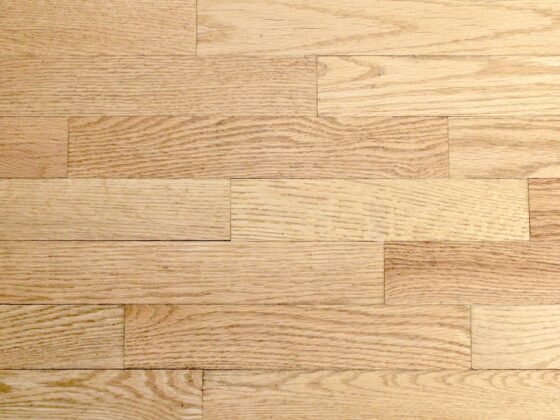
Can crayons save your hardwood floor?
Paraffin wax is what makes up crayons. If you have a scratch on your hardwood floors, the right colored crayon could save the day. As long as it’s a minor scratch, rub the crayon onto the floor to create a concealer.

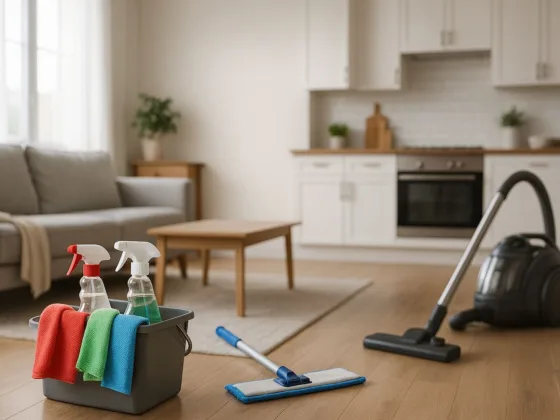
Staying on top of scratches is just the start. If you want your hardwood floors to feel and look their best, then you’ll need to learn the best cleaning tips.
What’s the right way to clean hardwood flooring? Read on to find out.
1. The Pre-Clean Process
Before you can deep clean hardwood floors, sweep or vacuum. When you’re vacuuming, make sure you use the hard floor setting. The hard floor setting is going to lift the vacuum cleaner while also deactivating the brush roll.
By using the right setting, you won’t have to worry about damaging your floors. The hard floor setting will use suction to gather up all of the dust and debris. After sweeping or vacuuming, it’s time to get out the dust mop!
Use a Dustmop or Microfiber Cloth
If you don’t have a dust mop, you can use a microfiber cloth instead. Place the microfiber cloth face down on the floor, and use your broom or vacuum to move it around. Of course, a dust mop will make life easier since the handle will be designed to help you get the hardest to reach places.
Now you have most of the dirt and debris up off of the floor. Use a damp rag to get whatever’s leftover in any of your piles.
At this point, you’ve completed the pre-cleaning process. Your hardwood floors are now free of dirt and debris, so you can begin to deep clean them without worrying about causing any damage.
Read Also:
2. Get Out the Mop
What type of mop will work best on your hardwood flooring? Sponge, strip, or microfiber mops work great for hardwood floors.
You can use string mops or strip ones. The issue with string-styled mops is that they tend to get too wet, and too much water is terrible on hardwood floors.
Steam Mops are Bad
Avoid using steam mops at all costs. The only exception would be a steam mop that is specially designed to clean hardwood floors. The issue with steam cleaning is that it can dull the wood’s finish and cause permanent damage.
If you have a mop that uses a spray and mop combo, double-check the wet pad material. As long as the wet pads are safe for hardwood floors, you’ll be good to go.
3. Pre Mop
Your pre mop is a great way to lift anything sticky up off of the ground, helping reveal the wood’s surface. That way, when you start applying your hardwood floor cleaning detergent, it’ll be able to deliver the best results.
Water Warning
Avoid letting the water stand in any area. Standing water can permanently damage your floors, even if they’re prefinished. To avoid standing water, you’ll want to wring out your mop thoroughly. Before using a hardwood floor cleaner, we suggest doing a quick mop with warm water.
4. Safely Apply the Floor Cleaner
When applying the floor cleaner, be sure to follow the product label instructions. Different companies have different concentrations in their cleaning products, so the directions won’t always be the same.
While one hardwood floor cleaner might need to sit on the floor for a few minutes, others must be wiped off immediately. If you’re making the detergent yourself, you won’t have to worry about letting it sit for a lot of time.
DIY detergents can be used in the same way you’d use soap. Dilute the detergent with the appropriate amount of water, keep your mop wet but not stopping wet, and clean your floors!
DIY Floor Cleaning Detergent vs. Store Bought
Did you want to clean hardwood flooring with a detergent you make? Use warm water with the right vinegar ratio, to give your floors a perfect shine.
Another option is to add in essential oils so you’re home can have a signature scent. Plant-based liquid soaps also work well on hardwood floors, and you can combine them with water and vinegar as well.
We also find that vegetable oil and vinegar also do a great job of helping the floor shine, along with lifting up the dirt. Of course, if you don’t want to take the time to make your own detergent, there’s a lot of great products on the market.
As long as you buy a professional wood floor cleaner, you’ll be good to go. We also suggest looking for cleaners that come in spray bottles since they make life easier.
5. Post Cleaning
Now your hardwood floors are squeaky clean. Go around the house and double-check for any areas of standing water. Use a microfiber cloth to wipe up damp spots. The less moisture on your floor, the better.
Polish and Conceal
Use this time to inspect your floor for any scratches or dull areas. If you notice dull areas, a wood floor polish can spruce things up. If you notice scratches, buy an appropriate color concealer to cover them up.
6. Keep Up With Daily Maintenance
Deep cleaning your hardwood floors is a great start, but you shouldn’t stop there. You’ll also need to maintain your floors on a daily basis.
Sweep or dust mop your hardwood floors a couple of times throughout the day and vacuum every week. Use a damp mop on the heavy traffic areas at least 3 times a month and deep clean every 3-4 weeks.
Enjoy Clean Hardwood Flooring
Now you know how to deep clean hardwood floors like a pro! Since the pre-cleaning process can be the most time-consuming, get a jump-start right now.
Find a broom, dust mop, or vacuum that’s safe to use on the hardwood floors. Remember to adjust the vacuum setting, otherwise, the brush could scratch the floor’s finish.
When you stay on top of maintenance, you’ll be able to enjoy the rewards of clean hardwood flooring week after week. If you’d like more advice, see what the rest of our website is all about.