• Home Improvement
    • DIY
    • Remodeling
    • Woodworking
    • Accessories
    • Home Design
      • Furniture
      • Organize
      • Tips
      • Decor
        • Interior
        • Exterior
    • Design Ideas
      • Bathroom
      • Bedroom
      • Dining Room
      • Living Room
      • Kitchen
  • Gardening
    • Backyard
    • Front Yard
    • Landscaping
  • Building Staircase
  • Categories
    • Home Improvement
    • Decor
    • Gardening
    • Woodworking
    • Lifestyle
    • Green Living
    • Real Estate
Dream Lands Design
  • Home Improvement
    • DIY
    • Remodeling
    • Woodworking
    • Accessories
    • Home Design
      • Furniture
      • Organize
      • Tips
      • Decor
        • Interior
        • Exterior
    • Design Ideas
      • Bathroom
      • Bedroom
      • Dining Room
      • Living Room
      • Kitchen
  • Gardening
    • Backyard
    • Front Yard
    • Landscaping
  • Building Staircase
  • Categories
    • Home Improvement
    • Decor
    • Gardening
    • Woodworking
    • Lifestyle
    • Green Living
    • Real Estate
Featured image - Why Woodworking Doesn't Work With Wet Wood
You're here: Home Woodworking Why Woodworking Doesn’t Work With Wet Wood

Why Woodworking Doesn’t Work With Wet Wood

  • Perla Irish
  • December 15, 2019
Total
1
Shares
0
0
1
0
0
Table of Contents Show
  1. Shrinkage
  2. Wood Damage
  3. Tool Wear
  4. Adhesive Problems
  5. Improper Sanding
  6. Mushy Wood
  7. Conclusion

Wood is generally hygroscopic, always absorbing and letting out moisture from its environment. The moisture levels range per piece and depend on the source. It is therefore common that you have likely experienced warping or cracking of wood, leading to change in shape or dimensions.

image - Why Woodworking Doesn't Work With Wet Wood
Why Woodworking Doesn’t Work With Wet Wood

Wet wood is generally bad for carpentry. As described by this stoneycreekwoodworks.com post, you don’t want to waste resources and materials due to wet woodworking. Being conscious of the wily ways of damp wood can keep you ahead of the game. Knowing how to maneuver your way with driftwood is necessary to reduce the imminent hassle it presents.

Professionals in the wood manufacturing and plumbing industry have to invest in monitoring the moisture content of wood for them to get the value for their timber products. Otherwise, it is technically gruesome experience on such woodworking. Wet wood rots with time due to bound moisture, unless an effort is put to dry it promptly.

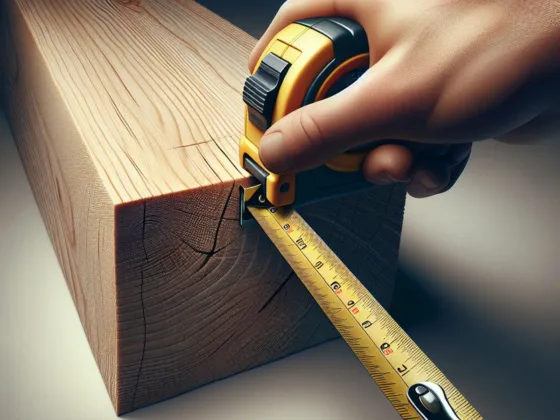
Notably, woodwork with moisture content below 12% is ideal for your project; hence the need to have an off-the-counter MC measurement tool to help in knowing the MC level. Indicated below are reasons why woodworking doesn’t work with wet wood:


Read Also:

  • Beautiful Restorations: A Step-By-Step Guide to Restoring Wooden Furniture
  • Did You Know Woodworking Can be Beneficial to You?
  • Exceptional Uses of a Sawhorse in Woodworking
  • 5 Woodworking Skills to Learn for DIY Projects

Shrinkage

Wet wood has high moisture content, and when it begins to dry, you will experience shrinking of the wood. The stakes, in this case, is that dimensions such as width and thickness will be negatively impacted, losing your initial design work.

Moreover, if you have wooden flashboards fitted together, you will end up with buckling and cupping gaps, which is quite an unpleasant sight, that leads to wasted time and effort.

Wood Damage

Wet wood is subject to gouging and tear-outs. The reason behind this is that generally, high moisture timber has much-softened fiber.

Therefore, when using a tool like a sander on such wood, the surface tends to tear instead of becoming smooth, this is because wood strength is greatly affected by any moisture content imbalance. What this creates for the plumber or wood manufacturer is constant and costly reworking.

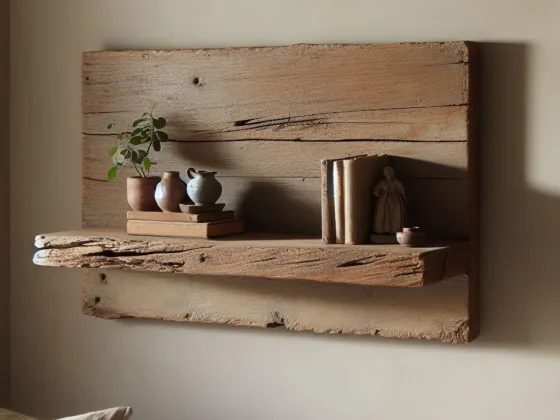
Any projects that have ever been done with such driftwood can neither be used as shelves nor can they support the weight of a person, due to weakness brought about by continuous waterlogging and drying.

For quality control, engage the services of a kiln drying equipment so that you don’t have project stalling or reputations damage delivering below par projects that might need reworking.

Tool Wear

High moisture content woodwork can damage your tools or shorten their lifespans. Imagine using a planer or a sander on wet wood! Wet sawdust will remain on the blades and other moving parts and can gum up the works of your woodwork machines, to the extent of even causing rust on the metallic parts.

These tools are quite expensive. Hence you need to take great care as a wood manufacturer, Perhaps, the reason wet wood in woodworking might not be a rewarding endeavor.

Adhesive Problems

Handling damp wood, especially when gluing, present a situation where joints will not hold properly together with time. Once the wood dries, it tends to shrink, pulling away from the other woods.

It can be particularly disastrous with glued down flooring. Additionally, the curing process is very much slowed when using damp wood.

Improper Sanding

Sanding wet wood only leads to scratches and swell marks, and such imperfections tamper with the aesthetic appeal of the wood. Understand that such a block of wood has actually not undergone a complete transformation and will still shrink when it finally gets dried up.

Mushy Wood

Akin to adding water to sand, when using sandpaper on damp or wet wood, you are only likely to extract water from the woodwork. The result is a sandpaper that is unusable; with mushy lumber left on the surface while scraping the wood.

image - Woodworking

Conclusion

The risk that your project stalls due to high moisture content wood can be minimized by knowing the best time to proceed with your woodworking, which is when your woodwork has reached an equilibrium point with your environment.

Similarly, it advisable to purchase MC readers to help determine the level of moisture content long before you start working. Equally important is that you invest in drying equipment, like some well-placed heater, which can be ideal for your workshop.

Essentially, before you start working, allow the time for the wood to acclimate with the surrounding, this will prevent working with wet wood that has high moisture content. Ultimately this reduces common issues such as tools wearing out due to damp wood, damaging salvageable wood that could be put into better use, besides eliminating adhesive and shrinkage problems, as well as improper sanding.

Total
1
Shares
Share 0
Tweet 0
Pin it 1
Share 0
Share 0
Perla Irish

Perla Irish, who is more familiarly known as Irish, is the Content Manager at Dreamlandsdesign.com. She loves following trends around home and garden, interior design, and digital marketing. Through this blog, Irish wants to share information and help readers solve the problems they are experiencing.

Related Topics
  • woods
  • woodwork
Previous Article
Featured image - Five Signs It's Time to Change Your Doors

Five Signs It’s Time to Change Your Doors

  • Perla Irish
  • December 15, 2019
View Post
Next Article
Featured image - Furnace and Heating Maintenance Tips to Keep Cozy All Winter Long

Furnace and Heating Maintenance Tips to Keep Cozy All Winter Long

  • Perla Irish
  • December 15, 2019
View Post

Subscribe

Subscribe now to our newsletter

You May Also Like
Wooden pergola attached to the house with strong beams.
View Post

How to Build a Pergola Attached to the House: Instructions and Drawings

  • May 19, 2025
Tape measure measuring the thickness of a piece of lumber.
View Post

How to Determine Deck Framing Lumber Sizes: A Complete Guide

  • May 13, 2025
A close-up view of wood lattice installed under a deck on uneven ground.
View Post

How to Install Lattice Under Deck Uneven Ground

  • February 5, 2025
A floating shelf from an old door
View Post

A Guide on How to Build a Floating Shelf With No Visible Supports and Plenty of Strength

  • January 13, 2025
A cheerful Caucasian father and Hispanic mother work together on a DIY home improvement project in their lush backyard, measuring and cutting lumber with various tools scattered around them. Partially completed deck skirting showcases their progress, emphasizing teamwork and dedication to their outdoor task.
View Post

Quick DIY Deck Skirting: Hide Under Deck in 4 Days

  • September 14, 2024
A trendy DIY kitchen featuring bespoke wooden cabinets in various finishes and colors, with a joyful Hispanic family of mixed genders actively engaged in the cabinet project, surrounded by tools and materials, conveying creativity and a personal touch in home improvement.
View Post

Build Your Dream Kitchen: DIY Kitchen Cabinet Plans

  • September 1, 2024
A welcoming kitchen filled with warm, inviting light, featuring a meticulously crafted butcher block table made of rich hardwood. The table showcases the natural grain and character of maple or oak. In the foreground, a pair of Caucasian hands skillfully work on the table, holding a saw, with sandpaper and other DIY tools nearby. The overall atmosphere radiates charm and creativity, suggesting a space perfect for cooking and experimentation.
View Post

The Ultimate Guide to Building a Butcher Block Table for Beginners

  • August 29, 2024
A warmly lit kitchen featuring a handcrafted wooden countertop, with a person focused on a carpentry project. The individual uses a saw and sandpaper to showcase the intricate grain patterns of the wood. Surrounding the workspace are green plants and rustic kitchen decorations, contributing to a cozy and homely atmosphere.
View Post

Transform Your Kitchen: How to Build Wood Countertops Like a Pro

  • August 29, 2024

Leave a Reply Cancel reply

Your email address will not be published. Required fields are marked *

This site uses Akismet to reduce spam. Learn how your comment data is processed.

  • About Us
  • Privacy Policy
  • Terms of Use
  • Disclosure
  • Sitemap
  • Contact Us

Input your search keywords and press Enter.