• Home Improvement
    • DIY
    • Remodeling
    • Woodworking
    • Home Design
      • Furniture
      • Organize
      • Tips
      • Decor
        • Interior
        • Exterior
    • Design Ideas
      • Bathroom
      • Bedroom
      • Dining Room
      • Living Room
      • Kitchen
  • Gardening
    • Backyard
    • Front Yard
    • Landscaping
  • Building Staircase
  • Categories
    • Home Improvement
    • Decor
    • Gardening
    • Woodworking
    • Lifestyle
    • Green Living
    • Real Estate
Dream Lands Design
  • Home Improvement
    • DIY
    • Remodeling
    • Woodworking
    • Home Design
      • Furniture
      • Organize
      • Tips
      • Decor
        • Interior
        • Exterior
    • Design Ideas
      • Bathroom
      • Bedroom
      • Dining Room
      • Living Room
      • Kitchen
  • Gardening
    • Backyard
    • Front Yard
    • Landscaping
  • Building Staircase
  • Categories
    • Home Improvement
    • Decor
    • Gardening
    • Woodworking
    • Lifestyle
    • Green Living
    • Real Estate
Featured image - How to Build Twin Corner Beds with Storage

How to Build Twin Corner Beds with Storage

  • Perla Irish
  • February 17, 2020
Total
189
Shares
0
0
189
0
0
Table of Contents Show
  1. Preparation
  2. Cut List for the Box
  3. Cut List for the Top Unit
    1. Step 1:
    2. Step 2:
    3. Step 3:
    4. Step 4:
    5. Step 5:
    6. Step 6:
    7. Step 7:
    8. Step 8:

If you have searched for twin corner beds chances are you have seen the pictures of a plan in Pinterest.

But how do you make that one yourself?

Assuming you have all the necessary tools and materials we are going to give a written guide of how to build twin corner beds with storage.

Preparation

You need to buy some materials for this project. Down below we will provide the shopping list that you need to complete.

  • 7 – 2×2, 8′ Long, Furring Strips
  • 2 – 32″ High x 40 1/2″ Long (or longer) Wainscoting Panels OR 1 sheet of 1/4″ plywood or MDF
  • 2 – 1×8 Boards, 8′ Length (Pine is cheapest)
  • 1 – a sheet of 3/4″ plywood or MDF
  • Edge Banding (if you are using plywood and staining the bed)
  • Wood Filler
  • Wood Glue

Aside from these materials, you are going to need some materials like sandpaper, paint, brush, mattress for your bed, etc. While on the topic about the mattress you should check out trendyhomeinteriors.com to find the best suitable option for you.


Read Also:

  • DIY Corner Computer Desk Plans, Build Your Own Computer Desk Plans
  • 10 Best Ways To Make Your Bedroom Interior Creative and Innovative
  • DIY Bed Frame Ideas, How to Build a Wooden Bed Frame Step by Step
  • 7 Woodworking Tips for When You Remodel the Bedroom
  • How to Create More Space in Your Bedroom
  • Futon Beds: Reasons Why they are Popular

Cut List for the Box

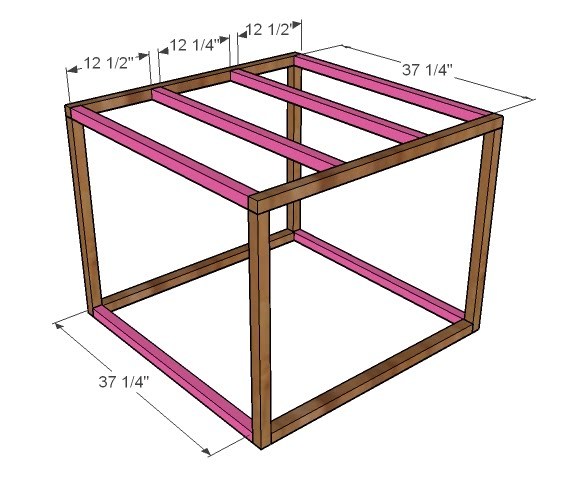
  • 4 – 2×2 @ 40 1/4″ (Tops and Bottoms Box Ends)
  • 4 – 2×2 @ 29″ (Legs for the Box Ends)
  • 6 – 2×2 @ 37 1/4″ (Supports)
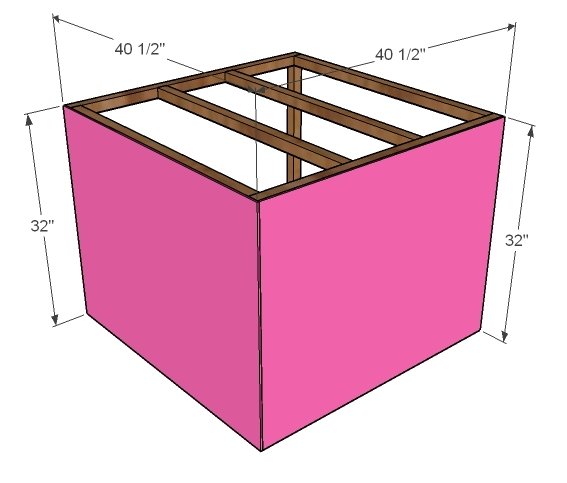
  • 2 – 32″ Wainscoting @ 40 1/2″ (Panels)

Cut List for the Top Unit

  • 1 – 1×8 @ 40 1/2″ (End)
  • 2 – 1×8 @ 39 3/4″ (Long Dividers)
  • 1 – 1×8 @ 14 1/2″ (Short Divider)
  • 1 – 1×8 @ 24 1/2″ (Final Divider)
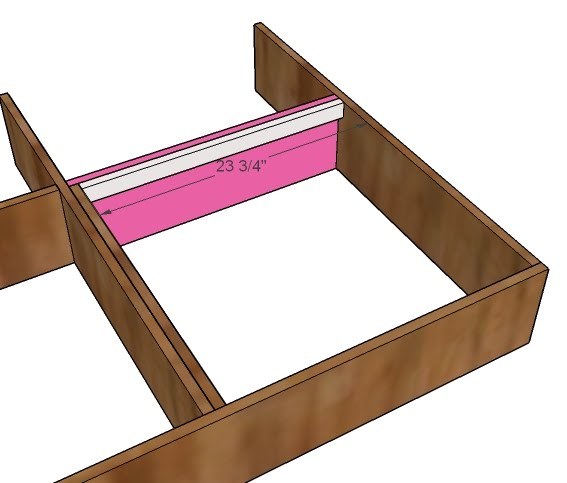
  • 1 -1×2 @ 24 1/2″ (Cleat for Support Lid, 1st one installed)
  • 1 – 1×2 @ 23 3/4″ (Cleat for Support Lid, 2nd one installed)

Please make sure to work on a clean surface. You don’t want your glue to pick up unwanted dust.

Step 1:

Step 1 - How to Build Twin Corner Beds with Storage

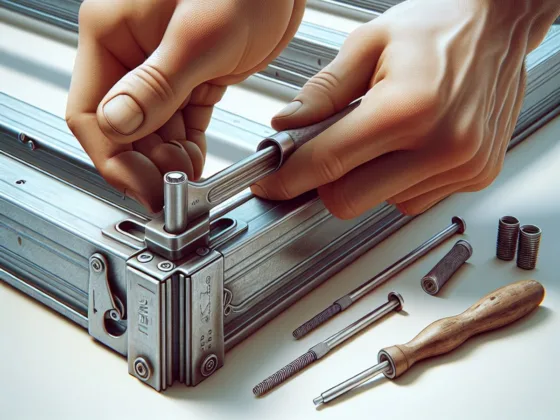
Building the box end. You are going to attach the cut parts. You can make the bond stronger by adding a screw-on top of the glue.

Step 2:

Support for the box. Make sure you don’t use any glue while installing the supports for the box. Avoid using glue and use 2″ screws only.  Your project should turn out to be a square at this point. Or you are doing something wrong.

Step 2 - How to Build Twin Corner Beds with Storage

Step 3:

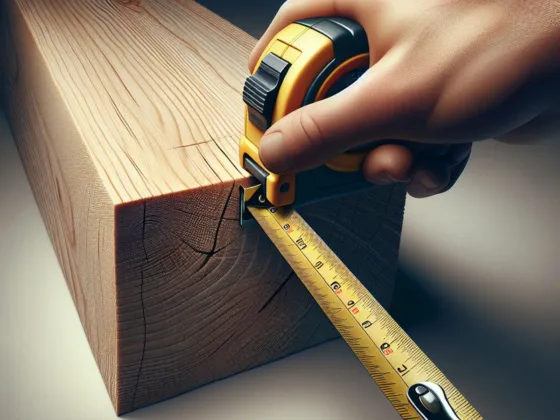
Wainscoting the box. Measure the box and cut out your wainscoting. Fit the coting to one side and once again don’t use any glue. Use 4 1 1/4″ screws instead of glue in all edges. The purpose of this step is to make sure you can unscrew them later if you want.

Step 3 - How to Build Twin Corner Beds with Storage

Step 4:

Using 2″ screws and glue build your dividers. Then add the 1×2 cleat. Use 1 1/4″ screws. Before you screw them in you should also use glue. So that the joins don’t come out loose.

Step 4 - How to Build Twin Corner Beds with Storage

Step 5:

Add the final cleat in the same fashion.
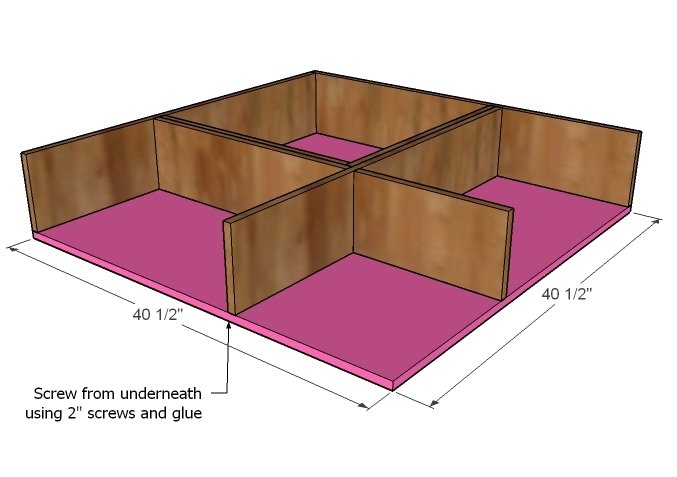
Step 5 - How to Build Twin Corner Beds with Storage

Step 6:

Bottom cut. Cut your bottom plywood and attach it to the bottom of the unit. Remember the cleats will be on top on the top.

Use glow and 2″ screws. Make sure they stick together and stay.

Step 6 - How to Build Twin Corner Beds with Storage

Step 7:

Cut down the top plywood for your unit. Attach only the outer layers, not the inside one. The inside one will be a removable piece for your unit. Cut an arch-shaped handle piece on both sides to act as a handle.

Step 7 - How to Build Twin Corner Beds with Storage

Step 8:

Attach the top base from underneath. Using 2″ screw to hold it in place.

Don’t glue so that later when you want you can remove it easily.

Step 8 - How to Build Twin Corner Beds with Storage

You can drill holes in certain places and use them as “smart” storage.

The potential is infinite.

Total
189
Shares
Share 0
Tweet 0
Pin it 189
Share 0
Share 0
Previous Article
Featured image - KitchenAid Professional 600 Mixer Review

KitchenAid Professional 600 Mixer Review

  • Perla Irish
  • February 15, 2020
View Post
Next Article
Featured image - 5 Hallway Closet Organization Tactics to Stay More Organized

5 Hallway Closet Organization Tactics to Stay More Organized

  • Perla Irish
  • February 17, 2020
View Post

Subscribe

Subscribe now to our newsletter

You May Also Like
Artisan applying Venetian plaster to an interior wall while a homeowner assists by holding a hawk of mixed plaster, captured in warm natural light.
View Post

Venetian Plaster Finish Technique — How to Apply Venetian Plaster (DIY Guide)

  • December 10, 2025
Man using a desktop diode laser to cut vegetable-tanned leather in a well-organized home workshop
View Post

Can a Desktop Diode Laser Cut Leather? A Beginner’s Guide to Safety, Settings & Fume Control

  • December 5, 2025
Garage door stuck halfway open while a technician inspects the tracks during an emergency repair call.
View Post

7 Emergency Garage Door Issues You May Encounter

  • November 13, 2025
Homeowner repainting kitchen cabinets with donated paint and reused hardware to renovate with no money.
View Post

How to Renovate a House with No Money (2025): Free Materials, Assistance & a 30-Day Plan

  • November 12, 2025
Photorealistic living room showcasing non-toxic furniture: oak-toned sofa in natural linen, powder-coated side table, and open window with sheer.
View Post

What to Know About Non-Toxic Furniture for Aging in Place

  • October 17, 2025
Glazier measuring safety glass — cutting after tempering is not permitted (ASTM C1048).
View Post

Can You Cut Tempered Glass? The Safe, Professional Options for 2025

  • October 10, 2025
Minimalist walnut dining table with smooth surface and rounded edges in a softly lit modern room, highlighting warm wood texture and elegant design.
View Post

Luxury Dining Tables: Quiet Power, Lasting Presence

  • September 30, 2025
Featured image: DIY lawn dethatcher—homemade rake head with nail tines and handle, used to lift thatch from turf.
View Post

DIY Lawn Dethatcher, How to Make Your Own Lawn Dethatcher

  • September 12, 2025

Leave a Reply Cancel reply

Your email address will not be published. Required fields are marked *

This site uses Akismet to reduce spam. Learn how your comment data is processed.

  • About
  • Privacy Policy
  • Terms of Use
  • Disclosure
  • Sitemap
  • Contact Us

Input your search keywords and press Enter.