• Home Improvement
    • DIY
    • Remodeling
    • Woodworking
    • Accessories
    • Home Design
      • Furniture
      • Organize
      • Tips
      • Decor
        • Interior
        • Exterior
    • Design Ideas
      • Bathroom
      • Bedroom
      • Dining Room
      • Living Room
      • Kitchen
  • Gardening
    • Backyard
    • Front Yard
    • Landscaping
  • Building Staircase
  • Categories
    • Home Improvement
    • Decor
    • Gardening
    • Woodworking
    • Lifestyle
    • Green Living
    • Real Estate
Dream Lands Design
  • Home Improvement
    • DIY
    • Remodeling
    • Woodworking
    • Accessories
    • Home Design
      • Furniture
      • Organize
      • Tips
      • Decor
        • Interior
        • Exterior
    • Design Ideas
      • Bathroom
      • Bedroom
      • Dining Room
      • Living Room
      • Kitchen
  • Gardening
    • Backyard
    • Front Yard
    • Landscaping
  • Building Staircase
  • Categories
    • Home Improvement
    • Decor
    • Gardening
    • Woodworking
    • Lifestyle
    • Green Living
    • Real Estate
Featured image - How to Prepare for the Sanding and Polishing of Timber Floors
You're here: Home Home Improvement How to Prepare for the Sanding and Polishing of Timber Floors

How to Prepare for the Sanding and Polishing of Timber Floors

  • Perla Irish
  • January 3, 2022
Total
1
Shares
0
0
1
0
0

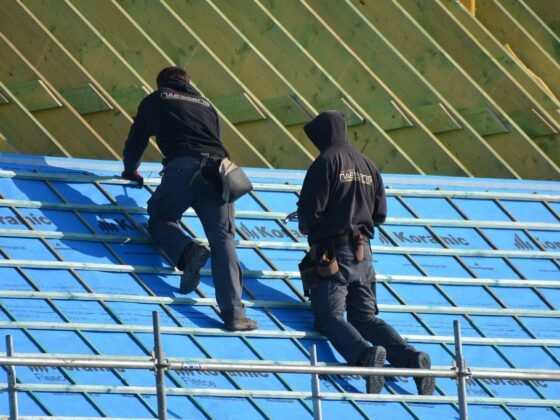
Whether you’re building a new home or planning a renovation, timing, and preparation are the keys to your success. It’s critical to coordinate all your trades to get everything done on time and on budget. Timing is particularly important when you have chosen to use hardwood flooring.

The preparation for sanding, finishing, and polishing are all extremely important and you certainly want other trades offsite at this time to avoid dust or other contaminants affecting the commercial timber flooring finish.

image - How to Prepare for the Sanding and Polishing of Timber Floors
How to Prepare for the Sanding and Polishing of Timber Floors

It’s highly recommended that you use timber flooring experts like Timber Sales Illinois to sand and polish your floors however you can certainly help ensure a great job by understanding the process, being well-prepared, and knowing what steps to take once the job’s complete.

Preparation

In preparing for the sanding, coating, and polishing of your floors there are five key points to consider:

  • Ensure your tradesmen will have great access to the site and suitable parking. This is a step often overlooked. Without suitable parking, it becomes very difficult to get the required tools and machinery on site. With proper access, you’ll avoid mud and mess which is really important when finishing a timber floor.
  • Make sure services are available. You’ll need the power to run your floor sanding equipment so make sure the electricity is on at the property or arrange for a suitable generator to meet your needs. You’ll also need access to water for cleaning as required.
  • Clean and clear away any furniture and mess from the floor you are going to sand and polish. If you’re working on a renovation of an old timber floor, you’ll need to be particularly careful of any rough or damaged edges of the timber along with any exposed nails.
  • If you’re working on a renovation and the property is currently lived in, you’ll need to consider the smell of polyurethane that may affect the property. You may want to remove items you feel may be affected by the smell, including sealing or removing food items.
  • If it’s a new property you are working on, it’s ideal to leave kickboards and skirting boards off for now and install them after the floor is finished.

Read Also:

  • Everything You Need to Know About Building a Timber Frame House
  • 5 Simple Renovations that Can Boost the Value of Your Home
  • Top Six Tips to Help You Plan for Your Timber Frame Home
  • What Are the Benefits of Hardwood Timber?

Completion

Once you’ve completed the sanding and polishing of your floors there are some key points you should not overlook:

  • Stay right off the floor for at least 24 hours once it’s finished. After 24 hours you may walk on the floors with clean socks on if you wish however you should avoid any other contact with the floors of any kind. By wearing socks you’ll avoid walking grit or dirt into the finish.
  • After 72 hours it should be safe to start putting your furniture on the floors. Be careful not the scuff the floors since the finish is not yet completely hardened. Polyurethane takes about seven days to completely cure.
  • Careful about what shoes you wear on your newly finished floors. If you’re into stilettos it’s highly recommended that you don’t wear them on the floor. The pointy heel is likely to dent the beautiful flooring.
  • Consider attaching felt or protective pads to the legs of your furniture. This will help to reduce the potential for scratches to occur on your floors.

Polished hardwood floors are a beautiful feature of any home and are a great way to refresh a tired room. Over time, they will get some nicks and dints and all of this can add character to your home.

At first, you’ll probably be concerned with a blemish here or there however, over time you may learn to appreciate the beauty of this natural product and the way it changes in the environment it is used.

Ideally, you will refinish your floors regularly, before they become too worn and damaged. With completely regular maintenance, your floors will look great for many years ahead.

Total
1
Shares
Share 0
Tweet 0
Pin it 1
Share 0
Share 0
Related Topics
  • floors
  • prepare
  • sanding
  • timber
Previous Article
featured image - Raise The Coziness Quotient of Your Bedroom

Raise The Coziness Quotient of Your Bedroom

  • Perla Irish
  • January 2, 2022
View Post
Next Article

Choose Kitchen Sinks To Suit Your Needs

  • Perla Irish
  • January 3, 2022
View Post

Subscribe

Subscribe now to our newsletter

You May Also Like
Garage door stuck halfway open while a technician inspects the tracks during an emergency repair call.
View Post

7 Emergency Garage Door Issues You May Encounter

  • November 13, 2025
Homeowner repainting kitchen cabinets with donated paint and reused hardware to renovate with no money.
View Post

How to Renovate a House with No Money (2025): Free Materials, Assistance & a 30-Day Plan

  • November 12, 2025
Photorealistic close-up of a stainless steel kitchen sink with water flowing cleanly into the drain, symbolizing a freshly cleaned and unclogged plumbing system. Bright neutral lighting with sharp detail and soft reflections.
View Post

Tips to Keep Your Drains Clean (2025 Evergreen Guide)

  • November 11, 2025
How to clean a house professionally: color-coded microfiber caddy, mop, and HEPA vacuum in a spotless living room and kitchen.
View Post

How to Clean a House Professionally: A Step-by-Step Checklist

  • November 5, 2025
Louisiana coastal home with rooftop solar panels at golden hour, live oaks draped in Spanish moss, bayou in the background.
View Post

What to Know Before Choosing a Solar Provider in Louisiana

  • November 5, 2025
High-efficiency 95% AFUE condensing gas furnace with sealed PVC venting and condensate drain in a tidy utility room.
View Post

80% vs 95% Furnace: What Changes, What You Save, and When to Choose Each

  • November 4, 2025
Licensed HVAC technician replacing a residential gas boiler; verifying flue joints and gas connections during commissioning
View Post

How Professional Boiler Replacement Ensures Safety and Peace of Mind

  • November 4, 2025
Aosu vs Ring doorbell comparison 2025 — resolution, storage, alerts, ecosystem
View Post

Aosu vs Ring Doorbell (2025 Comparison Guide)

  • November 3, 2025
  • About
  • Privacy Policy
  • Terms of Use
  • Disclosure
  • Sitemap
  • Contact Us

Input your search keywords and press Enter.