Table of Contents Show
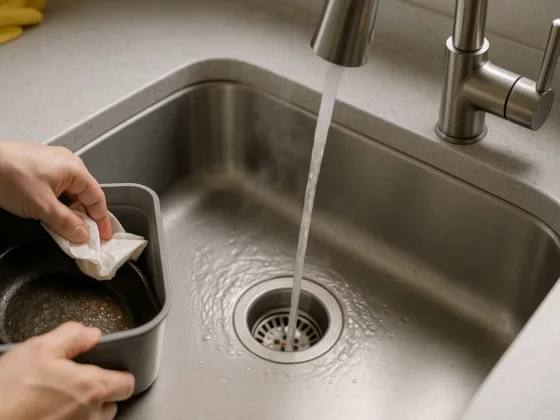
There might be nothing more annoying than the constant dripping of a leaky sink. But it can irritate more than just your senses, it can also irritate your wallet, as a leaky sink could cause water damage to the inside of your cabinets and possibly even develop mold, requiring hundreds of dollars of repair.

How to Fix a Leaky Kitchen Sink
Fixing a leaky kitchen sink isn’t especially hard, but you do have to know what to look for. Before you begin, however, here are a few things you must do.
Maybe you are also looking for ways to deal with leaking garbage disposal? go here to know more.
Read Also:
- Overcoming the Challenges of Pipeline Leakage with Leak Detection Services
- Everything You Need to Know about Choosing a White Kitchen Sink
- Keep Your Drain Pipe Clean with a Good Kitchen Sink Strainer
- Low Water Pressure In Your Home? Here’s How to Fix It
- The Pros And Cons of Stainless Steel Kitchen Sinks
- Which Kitchen Sink Material is Right for You?
- Best ways to Organize Your Kitchen Counters
- Common Plumbing Problems and You
Shut the Water Off
If you can, shut the water off to the whole house, but if not, at least turn the water off to the sink itself. There should be a cutoff valve located underneath the sink somewhere.
Stuff the Pipe
If you’re fixing the link above the cabinet in the sink area, stuff a rag or something over the pipe to make sure loose parts don’t go down the drain and clog it further.
Lay Out the Parts
On a rag next to your workstation, lay out a wrench, screws, and any other parts you may need to finish the job.
Protect the Hardware
If you’re having to fix the faucet itself, wrap the teeth of your wrench in duct tape to keep from scratching the metal. Either way, grab some distilled vinegar to help clean the mineral deposits off the inside of the pipe.
Sometimes, the problem is as simple as tightening a nut or replacing a rubber washer on the inside, but if it’s something more, you might need to do a little more elbow grease to solve the issue.
Fixing a Leaky Kitchen Sink
Below are a few steps you can take to help fix a leaky sink.
Assess the Situation
Is the leak coming from the faucet area in the sink or in the pipes in the cabinet below? Are there multiple streams of water coming from different places or is it a continual leak in one location?
Usually, your first indication that something is wrong is a giant puddle forming underneath the sink, possibly hidden by all of your cleaning supplies that are typically stored there.
However, if the leak is coming from a pressurized hose, it could also be sprayed as well, in which case you’ll want to turn the water off before assessing further damage.
A leak from the drain line is a little tougher to diagnose since you won’t be able to see where the leak is coming from until you actually use the sink. If you suspect that’s the culprit, open up the cabinet doors below the sink and turn the water on, watching to see a possible drip.
It could also be a leak in the seal around the drain, which means you’ll need to fill the sink up partially and let it sit to watch for drips. Look for damp areas under the sink or any standing water to identify the problem.
Fix the Obvious Issues
If the water is spraying everywhere, chances are there’s an issue with the connection between the pressurized hose and another pipe, so give the compression nut holding the two together with a good turn. Hold one half with a wrench, and use a second wrench to twist it. If the water stops, your problem is fixed.
Alternatively, you might find an issue with the connection up next to the drain itself. These are more problematic because you most likely won’t be able to fit a wrench up there to tighten the problem. Use locking or adjustable pliers to reach next to the drain and turn the nut, hopefully sealing off the leak.
Fix (or Replace) the Traps
In some cases, the leak may not be simply from a faulty connection, but from a corroded p-trap, which is the bent section in a pipe that keeps the nasty gasses from returning back up the pipe.
Usually, tightening the compression nuts will keep the leak from happening, but you might also have a blockage that is keeping the water from draining properly. In the worst cases that could also lead to corrosion.
In order to prevent this, take the p-trap off and clean out the blockages. An auger should do the job thoroughly enough, but you may also need to replace the trap entirely if it’s corroded. Once that’s finished, put the trap back on, using the wrench to tighten the bolts securely.
Fix Other Leaks
If the pipes aren’t leaking it could be because the seal around the faucet is leaking.
These can be hard to detect, as the water may drip down the inside of the sink bowl and drip from another location, so follow the water trail closely to see if it’s coming from somewhere else.
Alternatively, look for a broken seal around the drain, since that could be a problem also. Either way, a good application of a plumber’s putty should be enough to block the hole and seal the leak.
Finally, the faucet itself may be the issue. Sometimes the washers on the inside can become corroded and not produce a very tight seal; replace the washer completely in order to fix it.
Fixing the faucet usually requires disassembly of the entire faucet, which can vary depending on which type of faucet you have. Regardless, the process is pretty straightforward and shouldn’t be that time or cost-intensive.
Author Bio
 Hello, My name is Justin Curtis, and I am the creator of Mr. Garbage Disposal. While I am not a professional plumber, I am quite the handyman. I work as an accountant, but outside of work, I like to work with my hands and live frugally.